
Terrace gardening beetroot: Imagine stepping onto your terrace and plucking a vibrant, earthy beetroot, fresh from your own little garden oasis. Sounds idyllic, right? Well, it’s more achievable than you think! For centuries, humans have cultivated food in limited spaces, from ancient rooftop gardens in Babylon to the modern-day urban farming movement. This DIY guide isn’t just about growing vegetables; it’s about connecting with nature, reducing your carbon footprint, and enjoying the unparalleled taste of homegrown produce.
Why beetroot, and why on your terrace? Well, beetroot is surprisingly easy to grow in containers, even for beginners. Plus, it’s packed with nutrients and incredibly versatile in the kitchen. But more importantly, in today’s busy world, having a small garden can be a therapeutic escape. It’s a chance to disconnect from screens, get your hands dirty, and nurture something beautiful and delicious. This article will provide you with simple, effective terrace gardening beetroot tricks and hacks that will transform your terrace into a thriving edible landscape, one beetroot at a time. I’m excited to share my tips and tricks with you, so let’s get started!
Terrassen-Gartenarbeit: Wie du deine eigenen Rüben anbaust!
Hallo Gartenfreunde! Ich freue mich riesig, euch heute zu zeigen, wie ihr eure eigenen, köstlichen Rüben auf eurer Terrasse anbauen könnt. Es ist einfacher als ihr denkt und das Ergebnis ist einfach unschlagbar: frische, knackige Rüben direkt aus eurem eigenen kleinen Garten! Lasst uns loslegen!
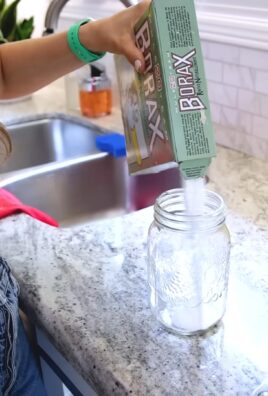
Was du brauchst:
Bevor wir anfangen, stelle sicher, dass du alles Notwendige zur Hand hast. Hier ist eine Liste:
* Rübensamen: Wähle eine Sorte, die dir gefällt. Es gibt viele verschiedene, von klassischen roten Rüben bis hin zu gelben oder sogar gestreiften Sorten.
* Pflanzgefäße: Wähle Töpfe oder Behälter mit einer Tiefe von mindestens 20-30 cm. Rüben brauchen Platz, um sich zu entwickeln.
* Hochwertige Blumenerde: Verwende eine gut durchlässige Blumenerde, die reich an Nährstoffen ist.
* Kompost (optional): Kompost hilft, die Erde anzureichern und die Nährstoffversorgung zu verbessern.
* Gießkanne oder Gartenschlauch: Für die regelmäßige Bewässerung.
* Gartenschaufel oder Kelle: Zum Befüllen der Töpfe und zum Pflanzen der Samen.
* Pflanzetiketten und Stift: Um die verschiedenen Rübensorten zu kennzeichnen (wenn du mehrere anbaust).
* Mulch (optional): Mulch hilft, die Feuchtigkeit im Boden zu halten und Unkraut zu unterdrücken.
* Dünger (optional): Ein organischer Dünger kann das Wachstum fördern.
Die Vorbereitung:
Bevor wir mit dem Pflanzen beginnen, müssen wir die Töpfe vorbereiten.
1. Töpfe vorbereiten: Stelle sicher, dass deine Töpfe Abzugslöcher haben, damit überschüssiges Wasser ablaufen kann. Lege eventuell eine Schicht Tonscherben oder Kies auf den Boden des Topfes, um die Drainage zu verbessern.
2. Erde einfüllen: Fülle die Töpfe mit Blumenerde. Lasse etwa 2-3 cm Platz bis zum Rand des Topfes. Wenn du Kompost verwendest, mische ihn gut unter die Blumenerde.
Die Aussaat:
Jetzt kommt der spannende Teil: das Pflanzen der Rübensamen!
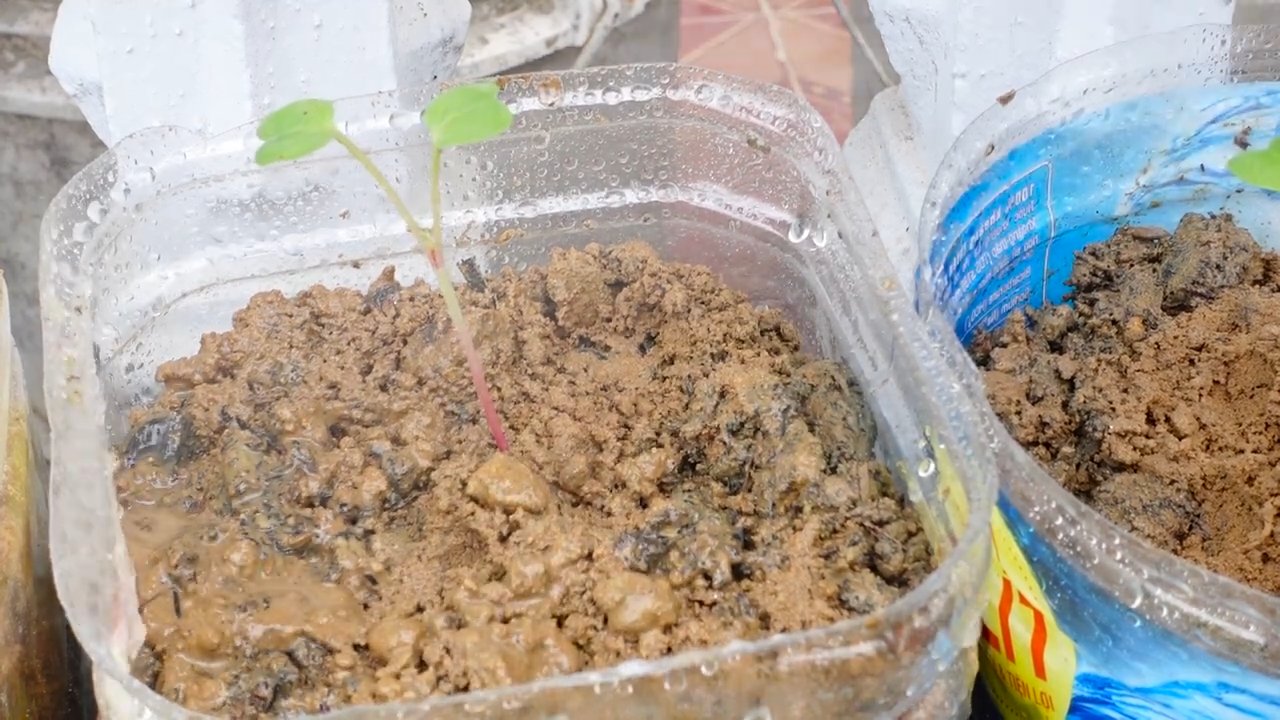
1. Samen säen: Drücke mit dem Finger kleine Mulden in die Erde, etwa 1-2 cm tief. Lege in jede Mulde 2-3 Samen. Rüben haben oft eine schlechte Keimrate, daher ist es besser, etwas mehr Samen zu säen.
2. Mit Erde bedecken: Bedecke die Samen vorsichtig mit Erde und drücke sie leicht an.
3. Gießen: Gieße die Erde vorsichtig an, sodass sie gut durchfeuchtet ist. Vermeide es, die Samen auszuspülen.
4. Beschriften: Beschrifte die Töpfe mit den Namen der Rübensorten und dem Datum der Aussaat. So behältst du den Überblick.
Die Pflege:
Die Pflege ist entscheidend für eine erfolgreiche Rübenernte.
1. Bewässerung: Halte die Erde feucht, aber nicht nass. Gieße regelmäßig, besonders bei trockenem Wetter. Vermeide Staunässe, da dies zu Wurzelfäule führen kann.
2. Standort: Stelle die Töpfe an einen sonnigen Standort. Rüben brauchen mindestens 6 Stunden Sonne pro Tag.
3. Vereinzeln: Sobald die Sämlinge etwa 5-7 cm groß sind, musst du sie vereinzeln. Entferne die schwächsten Pflanzen, sodass nur die stärkste Pflanze pro Stelle übrig bleibt. Dies gibt den verbleibenden Pflanzen genügend Platz zum Wachsen.
4. Unkraut entfernen: Halte die Töpfe frei von Unkraut. Unkraut konkurriert mit den Rüben um Nährstoffe und Wasser.
5. Düngen (optional): Wenn du möchtest, kannst du die Rüben alle paar Wochen mit einem organischen Dünger düngen. Befolge die Anweisungen auf der Verpackung.
6. Mulchen (optional): Eine Schicht Mulch um die Pflanzen herum hilft, die Feuchtigkeit im Boden zu halten und Unkraut zu unterdrücken. Verwende zum Beispiel Stroh, Holzhackschnitzel oder Grasschnitt.
Schutz vor Schädlingen und Krankheiten:
Rüben können von verschiedenen Schädlingen und Krankheiten befallen werden. Hier sind einige Tipps, wie du sie schützen kannst:
* Erdflöhe: Erdflöhe sind kleine Käfer, die Löcher in die Blätter fressen. Du kannst sie mit einem Insektizid auf Pyrethrum-Basis bekämpfen oder die Pflanzen mit einem Vlies abdecken.
* Blattläuse: Blattläuse saugen Pflanzensaft und können die Pflanzen schwächen. Du kannst sie mit einem Wasserstrahl abspritzen oder mit einer Seifenlösung behandeln.
* Rübenfliege: Die Larven der Rübenfliege fressen sich in die Blätter. Entferne befallene Blätter und entsorge sie.
* Pilzkrankheiten: Bei feuchtem Wetter können Pilzkrankheiten auftreten. Sorge für eine gute Belüftung und vermeide Staunässe.
Die Ernte:
Der Zeitpunkt der Ernte hängt von der Sorte und der Größe der Rüben ab. In der Regel sind Rüben nach etwa 8-10 Wochen erntereif.
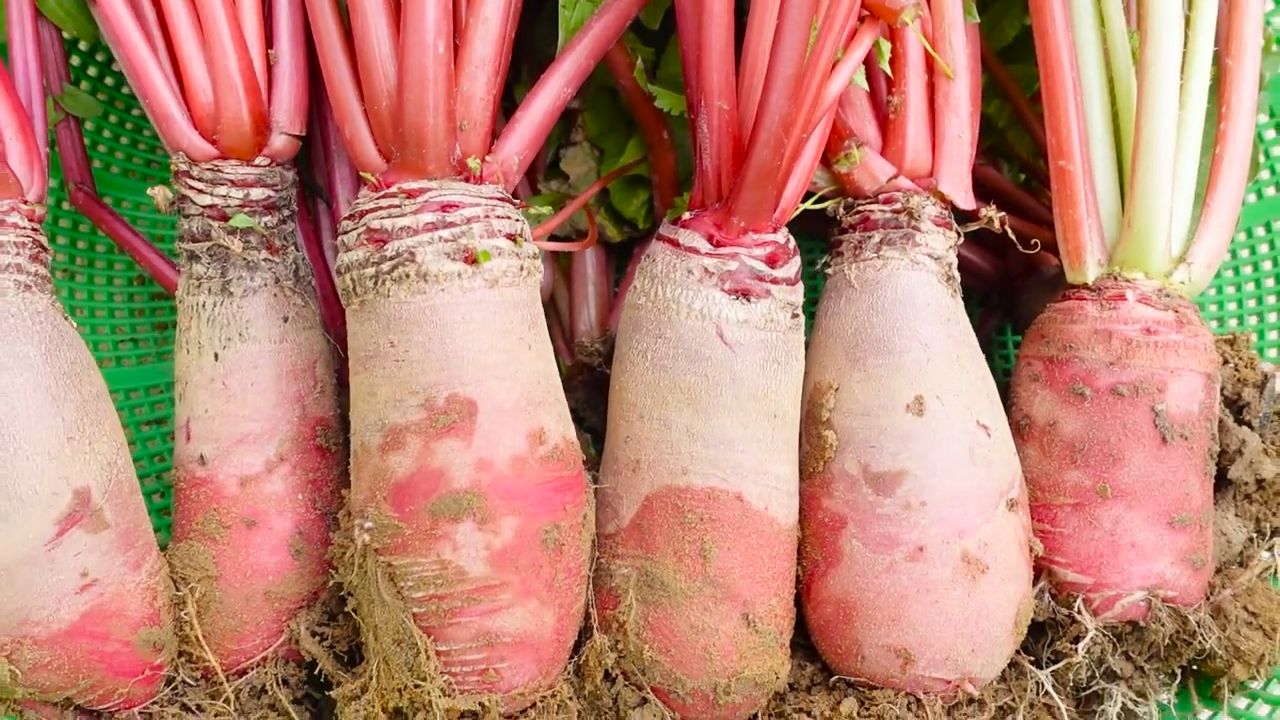
1. Erntezeitpunkt: Die Rüben sind erntereif, wenn sie die gewünschte Größe erreicht haben. Du kannst die Größe der Rüben unter der Erde vorsichtig überprüfen, indem du etwas Erde um die Pflanze herum entfernst.
2. Ernten: Ziehe die Rüben vorsichtig aus der Erde. Wenn sie sich nicht leicht lösen, kannst du eine Gartenschaufel oder Kelle verwenden, um die Erde um die Rübe herum zu lockern.
3. Reinigen: Entferne die Erde von den Rüben und schneide die Blätter ab. Lasse etwa 2-3 cm Stiel an der Rübe.
4. Lagern: Du kannst die Rüben im Kühlschrank lagern. Wickle sie in ein feuchtes Tuch oder lege sie in einen Plastikbeutel. Sie halten sich so mehrere Wochen.
Verwendung der Rüben:
Rüben sind vielseitig verwendbar. Du kannst sie roh essen, kochen, braten, backen oder einlegen. Die Blätter sind ebenfalls essbar und können wie Spinat zubereitet werden.
Hier sind einige Ideen:
* Rübensalat: Reibe rohe Rüben und mische sie mit Apfel, Walnüssen und einem Dressing aus Essig, Öl und Honig.
* Rübensuppe: Koche Rüben mit Gemüsebrühe und Gewürzen. Püriere die Suppe und serviere sie mit einem Klecks Joghurt oder Sauerrahm.
* Gebratene Rüben: Schneide Rüben in Würfel und brate sie mit Olivenöl, Knoblauch und Kräutern.
* Eingelegte Rüben: Lege gekochte Rüben in Essig, Zucker und Gewürzen ein.
* Rübenblätter: Dünste die Blätter mit Knoblauch und Olivenöl oder verwende sie in Suppen und Eintöpfen.
Zusätzliche Tipps für den Anbau von Rüben auf der Terrasse:
* Wähle den richtigen Topf: Achte darauf, dass der Topf groß genug ist, damit die Rüben genügend Platz zum Wachsen haben. Ein Topf mit einem Durchmesser von mindestens 30 cm und einer Tiefe von 20-30 cm ist ideal.
* Verwende hochwertige Erde: Rüben brauchen eine gut durchlässige und nährstoffreiche Erde. Verwende eine hochwertige Blumenerde oder mische deine eigene Erde aus Blumenerde, Kompost und Sand.
* Gieße regelmäßig: Rüben brauchen regelmäßig Wasser, besonders bei trockenem Wetter. Achte darauf, dass die Erde immer feucht ist, aber nicht nass.
* Dünge regelmäßig: Rüben sind Starkzehrer und brauchen regelmäßig Dünger. Verwende einen organischen Dünger oder einen speziellen Gemüsedünger.
* Schütze die Pflanzen vor Schädlingen und Krankheiten: Kontrolliere die Pflanzen regelmäßig auf Schädlinge
Conclusion
So, there you have it! Transforming your terrace into a vibrant, beetroot-producing haven is not only achievable but also incredibly rewarding. We’ve walked you through the simple steps, from selecting the right containers and soil to nurturing your beetroot plants and harvesting their earthy goodness. This DIY approach to growing beetroot on your terrace offers a multitude of benefits, from enjoying fresh, organic produce to reducing your carbon footprint and adding a touch of green to your urban landscape.
Why is this a must-try? Because store-bought beetroot simply can’t compare to the flavor and satisfaction of harvesting your own. Imagine the deep, earthy sweetness of freshly picked beetroot in your salads, roasted as a side dish, or even juiced for a healthy boost. Plus, you have complete control over the growing process, ensuring that your beetroot is free from harmful pesticides and chemicals.
But the beauty of terrace gardening lies in its adaptability. Feel free to experiment with different beetroot varieties. Consider growing ‘Detroit Dark Red’ for its classic flavor and uniform shape, or try ‘Golden Beet’ for a sweeter, milder taste and a vibrant golden hue. You can also interplant your beetroot with companion plants like lettuce, spinach, or radishes to maximize space and deter pests. Another variation to consider is succession planting. By sowing seeds every few weeks, you can ensure a continuous harvest of fresh beetroot throughout the growing season.
Don’t be afraid to get your hands dirty and embrace the learning process. Terrace gardening is a journey of discovery, and there’s always something new to learn. Even if you encounter challenges along the way, remember that every mistake is an opportunity to improve your skills and knowledge.
We wholeheartedly encourage you to give this DIY beetroot growing trick a try. It’s a simple, affordable, and incredibly rewarding way to connect with nature and enjoy the fruits (or rather, roots!) of your labor. Once you’ve experienced the joy of harvesting your own homegrown beetroot, you’ll never look at store-bought produce the same way again.
And most importantly, we want to hear about your experience! Share your photos, tips, and challenges with us in the comments below. Let’s build a community of terrace gardeners who are passionate about growing their own food and creating beautiful, sustainable spaces. Your insights and experiences can inspire others to embark on their own beetroot-growing adventures. So, grab your seeds, prepare your containers, and get ready to enjoy the delicious rewards of growing your own beetroot on your terrace! Happy gardening!
Frequently Asked Questions (FAQ)
What is the best time of year to plant beetroot on my terrace?
The best time to plant beetroot depends on your local climate. Generally, beetroot thrives in cooler temperatures. For most regions, spring and fall are ideal planting seasons. In warmer climates, you can also grow beetroot during the winter months. Avoid planting during the hottest part of summer, as high temperatures can cause the roots to become tough and bitter. Check your local gardening calendar for specific planting dates in your area.
What type of soil is best for growing beetroot in containers?
Beetroot prefers well-draining, fertile soil with a slightly acidic to neutral pH (around 6.0 to 7.0). A good potting mix for beetroot should be a blend of compost, peat moss or coco coir, and perlite or vermiculite. This combination provides good drainage, aeration, and nutrient retention. Avoid using heavy clay soil, as it can become waterlogged and hinder root development. You can also amend your potting mix with organic matter like well-rotted manure or compost to improve its fertility and drainage.
How much sunlight do beetroot plants need on a terrace?
Beetroot plants need at least 6 hours of direct sunlight per day to thrive. Choose a sunny spot on your terrace that receives ample sunlight throughout the day. If your terrace is partially shaded, try to position your containers in the area that receives the most sunlight. If you live in a particularly hot climate, providing some afternoon shade can help prevent the roots from becoming stressed.
How often should I water my beetroot plants on the terrace?
Water your beetroot plants regularly, especially during dry periods. The soil should be kept consistently moist, but not waterlogged. Check the soil moisture by sticking your finger about an inch deep into the soil. If it feels dry, it’s time to water. Water deeply and thoroughly, allowing the water to drain out of the bottom of the container. Avoid overhead watering, as it can promote fungal diseases.
What are some common pests and diseases that affect beetroot plants?
Some common pests that can affect beetroot plants include aphids, flea beetles, and leaf miners. Aphids can be controlled with insecticidal soap or neem oil. Flea beetles can be deterred by using row covers or diatomaceous earth. Leaf miners can be controlled by removing and destroying infested leaves. Common diseases that can affect beetroot plants include powdery mildew and leaf spot. Powdery mildew can be prevented by ensuring good air circulation and avoiding overhead watering. Leaf spot can be controlled by removing and destroying infected leaves and applying a fungicide if necessary.
How do I know when my beetroot is ready to harvest?
Beetroot is typically ready to harvest when the roots are about 2-3 inches in diameter. You can gently brush away some of the soil around the base of the plant to check the size of the roots. The leaves should also be healthy and vibrant. To harvest, gently pull the beetroot from the soil, twisting slightly if necessary. Avoid damaging the roots during harvest.
Can I eat the beetroot greens?
Yes, beetroot greens are edible and nutritious! They can be used in salads, stir-fries, or cooked like spinach. Harvest the greens when they are young and tender for the best flavor. Avoid harvesting too many greens at once, as this can weaken the plant.
How can I store my harvested beetroot?
To store your harvested beetroot, remove the greens, leaving about an inch of stem attached. Gently brush off any excess soil. Store the beetroot in a cool, dark, and humid place, such as a refrigerator or root cellar. Beetroot can be stored for several weeks under these conditions.
Can I grow beetroot in the same container as other plants?
Yes, you can grow beetroot in the same container as other plants, as long as they have similar growing requirements. Good companion plants for beetroot include lettuce, spinach, radishes, and onions. Avoid planting beetroot near plants that are susceptible to the same pests and diseases.
What if my beetroot roots are small and stunted?
If your beetroot roots are small and stunted, there could be several reasons. It could be due to insufficient sunlight, poor soil fertility, overcrowding, or lack of water. Make sure your plants are receiving at least 6 hours of direct sunlight per day, and that the soil is well-draining and fertile. Thin out the plants if they are overcrowded, and water regularly, especially during dry periods. You can also fertilize your plants with a balanced fertilizer to promote root growth.
Leave a Comment