
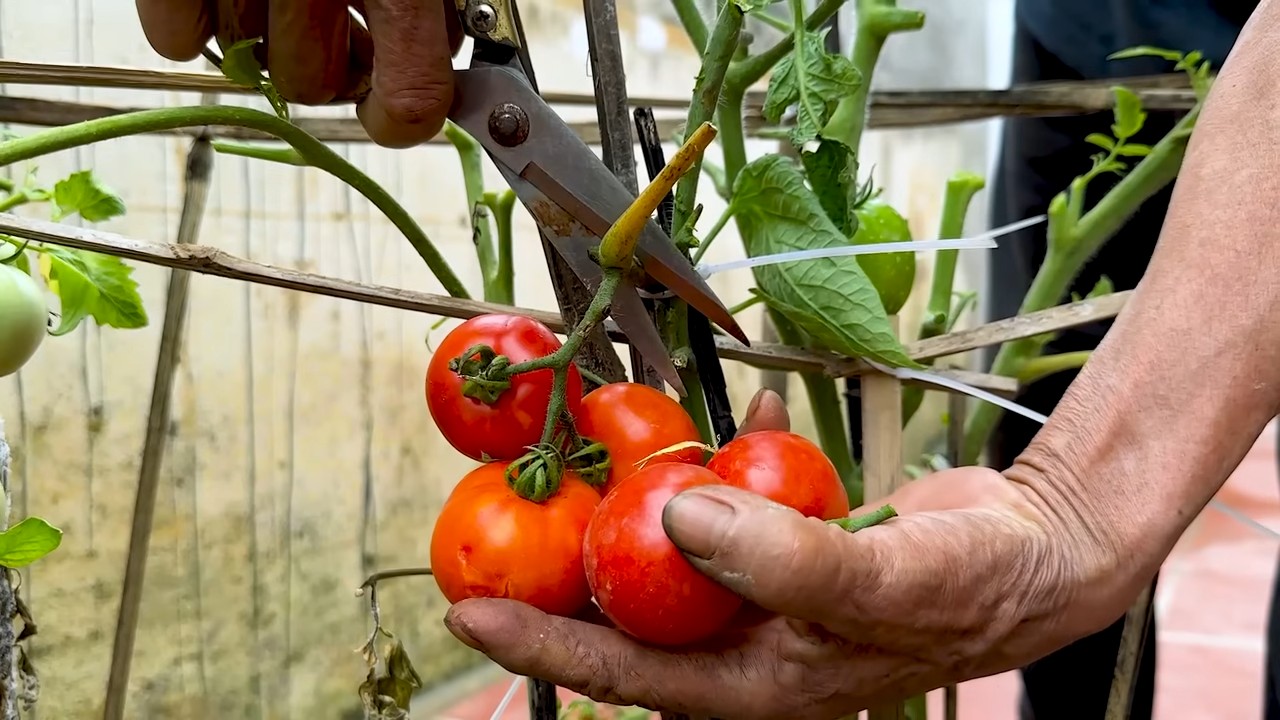
Tomato can trick – sounds intriguing, right? I’m so excited to share this simple yet incredibly effective gardening hack that will revolutionize how you grow your tomatoes! For centuries, gardeners have sought the perfect balance of nutrients and support to cultivate thriving tomato plants. From ancient Incan terraces to modern-day backyard gardens, the quest for the juiciest, most flavorful tomatoes has been a constant.
But what if I told you the secret to healthier, more robust tomato plants could be found in your recycling bin? That’s right! This DIY trick repurposes something you likely already have on hand – a humble tomato can – to provide a targeted boost of iron directly to your tomato roots.
Why is this so important? Well, many soils lack sufficient iron, a crucial nutrient for chlorophyll production, which is essential for photosynthesis. Without enough iron, your tomato plants can suffer from yellowing leaves and stunted growth. This tomato can trick is a game-changer because it’s an easy, affordable, and eco-friendly way to combat iron deficiency and unlock the full potential of your tomato harvest. Trust me, once you try this, you’ll wonder why you didn’t do it sooner! Let’s dive in and learn how to give your tomatoes the iron boost they crave!
Verwandle leere Tomatendosen in stilvolle Aufbewahrungslösungen
Hey Leute! Habt ihr auch immer das Problem, dass ihr zu viele leere Tomatendosen rumstehen habt? Wegwerfen ist ja keine Option, oder? Ich zeige euch heute, wie ihr aus diesen unscheinbaren Dosen richtig coole und praktische Aufbewahrungslösungen zaubern könnt. Das ist nicht nur super nachhaltig, sondern macht auch noch richtig Spaß! Lasst uns loslegen!
Was du brauchst:
* Leere Tomatendosen (gut gereinigt und getrocknet)
* Schleifpapier (fein)
* Grundierung (optional, aber empfehlenswert)
* Farbe (Acrylfarbe, Sprühfarbe oder Kreidefarbe – je nach Geschmack)
* Pinsel oder Sprühdose
* Dekorative Elemente (Stoffe, Bänder, Spitze, Knöpfe, Aufkleber, etc.)
* Heißklebepistole (optional, für das Anbringen von Dekorationen)
* Schere
* Lineal
* Bleistift
* Klarlack (optional, zum Versiegeln)
* Handschuhe (zum Schutz der Hände beim Schleifen und Lackieren)
* Abdeckfolie oder Zeitungspapier (zum Schutz der Arbeitsfläche)
Vorbereitung der Tomatendosen
Dieser Schritt ist super wichtig, damit eure Dosen später auch wirklich gut aussehen und sich anfühlen.
1. Reinigung: Zuerst müsst ihr die leeren Tomatendosen gründlich reinigen. Entfernt alle Etiketten und Klebereste. Am besten weicht ihr die Dosen in warmem Seifenwasser ein und schrubbt sie dann mit einem Schwamm ab. Hartnäckige Klebereste könnt ihr mit etwas Öl oder einem Etikettenentferner beseitigen.
2. Trocknen: Nachdem die Dosen sauber sind, lasst ihr sie vollständig trocknen. Das ist wichtig, damit die Farbe später gut haftet. Ihr könnt sie entweder an der Luft trocknen lassen oder mit einem Küchentuch abtrocknen.
3. Entfernen scharfer Kanten: Jetzt kommt der wichtigste Schritt: die scharfen Kanten! Die Dosen haben oft oben und unten scharfe Kanten, an denen man sich leicht schneiden kann. Nehmt das Schleifpapier und schleift die Kanten vorsichtig ab, bis sie glatt sind. Achtet darauf, dass ihr nicht zu viel Druck ausübt, damit ihr die Dose nicht verformt. Tragt dabei am besten Handschuhe, um eure Hände zu schützen.
4. Reinigung nach dem Schleifen: Nach dem Schleifen sind die Dosen staubig. Wischt sie mit einem feuchten Tuch ab, um den Schleifstaub zu entfernen. Lasst sie dann wieder trocknen.
Grundierung (optional, aber empfohlen)
Eine Grundierung sorgt dafür, dass die Farbe besser haftet und das Ergebnis gleichmäßiger wird. Besonders bei glänzenden Dosen ist eine Grundierung sehr empfehlenswert.
1. Arbeitsfläche vorbereiten: Legt eure Arbeitsfläche mit Abdeckfolie oder Zeitungspapier aus, um sie vor Farbspritzern zu schützen.
2. Grundierung auftragen: Tragt die Grundierung gleichmäßig auf die Dosen auf. Wenn ihr eine Sprühgrundierung verwendet, haltet die Dose in einem Abstand von etwa 20-30 cm und sprüht in gleichmäßigen Bewegungen. Wenn ihr eine Grundierung mit dem Pinsel auftragt, achtet darauf, dass ihr keine dicken Farbnasen bildet.
3. Trocknen lassen: Lasst die Grundierung vollständig trocknen. Die Trocknungszeit hängt von der Art der Grundierung ab. Beachtet die Angaben des Herstellers.
Bemalen der Tomatendosen
Jetzt kommt der spaßige Teil: das Bemalen! Hier könnt ihr eurer Kreativität freien Lauf lassen und die Dosen ganz nach eurem Geschmack gestalten.
1. Farbe auswählen: Wählt eine Farbe, die euch gefällt und die zu eurer Einrichtung passt. Acrylfarbe, Sprühfarbe und Kreidefarbe sind alle gute Optionen. Acrylfarbe ist vielseitig und in vielen Farben erhältlich. Sprühfarbe ist schnell und einfach aufzutragen. Kreidefarbe verleiht den Dosen einen Vintage-Look.
2. Farbe auftragen: Tragt die Farbe gleichmäßig auf die Dosen auf. Wenn ihr Sprühfarbe verwendet, haltet die Dose wieder in einem Abstand von etwa 20-30 cm und sprüht in gleichmäßigen Bewegungen. Wenn ihr Farbe mit dem Pinsel auftragt, achtet darauf, dass ihr keine dicken Farbnasen bildet. Eventuell müsst ihr mehrere Schichten auftragen, um ein deckendes Ergebnis zu erzielen. Lasst jede Schicht gut trocknen, bevor ihr die nächste auftragt.
3. Trocknen lassen: Lasst die Farbe vollständig trocknen. Die Trocknungszeit hängt von der Art der Farbe ab. Beachtet die Angaben des Herstellers.
Dekorieren der Tomatendosen
Hier könnt ihr euren Dosen den letzten Schliff geben und sie zu echten Hinguckern machen.
1. Dekorative Elemente auswählen: Wählt dekorative Elemente aus, die zu eurem Stil passen. Stoffe, Bänder, Spitze, Knöpfe, Aufkleber, Stempel – alles ist erlaubt!
2. Dekorationen anbringen: Befestigt die Dekorationen mit Heißkleber, Klebstoff oder Nadel und Faden an den Dosen. Wenn ihr Stoff oder Bänder verwendet, könnt ihr sie um die Dosen wickeln und festkleben. Spitze und Knöpfe lassen sich gut mit Heißkleber befestigen. Aufkleber sind besonders einfach anzubringen.
3. Kreative Ideen: Hier sind ein paar Ideen, wie ihr eure Dosen dekorieren könnt:
* Stoffbezug: Schneidet ein Stück Stoff zu, das um die Dose passt, und klebt es fest.
* Bänder und Spitze: Wickelt Bänder und Spitze um die Dose und befestigt sie mit Heißkleber.
* Knöpfe: Klebt Knöpfe in verschiedenen Größen und Farben auf die Dose.
* Aufkleber: Verziert die Dose mit Aufklebern in verschiedenen Formen und Motiven.
* Stempel: Stempelt Muster und Motive auf die Dose.
* Bemalen: Malt Muster und Motive mit Acrylfarbe auf die Dose.
* Beschriften: Beschriftet die Dosen mit Kreidefarbe oder einem Permanentmarker, um zu kennzeichnen, was sich darin befindet.
Versiegeln (optional)
Ein Klarlack schützt die Farbe und die Dekorationen und macht die Dosen widerstandsfähiger.
1. Klarlack auftragen: Tragt den Klarlack gleichmäßig auf die Dosen auf. Wenn ihr Sprühlack verwendet, haltet die Dose in einem Abstand von etwa 20-30 cm und sprüht in gleichmäßigen Bewegungen. Wenn ihr Lack mit dem Pinsel auftragt, achtet darauf, dass ihr keine dicken Farbnasen bildet.
2. Trocknen lassen: Lasst den Klarlack vollständig trocknen. Die Trocknungszeit hängt von der Art des Lacks ab. Beachtet die Angaben des Herstellers.
Verwendung der Tomatendosen
Jetzt sind eure neuen Aufbewahrungslösungen fertig! Hier sind ein paar Ideen, wie ihr sie verwenden könnt:
* Stiftehalter: Stellt eure Stifte, Pinsel und Scheren in die Dosen.
* Küchenutensilien: Bewahrt Kochlöffel, Schneebesen und andere Küchenutensilien in den Dosen auf.
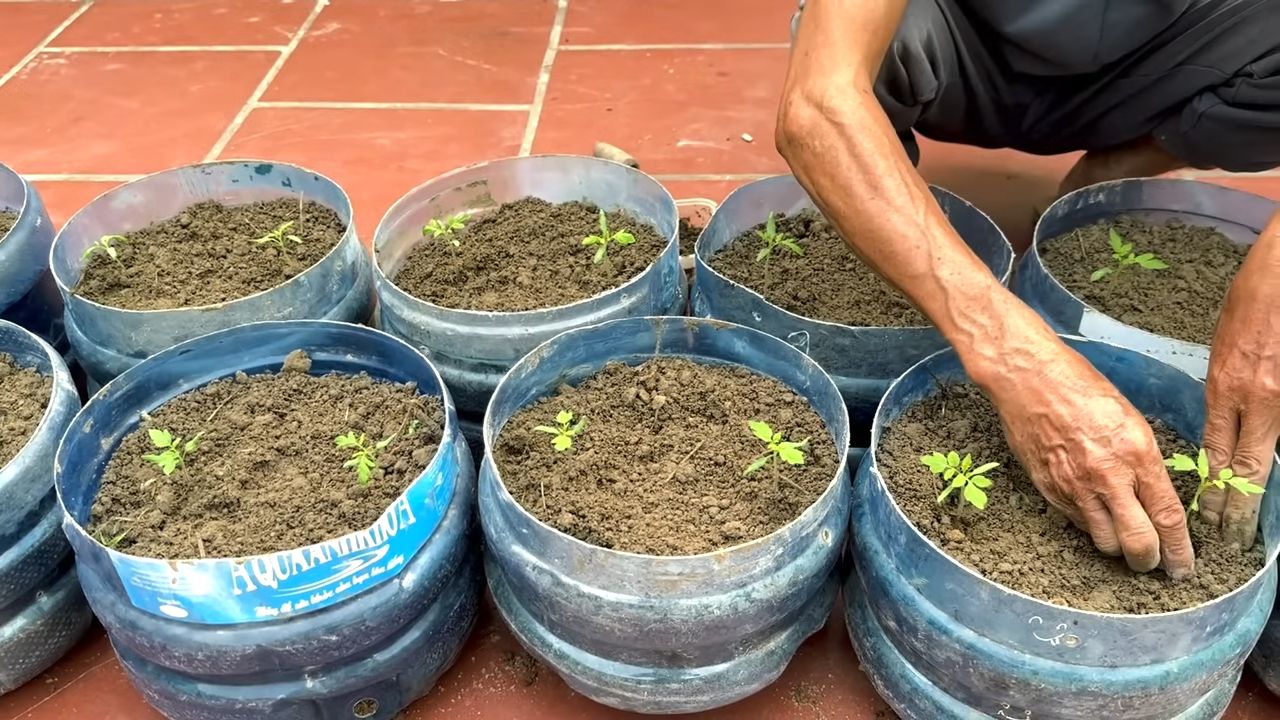
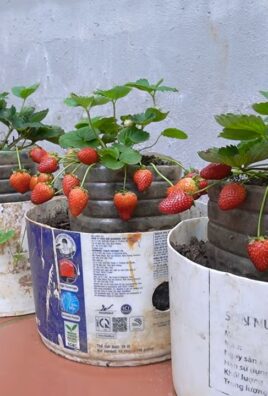
* Pflanzentöpfe: Pflanzt Kräuter, Blumen oder Sukkulenten in die Dosen. Achtet darauf, dass ihr Löcher in den Boden bohrt, damit das Wasser ablaufen kann.
* Badezimmerorganisation: Bewahrt Wattestäbchen, Wattepads, Make-up-Pinsel und andere Badartikel in den Dosen auf.
* Nähzeug: Bewahrt Nadeln, Fäden, Knöpfe und andere Nähutensilien in den Dosen auf.
* Schreibtischorganisation: Bewahrt Büroklammern, Gummibänder, Notizzettel und andere Büroartikel in den Dosen auf.
* Kerzenhalter: Stellt Teelichter oder kleine Kerzen in die Dosen. Achtet darauf, dass die Dosen nicht zu heiß werden.
Zusätzliche Tipps und Tricks
* Rost vermeiden: Um Rost zu
Conclusion
So, there you have it! The humble tomato can, often relegated to the recycling bin, holds the key to a surprisingly effective and incredibly simple DIY trick for achieving perfectly portioned and beautifully consistent baked goods. This isn’t just about saving a few dollars on specialized baking equipment; it’s about unlocking a new level of precision and creativity in your kitchen.
Why is this a must-try? Because it’s accessible, affordable, and yields impressive results. Forget struggling with unevenly sized cookies or muffins. Say goodbye to the frustration of trying to cut brownies into uniform squares. With this simple technique, you can transform ordinary recipes into bakery-worthy creations. The consistent size and shape provided by the tomato can ensures even baking, preventing some pieces from being overcooked while others remain underdone. This leads to a superior final product in terms of both texture and taste.
But the benefits extend beyond aesthetics and even baking. Using a tomato can as a mold or cutter also minimizes waste. When cutting cookies or biscuits, you can nestle the can tightly against previously cut shapes, reducing the amount of leftover dough scraps. This not only saves ingredients but also streamlines the cleanup process.
Ready to take your baking game to the next level? Don’t limit yourself to just cookies and brownies. This trick works wonders for biscuits, scones, mini cheesecakes, and even individual portions of savory dishes like shepherd’s pie. Experiment with different sizes of tomato cans to create a variety of portion sizes. For a rustic touch, leave the edges slightly rough after cutting. For a more polished look, gently smooth the edges with your fingers or a spatula.
Consider these variations to personalize your experience:
* Flavored Oils: Lightly coat the inside of the tomato can with flavored oil (such as olive oil infused with herbs or chili) before adding your dough or batter. This will impart a subtle but delicious flavor to the finished product.
* Parchment Paper Liners: For easy removal and cleanup, line the inside of the tomato can with a strip of parchment paper before adding your mixture. This is especially helpful for delicate items like cheesecakes or custards.
* Stacking for Height: If you’re feeling adventurous, try stacking multiple tomato cans on top of each other to create taller baked goods. Just be sure to secure them together with tape or clips to prevent them from toppling over.
* Freezing for Later: Use the tomato can to portion and freeze individual servings of dough or batter. This is a great way to prepare for future baking sessions or to have a quick and easy dessert option on hand.
We wholeheartedly encourage you to try this simple yet effective DIY trick. It’s a game-changer for home bakers of all skill levels. Once you experience the precision and consistency it offers, you’ll wonder how you ever baked without it.
So, grab a tomato can (or several!), dust off your favorite recipe, and get baking! We’re confident that you’ll be delighted with the results. And most importantly, don’t forget to share your creations and experiences with us. We’d love to see what you come up with! Post photos of your perfectly portioned treats on social media using [Your Hashtag] and let us know how the tomato can trick worked for you. Happy baking!
Frequently Asked Questions
What size tomato can is best for this trick?
The ideal size of the tomato can depends on the recipe and the desired portion size. A standard 14.5-ounce tomato can is a good all-purpose option for cookies, biscuits, and brownies. However, you can use smaller cans (like those used for tomato paste) for mini treats or larger cans (like those used for crushed tomatoes) for larger portions. Experiment with different sizes to find what works best for your needs. Remember to thoroughly wash and dry the cans before using them.
Is it safe to bake directly in a tomato can?
Yes, it is generally safe to bake directly in a tomato can, as long as you take a few precautions. First, ensure that the can is clean and free of any rust or sharp edges. Second, avoid using cans that have any dents or damage, as this could compromise their structural integrity. Third, lightly grease the inside of the can with cooking spray or oil to prevent sticking. Finally, be careful when handling the hot cans after baking, as they can get very hot. If you are concerned about potential leaching of chemicals from the can, you can line it with parchment paper before adding your dough or batter.
How do I remove the baked goods from the tomato can?
Removing baked goods from the tomato can is usually quite easy. If you greased the can properly, the baked goods should slide out with minimal effort. You can also run a thin knife or spatula around the edges of the can to loosen the baked goods. For more delicate items, lining the can with parchment paper is highly recommended. Simply lift the parchment paper out of the can, and the baked goods will come with it. If you’re having trouble removing the baked goods, try placing the can in the freezer for a few minutes to help them firm up.
Can I reuse the tomato cans for baking?
Yes, you can reuse tomato cans for baking, as long as they are in good condition. After each use, thoroughly wash and dry the cans to prevent rust and bacteria growth. Inspect the cans for any signs of damage, such as dents or rust, and discard them if necessary. Store the cans in a dry place to prevent them from rusting. While reusing is possible, consider the cost of the cans versus the time spent cleaning and maintaining them. Some bakers prefer to use new cans each time for hygiene purposes.
What other materials can I use if I don’t have tomato cans?
If you don’t have tomato cans on hand, you can use other similar-sized metal containers, such as tuna cans, vegetable cans, or even cookie cutters. Just make sure that the containers are clean, free of any sharp edges, and safe for baking. You can also use silicone molds or ramekins as alternatives. Silicone molds are particularly convenient because they are non-stick and easy to clean. Ramekins are also a good option for individual portions of baked goods.
Will this trick work for all types of dough and batter?
This trick works best for doughs and batters that hold their shape well, such as cookie dough, biscuit dough, brownie batter, and muffin batter. It may not be as effective for very thin or runny batters, as they may leak out of the can. If you’re using a thinner batter, you can try lining the can with parchment paper or using a thicker can, such as a soup can.
How does using a tomato can improve the baking process?
Using a tomato can improves the baking process in several ways. First, it ensures that all of your baked goods are the same size and shape, which leads to more even baking. Second, it minimizes waste by allowing you to cut out shapes efficiently. Third, it can help to prevent the edges of your baked goods from burning, as the can acts as a barrier between the dough and the hot oven. Finally, it’s a cost-effective and readily available alternative to specialized baking equipment.
Can I use this trick for savory dishes as well?
Absolutely! While this trick is commonly used for sweet treats, it can also be used for savory dishes. For example, you can use tomato cans to create individual portions of shepherd’s pie, lasagna, or quiche. The consistent size and shape provided by the cans will ensure that each portion is cooked evenly and looks appealing. Just be sure to adjust the baking time and temperature as needed for the specific recipe.
How do I prevent the tomato can from rusting?
To prevent tomato cans from rusting, it’s crucial to thoroughly wash and dry them after each use. Avoid using abrasive cleaners or scrub brushes, as these can scratch the surface of the can and make it more susceptible to rust. Once the cans are dry, store them in a dry place, away from moisture. You can also apply a thin layer of cooking oil to the inside of the cans to help protect them from rust. If you notice any signs of rust, discard the can immediately.
Is there a specific type of tomato can I should avoid using?
While most tomato cans are safe to use for baking, there are a few types that you should avoid. First, avoid using cans that have any dents or damage, as this could compromise their structural integrity. Second, avoid using cans that have a plastic lining, as the plastic may melt or leach chemicals into your food during baking. Third, avoid using cans that have been used to store acidic foods other than tomatoes, as these foods may have corroded the metal. Finally, always check the can for any signs of rust or damage before using it.

Leave a Comment