
Harvesting Rooftop Asparagus: Imagine stepping onto your rooftop garden, the city sprawling beneath you, and snipping fresh, vibrant asparagus spears you’ve grown yourself. Sounds like a dream, right? Well, it doesn’t have to be! This DIY guide will unlock the secrets to successfully harvesting rooftop asparagus, transforming your urban space into a thriving edible oasis.
Asparagus, a delicacy enjoyed for centuries, boasts a rich history. From ancient Roman banquets to Renaissance gardens, this perennial vegetable has always been prized for its unique flavor and nutritional benefits. But who says you need acres of farmland to enjoy freshly harvested asparagus?
In today’s world, where access to fresh, locally sourced produce is becoming increasingly important, growing your own food is not just a hobby, it’s a statement. And let’s be honest, store-bought asparagus just doesn’t compare to the crisp, tender spears you can pluck straight from your own garden. Plus, learning how to properly harvest rooftop asparagus ensures you’ll enjoy a bountiful harvest year after year, maximizing your yield and minimizing waste. So, grab your gardening gloves, and let’s get started on this exciting rooftop adventure!
Harvesting Rooftop Asparagus: A Beginner’s Guide
Okay, so you’ve bravely ventured into the world of rooftop gardening and, even more impressively, you’ve managed to grow asparagus! Congratulations! Now comes the exciting part: harvesting your delicious, homegrown spears. Don’t worry, it’s not as daunting as it might seem. I’m here to guide you through the process, ensuring you get the most out of your rooftop asparagus patch.
Understanding Asparagus Growth and Harvesting
Before we dive into the nitty-gritty, let’s quickly cover some asparagus basics. Asparagus is a perennial plant, meaning it comes back year after year. The spears we eat are actually the young shoots that emerge from the plant’s crown (the root system). The key to a successful harvest is knowing when and how to cut those spears.
* Establishment is Key: Patience, my friend, is crucial. Asparagus needs time to establish a strong root system. Don’t harvest anything in the first year after planting. In the second year, you can harvest very lightly (just a few spears per plant). By the third year, you can usually enjoy a more substantial harvest.
* Spear Thickness Matters: Thicker spears are generally more desirable, but don’t be afraid to harvest thinner ones too. The plant will naturally produce a mix of sizes.
* Fern Development: Once the spears start to fern out (develop feathery foliage), it’s time to stop harvesting for the season. This allows the plant to replenish its energy reserves for the following year.
* Harvesting Window: The harvesting season typically lasts for 6-8 weeks in the spring.
Tools You’ll Need
Luckily, you don’t need a ton of fancy equipment for harvesting asparagus. Here’s what I recommend:
* A Sharp Knife or Asparagus Knife: A sharp knife is essential for making clean cuts. An asparagus knife is specifically designed for this purpose, with a serrated blade and a forked tip for easy spear retrieval, but a regular sharp knife will work just fine.
* A Basket or Container: To collect your harvested spears.
* Gloves (Optional): Asparagus plants can sometimes have prickly foliage, so gloves can protect your hands.
Step-by-Step Harvesting Guide
Alright, let’s get down to business! Here’s how to harvest your rooftop asparagus:
1. Check Daily: Asparagus spears can grow surprisingly quickly, especially in warm weather. I recommend checking your plants daily during the harvesting season. You’ll be amazed at how much they can grow in just 24 hours!
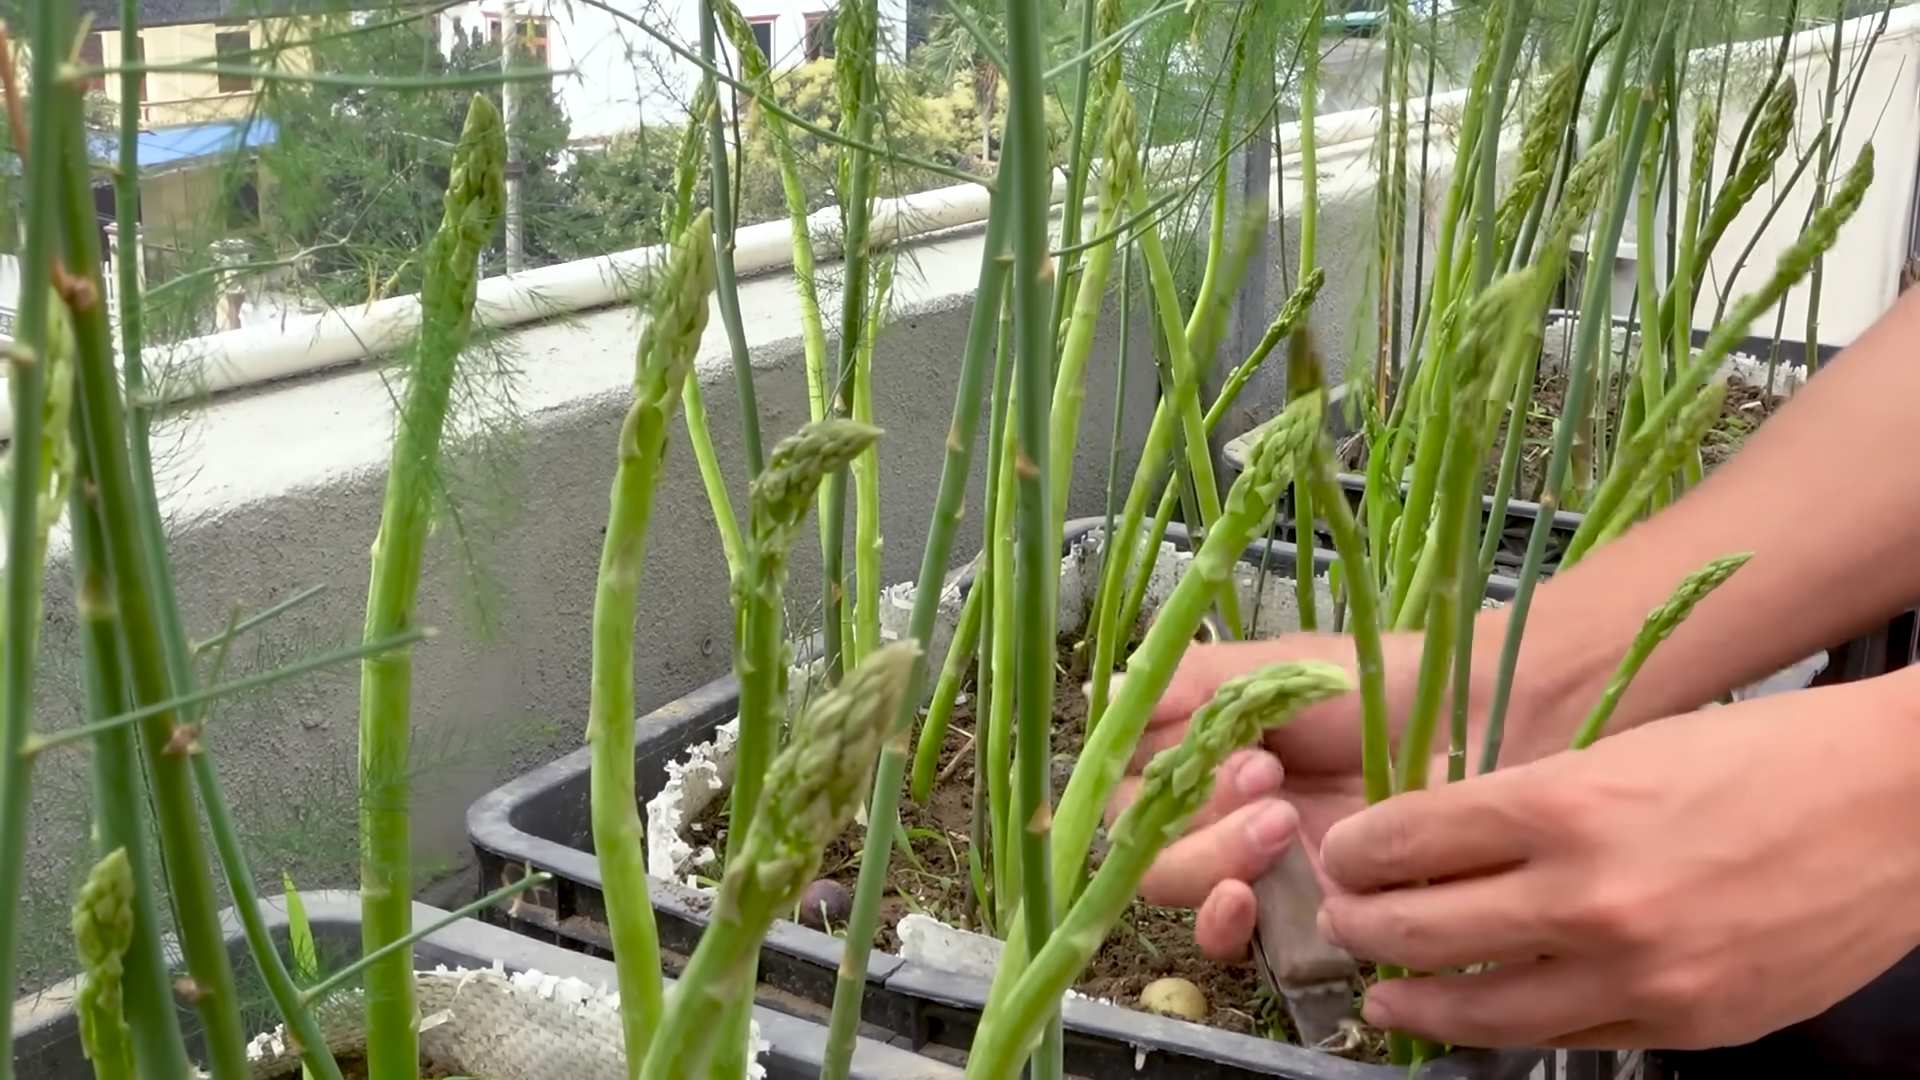
2. Identify Harvestable Spears: Look for spears that are at least 6-8 inches tall and about as thick as your finger (or slightly thinner). The tips should be tightly closed and compact. If the tips are starting to open up and fern out, it’s best to let those spears develop into ferns to feed the plant.
3. Make the Cut: Using your sharp knife or asparagus knife, carefully cut the spear at or slightly below the soil surface. Try to avoid damaging the surrounding spears or the crown of the plant. If you’re using an asparagus knife, insert the forked tip into the soil next to the spear and gently cut upwards. With a regular knife, carefully angle the blade and slice through the spear.
4. Handle with Care: Asparagus spears are delicate, so handle them gently to avoid bruising or breaking them. Place the harvested spears in your basket or container.
5. Repeat Daily: Continue checking your plants daily and harvesting any spears that are ready. Remember, the more you harvest, the more the plant will produce (within reason, of course!).
Troubleshooting and Tips for a Bountiful Harvest
Even with the best intentions, things don’t always go according to plan. Here are some common issues you might encounter and how to address them:
* Thin Spears: If your asparagus spears are consistently thin, it could be a sign that the plant needs more nutrients. Consider adding compost or a balanced fertilizer to the soil. Also, make sure the plant is getting enough sunlight.
* Spears Fern Out Quickly: If your spears are ferning out prematurely, it could be due to stress, such as drought or extreme heat. Make sure the plant is adequately watered, especially during dry spells.
* Pests and Diseases: Asparagus is relatively pest-resistant, but it can occasionally be
Okay, so you’ve bravely ventured into the world of rooftop gardening and, even more impressively, you’ve managed to grow asparagus! Congratulations! Now comes the exciting part: harvesting your delicious, homegrown spears. Don’t worry, it’s not as daunting as it might seem. I’m here to guide you through the process, ensuring you get the most out of your rooftop asparagus patch.
Understanding Asparagus Growth and Harvesting
Before we dive into the nitty-gritty, let’s quickly cover some asparagus basics. Asparagus is a perennial plant, meaning it comes back year after year. The spears we eat are actually the young shoots that emerge from the plant’s crown (the root system). The key to a successful harvest is knowing when and how to cut those spears.
* Establishment is Key: Patience, my friend, is crucial. Asparagus needs time to establish a strong root system. Don’t harvest anything in the first year after planting. In the second year, you can harvest very lightly (just a few spears per plant). By the third year, you can usually enjoy a more substantial harvest.
* Spear Thickness Matters: Thicker spears are generally more desirable, but don’t be afraid to harvest thinner ones too. The plant will naturally produce a mix of sizes.
* Fern Development: Once the spears start to fern out (develop feathery foliage), it’s time to stop harvesting for the season. This allows the plant to replenish its energy reserves for the following year.
* Harvesting Window: The harvesting season typically lasts for 6-8 weeks in the spring.
Tools You’ll Need
Luckily, you don’t need a ton of fancy equipment for harvesting asparagus. Here’s what I recommend:
* A Sharp Knife or Asparagus Knife: A sharp knife is essential for making clean cuts. An asparagus knife is specifically designed for this purpose, with a serrated blade and a forked tip for easy spear retrieval, but a regular sharp knife will work just fine.
* A Basket or Container: To collect your harvested spears.
* Gloves (Optional): Asparagus plants can sometimes have prickly foliage, so gloves can protect your hands.
Step-by-Step Harvesting Guide
Alright, let’s get down to business! Here’s how to harvest your rooftop asparagus:
1. Check Daily: Asparagus spears can grow surprisingly quickly, especially in warm weather. I recommend checking your plants daily during the harvesting season. You’ll be amazed at how much they can grow in just 24 hours!
2. Identify Harvestable Spears: Look for spears that are at least 6-8 inches tall and about as thick as your finger (or slightly thinner). The tips should be tightly closed and compact. If the tips are starting to open up and fern out, it’s best to let those spears develop into ferns to feed the plant.
3. Make the Cut: Using your sharp knife or asparagus knife, carefully cut the spear at or slightly below the soil surface. Try to avoid damaging the surrounding spears or the crown of the plant. If you’re using an asparagus knife, insert the forked tip into the soil next to the spear and gently cut upwards. With a regular knife, carefully angle the blade and slice through the spear.
4. Handle with Care: Asparagus spears are delicate, so handle them gently to avoid bruising or breaking them. Place the harvested spears in your basket or container.
5. Repeat Daily: Continue checking your plants daily and harvesting any spears that are ready. Remember, the more you harvest, the more the plant will produce (within reason, of course!).
Troubleshooting and Tips for a Bountiful Harvest
Even with the best intentions, things don’t always go according to plan. Here are some common issues you might encounter and how to address them:
* Thin Spears: If your asparagus spears are consistently thin, it could be a sign that the plant needs more nutrients. Consider adding compost or a balanced fertilizer to the soil. Also, make sure the plant is getting enough sunlight.
* Spears Fern Out Quickly: If your spears are ferning out prematurely, it could be due to stress, such as drought or extreme heat. Make sure the plant is adequately watered, especially during dry spells.
* Pests and Diseases: Asparagus is relatively pest-resistant, but it can occasionally be affected by asparagus beetles or fungal diseases. Inspect your plants regularly and take appropriate action if you notice any problems. Organic pest control methods are always a good option for rooftop gardens.
* Proper Watering: Asparagus needs consistent moisture, especially during the harvesting season. Water deeply whenever the soil feels dry to the touch. Avoid overwatering, which can lead to root rot.
* Mulching: Applying a layer of mulch around your asparagus plants can help retain moisture, suppress weeds, and regulate soil temperature. Organic mulches like straw or wood chips are excellent choices.
* Fertilizing: Asparagus is a heavy feeder, so it benefits from regular fertilization. Apply a balanced fertilizer in the spring before the harvesting season begins. You can also side-dress with compost throughout the growing season.
* Weed Control: Weeds can compete with asparagus for nutrients and water, so it’s important to keep your asparagus patch weed-free. Hand-pull weeds regularly or use a hoe to cultivate the soil.
* End of Season Care: Once the harvesting season is over and the spears have ferned out, it’s important to provide proper care to ensure a healthy crop the following year. Allow the ferns to grow and mature throughout the summer and fall. In late fall or early winter, after the ferns have turned brown and died back, cut them down to the ground. This will help prevent diseases from overwintering.
Storing Your Harvested Asparagus
Now that you’ve harvested your beautiful asparagus spears, you’ll want to keep them fresh until you’re ready to cook them. Here are a few storage tips:
* Refrigerate Immediately: The sooner you refrigerate your asparagus, the better.
* Stand Upright in Water: Trim the ends of the spears and stand them upright in a jar or glass filled with about an inch of water. Cover the tops loosely with a plastic bag. This will help keep the spears hydrated and prevent them from drying out.
* Use Within a Few Days: Asparagus is best used within a few days of harvesting.
Enjoying Your Rooftop Asparagus
The best part of growing your own asparagus is, of course, getting to eat it! There are countless ways to prepare asparagus, from simple roasting to elaborate sauces. Here are a few of my favorite ways to enjoy rooftop asparagus:
* Roasted Asparagus: Toss asparagus spears with olive oil, salt, and pepper, and roast them in a preheated oven at 400°F (200°C) for 10-15 minutes, or until tender-crisp.
* Grilled Asparagus: Brush asparagus spears with olive oil and grill them over medium heat for 5-7 minutes, or until tender-crisp.
* Steamed Asparagus: Steam asparagus spears for 5-7 minutes, or until tender-crisp.
* Asparagus Soup: Blend cooked asparagus with broth, cream, and seasonings for a delicious and creamy soup.
* Asparagus Frittata: Add chopped asparagus to a frittata or omelet for a healthy and flavorful breakfast or brunch.
Growing asparagus on your rooftop might seem like a challenge, but with a little patience and care, you can enjoy a delicious and rewarding harvest. Happy gardening!
Conclusion
So, there you have it! Harvesting rooftop asparagus is not only possible, but it’s a deeply rewarding experience that connects you to your food in a way few other gardening endeavors can. Imagine stepping onto your roof, breathing in the fresh air, and snipping off spears of tender, vibrant green asparagus, knowing you nurtured them from tiny crowns to culinary delights. It’s a far cry from the supermarket aisle, and the taste difference is simply undeniable.
This DIY trick, transforming your rooftop into a miniature asparagus farm, is a must-try for several reasons. First, it maximizes space, especially crucial for urban dwellers with limited garden plots. Second, it provides you with fresh, organic produce, free from the pesticides and herbicides often used in commercial farming. Third, it’s a sustainable practice, reducing your carbon footprint by minimizing transportation and packaging. And finally, it’s just plain fun! There’s a certain satisfaction that comes from growing your own food, a sense of accomplishment that’s hard to replicate.
But don’t stop there! Experiment with different varieties of asparagus. ‘Jersey Knight’ is a reliable and productive choice, but ‘Purple Passion’ offers a unique color and slightly sweeter flavor. Consider companion planting with herbs like basil or parsley, which can deter pests and enhance the flavor of your asparagus. You can also explore different container options, from repurposed plastic bins to stylish terracotta pots, ensuring they have adequate drainage and depth for the asparagus roots.
Remember, patience is key. Asparagus takes time to establish, but the rewards are well worth the wait. Once your rooftop asparagus patch is thriving, you’ll have a continuous supply of delicious spears for years to come.
We wholeheartedly encourage you to give this DIY trick a try. Embrace the challenge, learn from your mistakes, and celebrate your successes. And most importantly, share your experience with us! We’d love to hear about your rooftop asparagus adventures, see photos of your harvests, and learn any tips or tricks you’ve discovered along the way. Let’s build a community of rooftop asparagus enthusiasts and inspire others to embrace sustainable urban gardening. So, grab your gardening gloves, head to your rooftop, and start harvesting rooftop asparagus today! You won’t regret it.
Frequently Asked Questions (FAQ)
What kind of containers are best for growing asparagus on a rooftop?
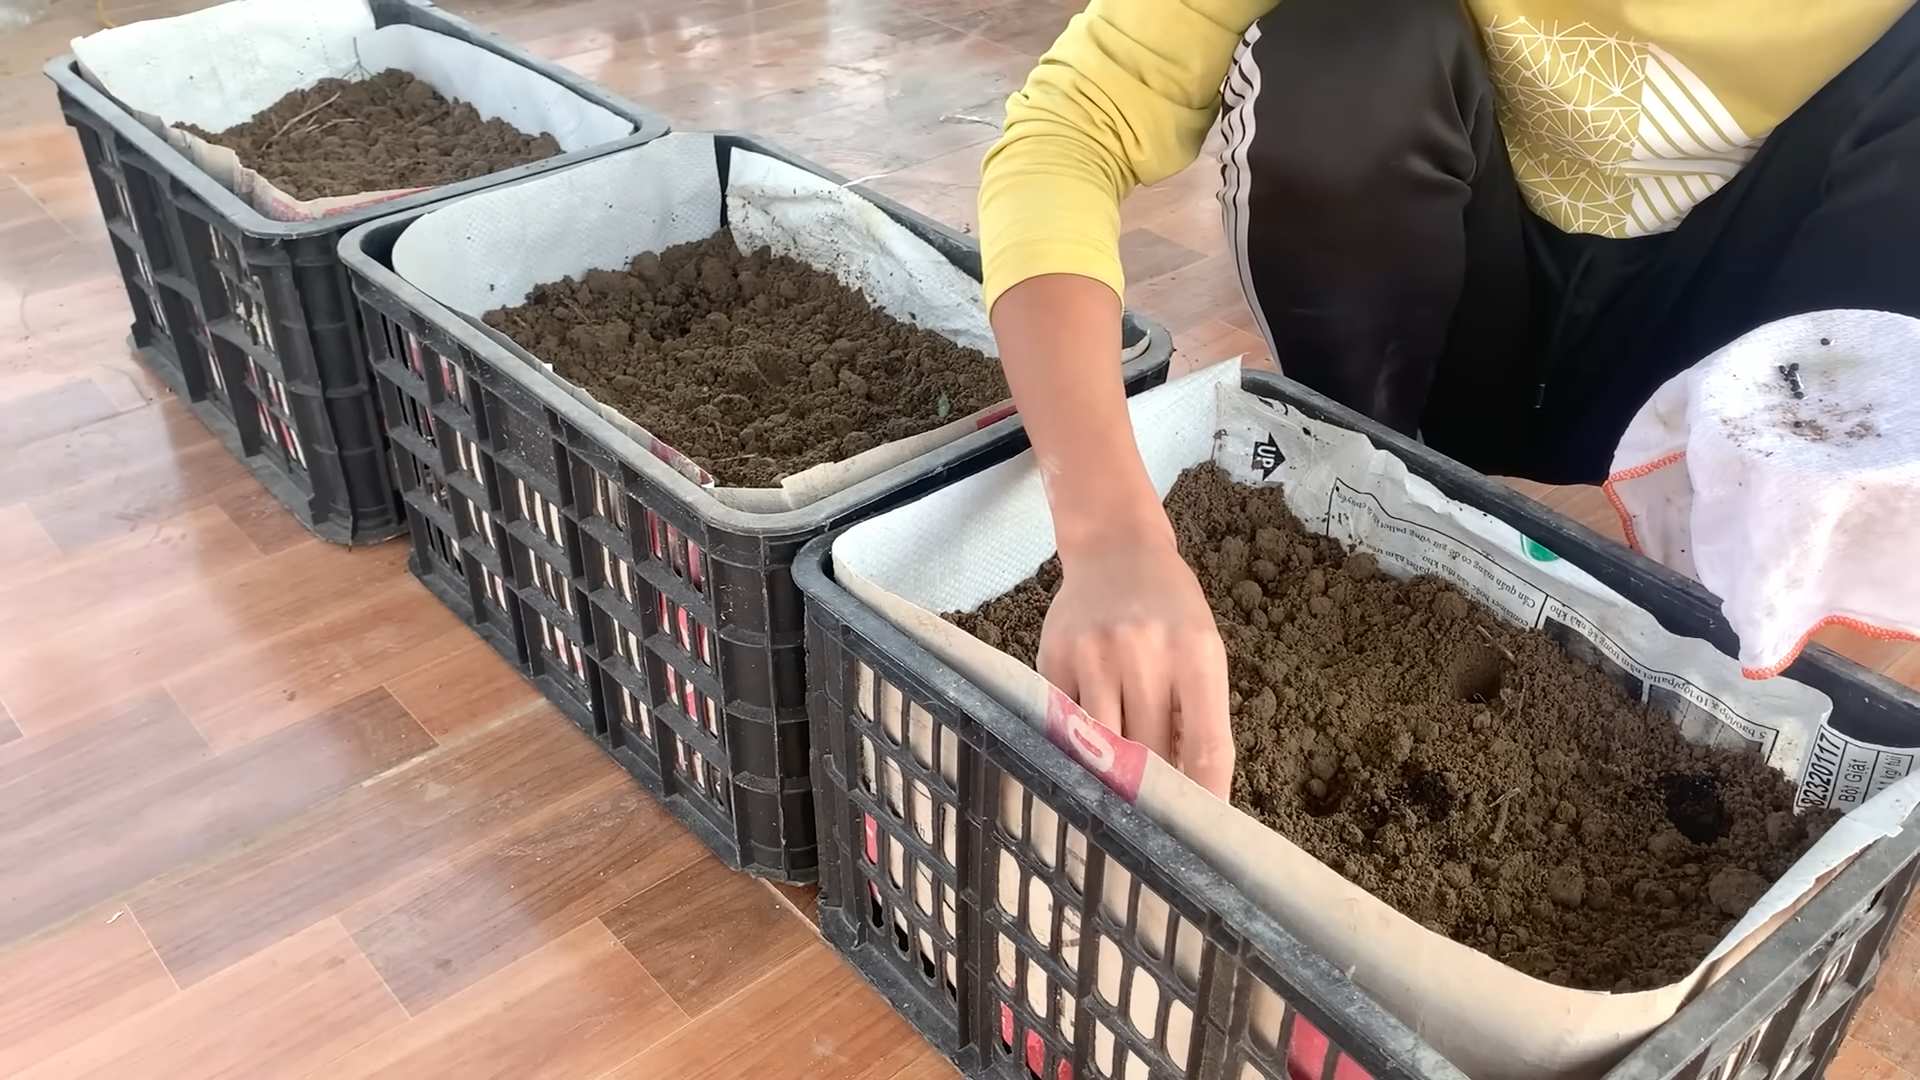
The best containers for rooftop asparagus are large, durable, and provide excellent drainage. Asparagus roots can grow quite deep, so aim for containers that are at least 12-18 inches deep and wide. Consider the weight of the container when filled with soil, especially for rooftop gardens. Lightweight options like plastic or fiberglass are preferable to heavy terracotta or concrete. Ensure the containers have drainage holes to prevent waterlogging, which can rot the asparagus crowns. You can also use raised beds if your rooftop structure can support the weight.
How often should I water my rooftop asparagus?
Watering frequency depends on the climate, container size, and soil type. Generally, asparagus needs consistent moisture, especially during the growing season. Check the soil moisture regularly by sticking your finger about an inch deep. If the soil feels dry, it’s time to water. Water deeply until water drains out of the drainage holes. Avoid overwatering, as this can lead to root rot. During hot, dry periods, you may need to water daily. In cooler, wetter weather, you can reduce watering frequency. Mulching around the asparagus plants can help retain moisture and reduce the need for frequent watering.
What kind of soil is best for rooftop asparagus?
Asparagus thrives in well-draining, fertile soil with a slightly acidic to neutral pH (6.0-7.0). A good soil mix for rooftop asparagus should consist of equal parts of compost, potting soil, and perlite or vermiculite. Compost provides essential nutrients and improves soil structure. Potting soil provides a good base for root growth. Perlite or vermiculite improves drainage and aeration. Avoid using heavy clay soil, as it can become waterlogged and inhibit root growth. You can also amend the soil with bone meal or rock phosphate to provide phosphorus, which is essential for root development.
How do I fertilize my rooftop asparagus?
Asparagus is a heavy feeder and benefits from regular fertilization. Apply a balanced fertilizer (e.g., 10-10-10) in early spring before the spears emerge. You can also side-dress with compost or well-rotted manure. Avoid using fertilizers high in nitrogen, as this can promote foliage growth at the expense of spear production. After the harvest season, fertilize again to replenish nutrients and promote strong root growth for the following year. Organic fertilizers, such as fish emulsion or seaweed extract, are also excellent options.
When is the best time to harvest rooftop asparagus?
The best time to harvest asparagus is in the spring, typically from April to June, depending on your climate. The spears are ready to harvest when they are about 6-8 inches tall and have tightly closed tips. Use a sharp knife or asparagus knife to cut the spears at ground level. Avoid harvesting all the spears in the first year or two, as this can weaken the plants. Allow some spears to fern out to provide energy for the roots. As the plants mature, you can harvest more heavily. Stop harvesting when the spears become thin and spindly, indicating that the plants need to rest.
How do I protect my rooftop asparagus from pests and diseases?
Rooftop asparagus is generally less susceptible to pests and diseases than ground-grown asparagus, but it’s still important to take precautions. Common pests include asparagus beetles and aphids. Handpick beetles or use insecticidal soap to control infestations. Aphids can be washed off with a strong stream of water. Diseases include rust and crown rot. Ensure good air circulation and avoid overwatering to prevent these diseases. Remove any infected foliage promptly. You can also use organic fungicides if necessary. Companion planting with herbs like basil or parsley can help deter pests.
Can I grow asparagus from seed on my rooftop?
While it’s possible to grow asparagus from seed, it’s a much slower process than starting with crowns. Asparagus crowns are one-year-old plants that are ready to be planted directly into the ground or containers. Growing from seed requires starting the seeds indoors several weeks before the last frost and then transplanting the seedlings into larger containers. It can take several years for asparagus plants grown from seed to produce harvestable spears. For faster results and a more reliable harvest, it’s best to start with asparagus crowns.
How long will my rooftop asparagus plants last?
With proper care, asparagus plants can last for 15-20 years or even longer. The key is to provide them with adequate sunlight, water, nutrients, and protection from pests and diseases. Regular fertilization, proper watering, and removing any dead or diseased foliage will help keep your asparagus plants healthy and productive for many years to come. Also, allowing some spears to fern out after the harvest season will help replenish the roots and ensure a bountiful harvest in the following years.


Leave a Comment