
Vinegar Fruit Wash Benefits: Are you tired of wondering what’s lurking on the surface of your apples, berries, and grapes? I know I am! We all want to provide the freshest, healthiest produce for ourselves and our families, but the thought of pesticides, waxes, and even just plain old dirt clinging to our fruits can be unsettling.
For centuries, cultures around the globe have sought ways to purify and cleanse their food. From simple water rinses to elaborate herbal soaks, the desire for clean, safe ingredients is deeply ingrained in our history. But in today’s world, with complex agricultural practices, a simple rinse often isn’t enough. That’s where a DIY vinegar fruit wash comes in!
This isn’t just another trendy cleaning hack; it’s a practical solution to a very real concern. Learning about vinegar fruit wash benefits will empower you to take control of your food’s cleanliness. I’m going to show you how to create a simple, effective, and affordable fruit wash using common household vinegar. Not only will it help remove unwanted residues, but it can also extend the shelf life of your precious fruits. So, let’s dive in and discover the secrets to sparkling clean, worry-free produce!
DIY Fruit and Vegetable Wash: A Natural and Effective Solution
Hey everyone! I’m so excited to share this super simple and effective DIY fruit and vegetable wash recipe with you. I’ve been using it for years, and it’s honestly made me feel so much better about what I’m feeding myself and my family. Store-bought produce can be coated in pesticides, waxes, and just general grime from handling. This wash helps remove all that gunk, leaving you with cleaner, tastier, and healthier fruits and veggies. Plus, it’s incredibly cheap and easy to make!
Why Make Your Own Fruit and Vegetable Wash?
Before we dive into the recipe, let’s talk about why you might want to ditch the store-bought washes and make your own.
* Cost-Effective: Seriously, you’ll save a ton of money. The ingredients are things you probably already have in your pantry.
* Natural and Safe: You know exactly what’s going into your wash. No harsh chemicals or mystery ingredients.
* Effective Cleaning: This wash is surprisingly powerful at removing dirt, wax, and pesticide residue.
* Environmentally Friendly: Less plastic waste from buying pre-made washes.
The Magic Ingredients: Vinegar and Water (and a Little Lemon!)
The star of this show is vinegar! Vinegar, especially white vinegar, is a natural disinfectant and degreaser. It’s also great at breaking down waxes and loosening dirt. I also like to add a little lemon juice for its extra cleaning power and fresh scent.
The Recipe: Simple and Customizable
Here’s my go-to recipe for a fruit and vegetable wash:
* 1 cup white vinegar
* 4 cups water
* 1 tablespoon lemon juice (optional, but I highly recommend it!)
Step-by-Step Instructions: Getting Your Wash On!
Okay, let’s get down to business! Here’s how to make and use your DIY fruit and vegetable wash:
1. Gather Your Supplies: You’ll need a clean spray bottle (or a large bowl), white vinegar, water, lemon (optional), a measuring cup, and a spoon.
2. Mix the Ingredients: In your spray bottle or bowl, combine the white vinegar, water, and lemon juice (if using). Give it a good shake or stir to make sure everything is well mixed.
3. Prepare Your Produce: Place your fruits and vegetables in a colander or large bowl.
4. Spray or Soak:
* For Spraying: Generously spray the produce with the vinegar solution, making sure to coat all surfaces.
* For Soaking: Pour the vinegar solution over the produce, ensuring everything is submerged.
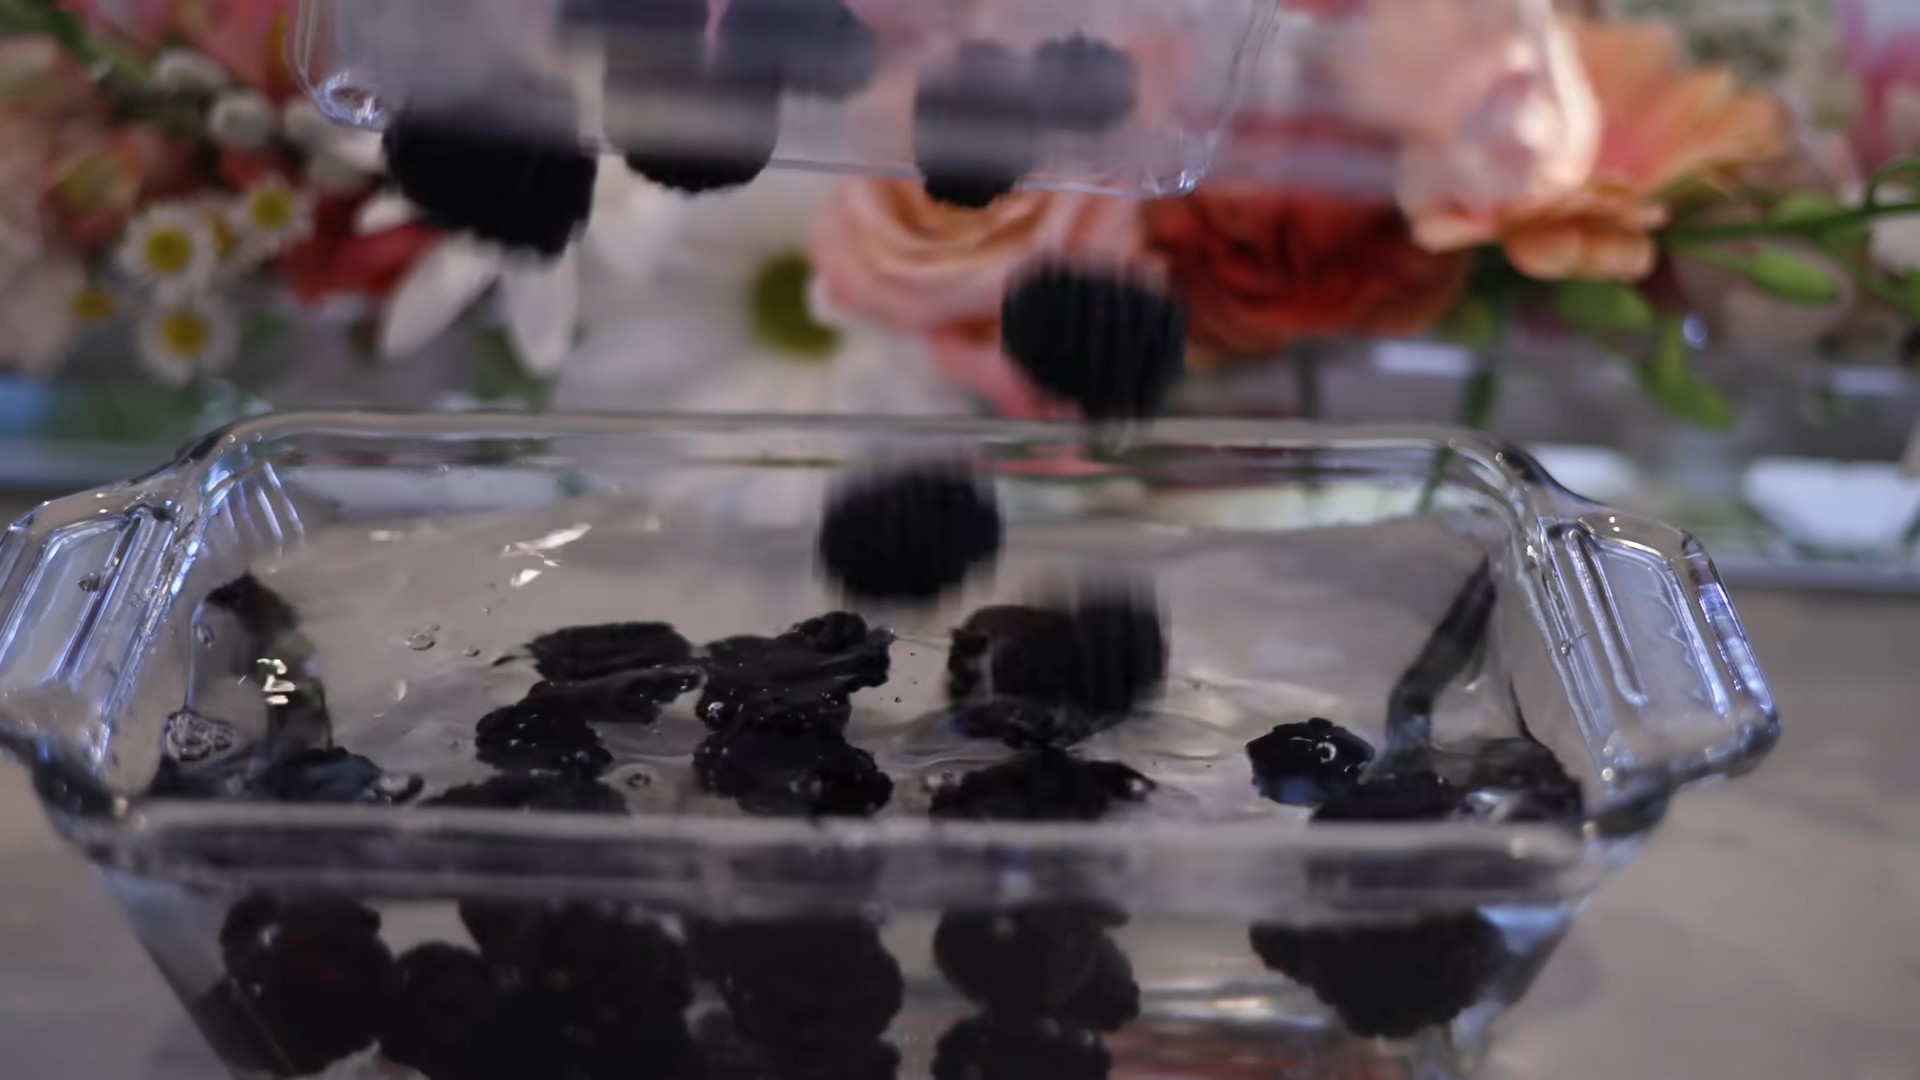
5. Let it Sit: Allow the produce to sit in the wash for about 10-15 minutes. This gives the vinegar time to work its magic and loosen any dirt or residue. Don’t skip this step! It’s crucial for effective cleaning.
6. Rinse Thoroughly: After soaking, rinse the produce thoroughly under cold, running water. Make sure to remove all traces of the vinegar solution. I like to rub the produce gently with my hands to help remove any remaining dirt.
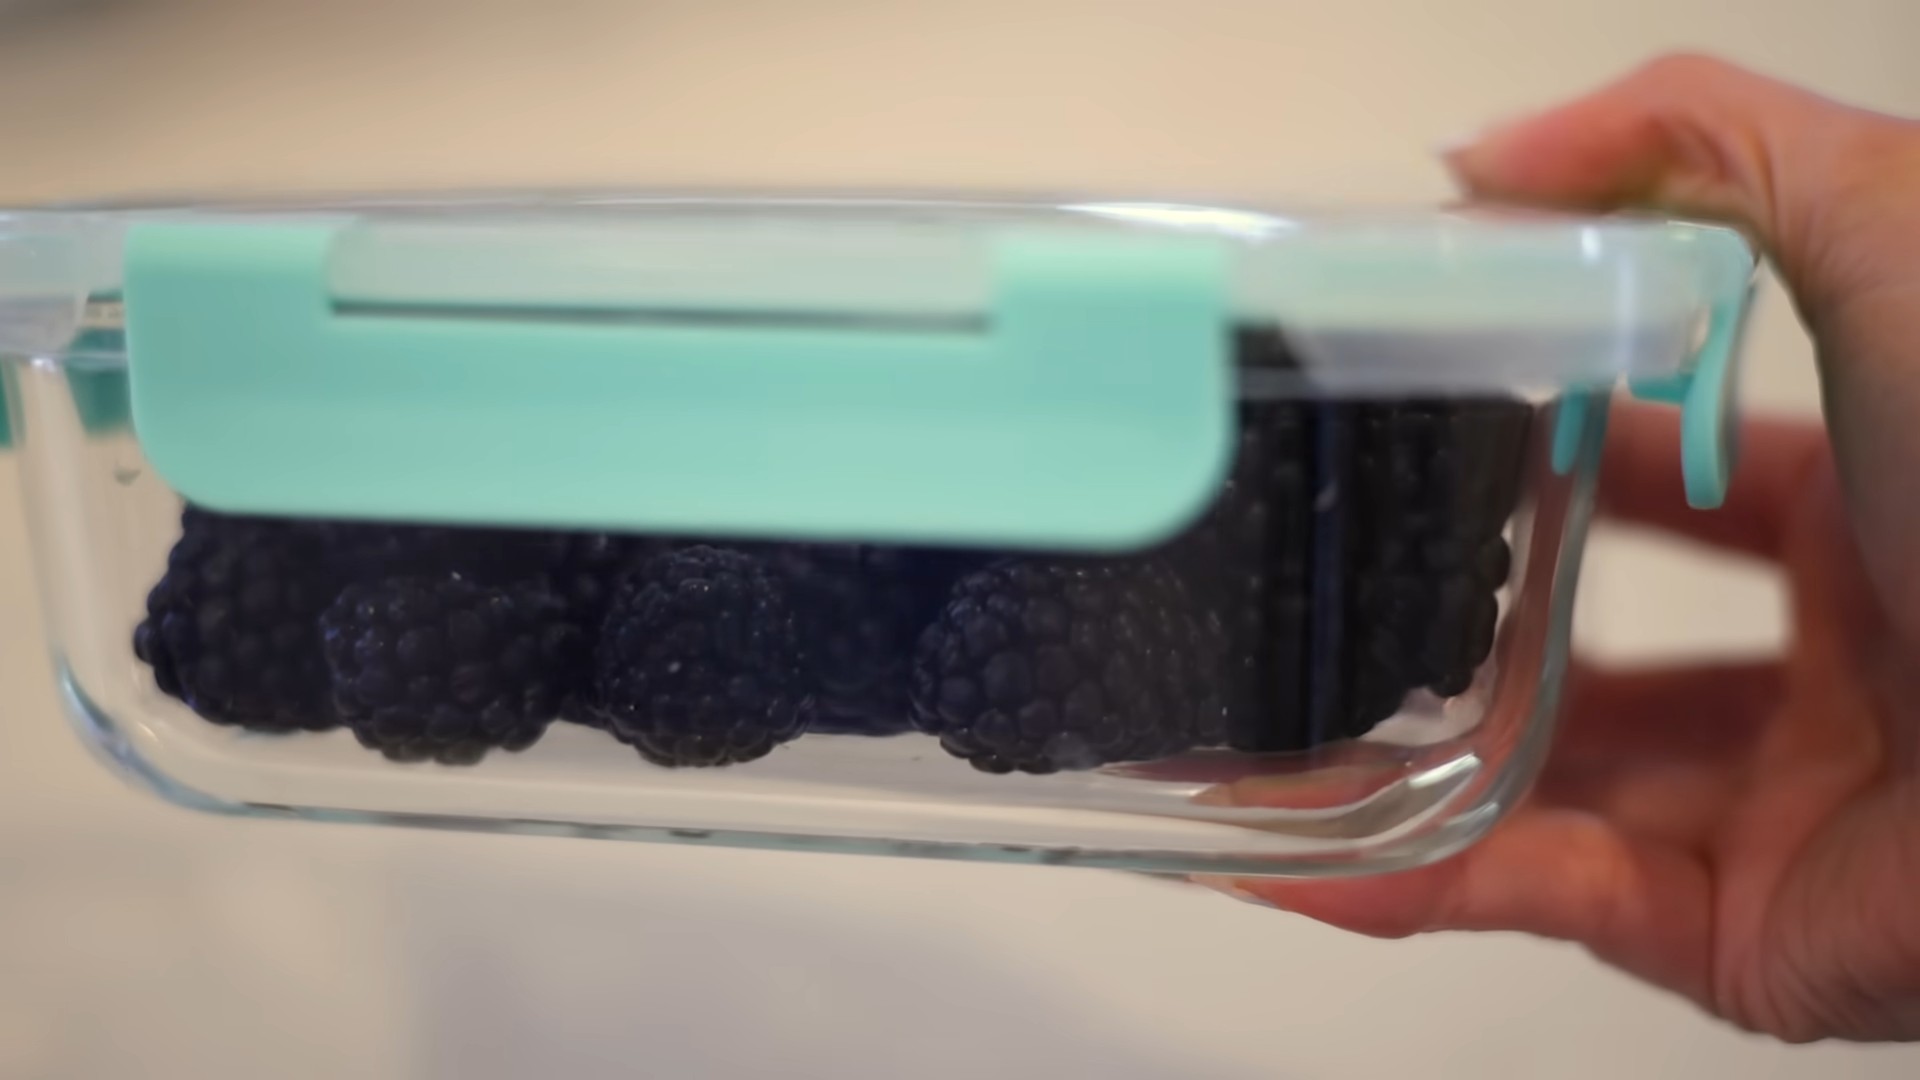
7. Dry and Store: Pat the produce dry with a clean towel or let it air dry completely before storing it in the refrigerator. Drying the produce helps prevent mold growth and keeps it fresher for longer.
Tips and Tricks for the Best Results
Here are a few extra tips to help you get the most out of your DIY fruit and vegetable wash:
* Use White Vinegar: While you can technically use other types of vinegar, white vinegar is the most effective for cleaning and has the least amount of flavor, so it won’t affect the taste of your produce.
* Adjust the Ratio: If you’re dealing with particularly dirty produce, you can increase the amount of vinegar in the solution. Just be sure to rinse thoroughly afterward.
* Don’t Soak Delicate Produce for Too Long: Soft fruits and vegetables like berries and leafy greens can become soggy if soaked for too long. Reduce the soaking time to 5-10 minutes for these items.
* Use a Vegetable Brush: For produce with thick skins, like potatoes and carrots, use a vegetable brush to scrub away any stubborn dirt.
* Make a Fresh Batch Each Time: While you can store the vinegar solution for later use, I prefer to make a fresh batch each time to ensure maximum effectiveness.
* Test on a Small Area First: If you’re concerned about the vinegar affecting the color or texture of a particular fruit or vegetable, test the wash on a small, inconspicuous area first.
* Add Baking Soda (for Extra Cleaning Power): For really tough grime, you can add a tablespoon of baking soda to the vinegar solution. The baking soda will create a fizzing action that helps to lift dirt and debris. Be careful, though, as the fizzing can be a bit messy!
* Essential Oils (for Scent and Added Benefits): If you want to add a pleasant scent and some extra antibacterial properties to your wash, you can add a few drops of lemon, grapefruit, or tea tree essential oil. Just make sure to use food-grade essential oils and add them sparingly.
Specific Produce Considerations
Different types of produce may require slightly different washing techniques. Here are a few tips for specific fruits and vegetables:
* Berries: Berries are delicate and can easily absorb water, so it’s best to wash them just before you’re ready to eat them. Gently rinse them in the vinegar solution and pat them dry with a paper towel.
* Leafy Greens: Leafy greens can be particularly dirty, so it’s important to wash them thoroughly. Separate the leaves and soak them in the vinegar solution for a few minutes. Then, rinse them well and spin them dry in a salad spinner.
* Apples and Pears: Apples and pears are often coated in wax to make them look shiny. The vinegar wash will help to remove this wax. Use a vegetable brush to scrub the skins while rinsing.
* Root Vegetables: Root vegetables like potatoes, carrots, and beets can be quite dirty, so it’s important to scrub them well with a vegetable brush.
* Grapes: Grapes can be tricky to wash because they’re so small and numerous. The best way to wash grapes is to soak them in the vinegar solution for a few minutes, then rinse them thoroughly under running water.
Storing Your Homemade Fruit and Vegetable Wash
If you’re not using all of your fruit and vegetable wash at once, you can store it in a sealed container in a cool, dark place. I usually keep mine in the refrigerator. It should last for about a week. However, I prefer to make a fresh batch each time to ensure maximum effectiveness.
Addressing Common Concerns
I know some of you might have a few concerns about using vinegar to wash your produce. Here are a few common questions and my answers:
* Will the vinegar make my produce taste like vinegar? No, as long as you rinse the produce thoroughly after soaking, you won’t taste any vinegar.
* Is vinegar safe to use on all types of produce? Yes, vinegar is generally safe to use on all types of produce. However, as I mentioned earlier, it’s best to test the wash on a small area first if you’re concerned about it affecting the color or texture of a particular fruit or vegetable.
* Can I use apple cider vinegar instead of white vinegar? While you can use apple cider vinegar, it’s not as effective as white vinegar for cleaning. It also has a stronger flavor, which may affect the taste of your produce.
Beyond the Basics: Variations and Add-Ins
Want to get a little fancy with your fruit and vegetable wash? Here are a few variations and add-ins you can try:
* Grapefruit Seed Extract: Add a few drops of grapefruit seed extract to your wash for its antibacterial and antifungal properties.
* Hydrogen Peroxide: For extra cleaning power, you can add a tablespoon of hydrogen peroxide to the vinegar solution. Be sure to rinse the produce thoroughly afterward.
* Salt: Adding a teaspoon of salt to the wash can help to draw out dirt and impurities.
Final Thoughts: Clean Eating Made Easy
Making your own fruit and vegetable wash is a simple and effective way to ensure that you’re eating clean, healthy produce. It’s also a great way to save money and reduce your environmental impact. I hope you’ll give this recipe a try and see for yourself how easy it is to make your own natural fruit and vegetable wash! Happy washing!
Conclusion
So, there you have it! This simple, yet incredibly effective, DIY vinegar fruit wash is more than just a cleaning hack; it’s a proactive step towards safeguarding your health and enjoying the freshest, most wholesome produce possible. We’ve explored the potential risks lurking on the surfaces of our fruits and vegetables, from pesticide residues to harmful bacteria, and demonstrated how easily these concerns can be addressed with a readily available, affordable ingredient: vinegar.
Why is this DIY trick a must-try? Because it empowers you to take control of what you’re putting into your body. You’re not just rinsing away visible dirt; you’re actively reducing your exposure to potentially harmful substances that can compromise your well-being. In a world where we’re increasingly conscious of the ingredients in our food, this vinegar fruit wash offers a simple, natural solution for ensuring the cleanliness and safety of our produce.
But the benefits don’t stop there. Beyond the health aspects, this wash can also extend the shelf life of your fruits and vegetables. By removing surface contaminants that contribute to spoilage, you’ll find that your produce stays fresher for longer, reducing food waste and saving you money in the long run. It’s a win-win situation!
Looking for variations? Absolutely! While white vinegar is a fantastic all-purpose option, you can experiment with apple cider vinegar for a slightly sweeter scent and added enzymatic benefits. Some people also like to add a few drops of lemon essential oil or grapefruit seed extract to the wash for enhanced antibacterial properties. Just be sure to use food-grade essential oils and dilute them properly. Another variation is to add a tablespoon of baking soda to the vinegar and water solution. The baking soda helps to scrub away any stubborn dirt or wax coatings. Remember to rinse thoroughly after using baking soda.
For delicate fruits like berries, a shorter soaking time is recommended to prevent them from becoming soggy. A quick rinse after a brief soak is usually sufficient. For thicker-skinned fruits and vegetables, you can even use a soft brush to gently scrub the surface while they’re submerged in the vinegar solution.
We wholeheartedly encourage you to try this DIY vinegar fruit wash and experience the difference for yourself. It’s a small change that can have a significant impact on your health and the quality of your food. Once you’ve given it a try, we’d love to hear about your experience! Share your thoughts, tips, and variations in the comments below. Let’s build a community of health-conscious individuals who are committed to enjoying the freshest, cleanest produce possible. Don’t forget to share this simple yet powerful **vinegar fruit wash benefits** with your friends and family so they can enjoy the same peace of mind.
Frequently Asked Questions (FAQ)
1. What kind of vinegar should I use for a fruit and vegetable wash?
White vinegar is generally recommended for its neutral flavor and effective cleaning properties. Apple cider vinegar is another good option, offering a slightly sweeter scent and potential enzymatic benefits. Avoid using flavored vinegars, as they may leave an undesirable taste on your produce. The key is to use a vinegar with an acidity level of around 5%, which is standard for most household vinegars. Make sure the vinegar is properly diluted with water to avoid damaging delicate fruits and vegetables.
2. What is the ideal vinegar to water ratio for the wash?
The recommended ratio is typically 1 part vinegar to 3 parts water. This creates a solution that is effective at removing contaminants without being too harsh on your produce. For example, you could use 1 cup of vinegar and 3 cups of water. Adjust the quantity based on the amount of produce you need to wash.
3. How long should I soak my fruits and vegetables in the vinegar wash?
The soaking time depends on the type of produce. For most fruits and vegetables, a 10-15 minute soak is sufficient. For delicate fruits like berries, a shorter soak of 5-10 minutes is recommended to prevent them from becoming soggy. For thicker-skinned produce, you can soak them for up to 20 minutes. Always rinse thoroughly after soaking.
4. Will the vinegar wash leave a taste on my fruits and vegetables?
If you rinse your produce thoroughly after soaking, the vinegar taste should be minimal or non-existent. The purpose of the rinse is to remove any residual vinegar and contaminants. If you are concerned about the taste, you can use a slightly weaker vinegar solution or reduce the soaking time.
5. Can I use this vinegar wash on all types of fruits and vegetables?
Yes, this vinegar wash is generally safe for use on all types of fruits and vegetables. However, it’s important to adjust the soaking time based on the delicacy of the produce. As mentioned earlier, shorter soaking times are recommended for berries and other delicate fruits.
6. Is a vinegar wash more effective than just rinsing with water?
Yes, a vinegar wash is significantly more effective than simply rinsing with water. Water alone can remove some surface dirt and debris, but it is not as effective at removing pesticide residues, bacteria, and other contaminants. Vinegar’s acidity helps to break down these substances, making them easier to rinse away.
7. Can I reuse the vinegar wash solution?
It is not recommended to reuse the vinegar wash solution. After each use, the solution will contain the contaminants that were removed from the produce. Reusing the solution would simply reintroduce those contaminants to other fruits and vegetables. It’s best to discard the used solution and prepare a fresh batch for each wash.
8. How often should I wash my fruits and vegetables with vinegar?
Ideally, you should wash your fruits and vegetables with vinegar every time you bring them home from the grocery store or farmers market. This will help to remove any contaminants that may have accumulated during transportation and handling. Even if you plan to peel the produce, washing it first is still a good idea to prevent transferring contaminants to the edible parts.
9. Can I add anything else to the vinegar wash to make it more effective?
Some people like to add a few drops of food-grade essential oils, such as lemon or grapefruit, to the vinegar wash for enhanced antibacterial properties. Another option is to add a tablespoon of baking soda to the solution. The baking soda helps to scrub away any stubborn dirt or wax coatings. Always rinse thoroughly after using baking soda.
10. How should I store my fruits and vegetables after washing them with vinegar?
After washing and rinsing your fruits and vegetables, pat them dry with a clean towel or paper towel. Store them in the refrigerator in airtight containers or produce bags. This will help to keep them fresh and prevent them from spoiling quickly. Washing your produce with vinegar can actually extend its shelf life by removing surface contaminants that contribute to spoilage.

Leave a Comment