
Water saving strawberry growing is easier than you think, and I’m here to show you how! Imagine plump, juicy strawberries bursting with flavor, all while using less water. Sounds like a dream, right? Well, it doesn’t have to be! For centuries, gardeners have sought ways to cultivate delicious crops efficiently. From ancient irrigation systems to modern hydroponics, the quest for water conservation in gardening is a long and fascinating one. Strawberries, in particular, have a rich history, enjoyed by Romans and cultivated in European gardens for centuries.
But let’s face it, in today’s world, water is a precious resource. With increasing droughts and a growing awareness of environmental responsibility, finding ways to conserve water in our gardens is more important than ever. That’s why I’m so excited to share these simple, yet effective, DIY tricks for water saving strawberry growing. These aren’t just about saving water; they’re about maximizing your yield, minimizing your effort, and enjoying the satisfaction of growing your own delicious strawberries sustainably.
This article will guide you through practical techniques that you can implement in your own garden, regardless of its size. Whether you have a sprawling backyard or a small balcony, you can enjoy a bountiful strawberry harvest while being kind to the planet. So, grab your gardening gloves, and let’s dive in!
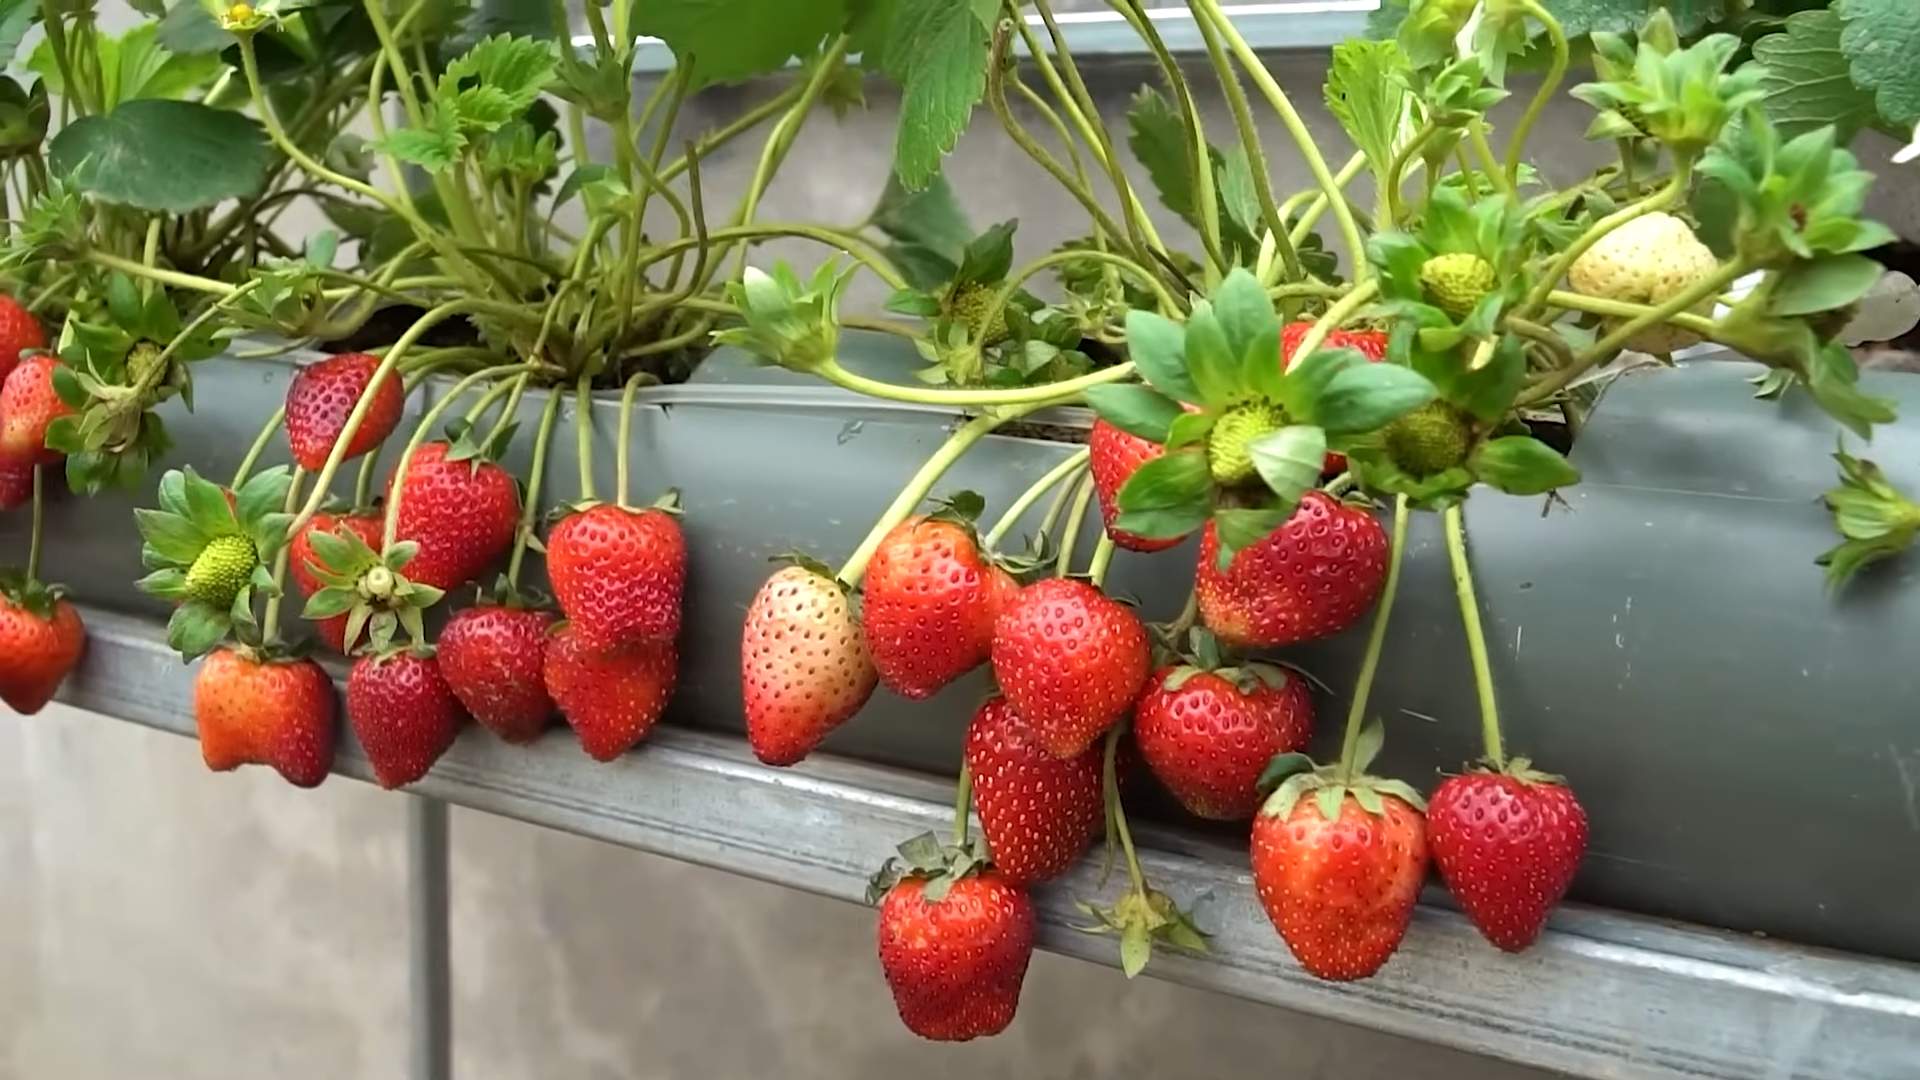
DIY Water-Saving Strawberry Tower: Grow More, Waste Less!
Hey there, fellow gardening enthusiasts! I’m so excited to share this project with you. If you’re like me, you love fresh strawberries, but you’re also conscious about water usage, especially during those hot summer months. This DIY strawberry tower is the perfect solution! It allows you to grow a ton of strawberries in a small space while significantly reducing water waste. Plus, it looks pretty darn cool!
Materials You’ll Need
Before we dive in, let’s gather our supplies. Don’t worry, most of these are readily available at your local hardware store or garden center.
* Two PVC pipes: One large (at least 6 inches in diameter and 5-6 feet long) and one smaller (around 2 inches in diameter and the same length). The larger pipe will be the main body of the tower, and the smaller one will be our irrigation system.
* Drill with various sized drill bits: You’ll need a large drill bit (around 2-3 inches, depending on the size of your strawberry plants) for the planting holes and a smaller bit for the irrigation pipe.
* Measuring tape or ruler: Accuracy is key!
* Permanent marker: For marking your drill points.
* PVC pipe cutter or saw: For cutting the pipes to the desired length (if needed).
* Landscaping fabric or burlap: To line the inside of the large PVC pipe.
* Potting soil: Choose a high-quality potting mix that drains well.
* Gravel or small rocks: For drainage at the bottom of the tower.
* Strawberry plants: Obviously! Choose everbearing varieties for a continuous harvest. I recommend starting with around 20-30 plants, depending on the size of your tower.
* End cap for the smaller PVC pipe: To seal the bottom of the irrigation pipe.
* PVC glue (optional): For extra security when attaching the end cap.
* Watering can or hose with a gentle spray nozzle: For initial watering.
* Gloves: To protect your hands.
* Safety glasses: Always a good idea when drilling!
Preparing the Large PVC Pipe (Planting Holes)
This is where the magic happens! We’re going to create the holes where our strawberry plants will live.
1. Mark the Planting Holes: Using your measuring tape and marker, mark the locations for your planting holes on the large PVC pipe. I recommend spacing them about 6-8 inches apart, staggered in a spiral pattern around the pipe. This will give your plants plenty of room to grow and ensure they get adequate sunlight. Make sure to leave about 6 inches at the bottom of the pipe without any holes – this will be buried in the ground or pot.
2. Drill the Holes: Now, carefully drill out the holes using your large drill bit. Take your time and be sure to hold the drill steady. You want the holes to be large enough to easily accommodate the root ball of your strawberry plants. I usually start with a smaller pilot hole and then gradually increase the size until it’s just right.
3. Smooth the Edges (Optional): If the edges of the holes are rough, you can use a file or sandpaper to smooth them out. This will prevent any damage to your plants.
Creating the Irrigation System
This is the key to our water-saving design! The smaller PVC pipe will act as a central watering system, distributing water evenly throughout the tower.
1. Drill Irrigation Holes: Using your smaller drill bit, drill small holes (about 1/8 inch) all along the length of the smaller PVC pipe. Space them about 2-3 inches apart, focusing on the areas that will be near the roots of your strawberry plants. Think about where the roots will be when the plants are in the holes you drilled in the larger pipe.
2. Cap the Bottom: Attach the end cap to the bottom of the smaller PVC pipe using PVC glue (if desired) or simply press it on firmly. This will prevent water from draining straight out the bottom.
3. Wrap with Fabric (Optional): To prevent soil from clogging the irrigation holes, you can wrap the smaller PVC pipe with a layer of landscaping fabric or burlap. Secure it with twine or rubber bands. This step is optional, but I find it helps keep the system running smoothly.
Assembling the Strawberry Tower
Now for the fun part – putting it all together!
1. Line the Large Pipe: Line the inside of the large PVC pipe with landscaping fabric or burlap. This will help retain moisture and prevent soil from washing out of the planting holes. Secure the fabric at the top and bottom with twine or staples.
2. Add Drainage: Pour a layer of gravel or small rocks into the bottom of the large PVC pipe. This will improve drainage and prevent the soil from becoming waterlogged.
3. Position the Irrigation Pipe: Place the smaller PVC pipe (our irrigation system) in the center of the large PVC pipe. Make sure it’s standing upright and centered.
4. Fill with Soil: Slowly fill the large PVC pipe with potting soil, packing it down gently as you go. Be careful not to damage the irrigation pipe. Leave a few inches of space at the top of the pipe.
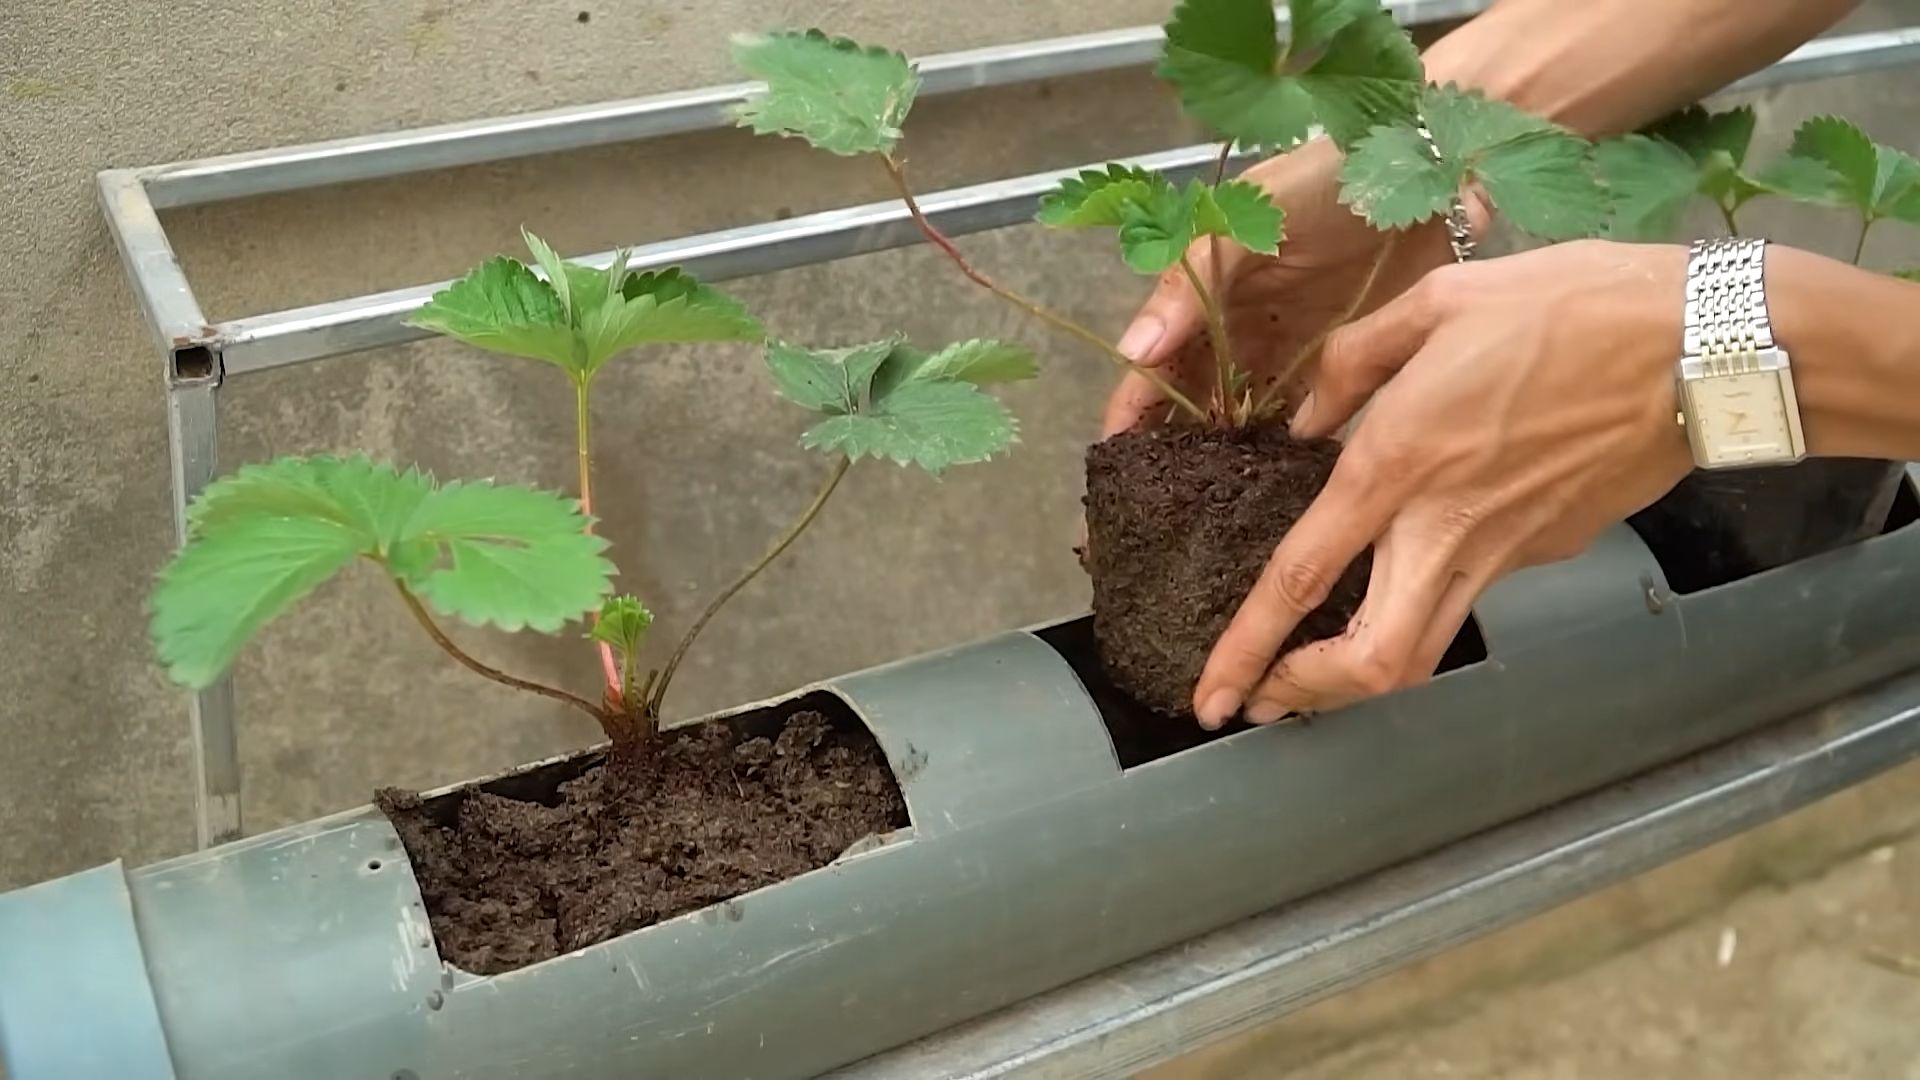
5. Plant Your Strawberries: Now it’s time to plant your strawberry plants! Gently remove each plant from its container and loosen the roots. Carefully insert the root ball into one of the planting holes, making sure the crown of the plant (where the leaves emerge) is above the soil level. Repeat this process for all the planting holes.
6. Top it Off: Add a final layer of potting soil to the top of the tower, filling in any gaps around the plants.
Placement and Watering
Almost there! Now we just need to find the perfect spot for our strawberry tower and give it some water.
1. Choose a Sunny Location: Strawberries need at least 6-8 hours of sunlight per day, so choose a location that gets plenty of sun. A south-facing spot is ideal.
2. Secure the Tower: If you’re placing your tower on soft ground, you can bury the bottom few inches of the large PVC pipe to provide extra stability. If you’re placing it on a hard surface, you may want to use a large pot or container to hold the tower upright.
3. Water Thoroughly: Water your strawberry tower thoroughly, pouring water into the top of the smaller PVC pipe. The water will slowly seep out through the irrigation holes, providing moisture directly to the roots of your plants.
4. Monitor Moisture Levels: Check the soil moisture regularly and water as needed. The frequency of watering will depend on the weather and the type of soil you’re using. In general, you’ll want to keep the soil consistently moist, but not soggy.
Maintenance and Care
With a little bit of care, your strawberry tower will provide you with a bountiful harvest for years to come!
* Fertilize Regularly: Strawberries are heavy feeders, so fertilize them regularly with a balanced fertilizer. Follow the instructions on the fertilizer packaging. I like to use a slow-release fertilizer at planting time and then supplement with a liquid fertilizer every few weeks.
* Remove Runners: Strawberry plants produce runners (long stems that grow horizontally). If you want to maximize your strawberry production, remove these runners as they appear. This will encourage the plant to put more energy into producing fruit.
* Watch for Pests and Diseases: Keep an eye out for common strawberry pests and diseases, such as aphids, spider mites, and powdery mildew. Treat any problems promptly with an appropriate insecticide or fungicide.
* Protect from Frost: If you live in an area with cold winters, protect your strawberry tower from frost by covering it with a blanket or tarp. You can also move it to a sheltered location, such as a garage or shed.
* Replace Plants as Needed: Over time, your strawberry plants may become less productive. Replace them with new plants every few years to keep your tower thriving.
Troubleshooting
Sometimes things don’t go exactly as planned. Here are a few common problems you might encounter and how to fix them:
* Water Draining Too Quickly: If the water is draining too quickly from the irrigation pipe, it could be because the holes are too large or the soil is too loose. Try wrapping the irrigation pipe with an extra layer of landscaping fabric or adding some compost to the soil to improve its water-holding capacity.
* Plants Not Getting Enough Water: If your plants are wilting or the soil is dry, they may not be getting enough water. Make sure the irrigation holes are not clogged and that you’re watering frequently enough. You can also try adding a layer of mulch to the top of the soil to help retain moisture.
* Plants Turning Yellow: Yellowing leaves can be a sign of nutrient deficiency. Fertilize your plants with a balanced fertilizer to provide them with the nutrients they need.
*
Conclusion
So, there you have it! This simple, yet incredibly effective, water-saving strawberry growing trick is a game-changer for any gardener, regardless of experience level. We’ve shown you how to drastically reduce water consumption, minimize weed growth, and create a thriving environment for your strawberry plants, all while enjoying a bountiful harvest of sweet, juicy berries.
Why is this a must-try? Because it addresses several key challenges faced by strawberry growers. Overwatering is a common mistake that can lead to root rot and fungal diseases. This method, by directing water precisely where it’s needed, eliminates that risk. Weeds compete with your strawberry plants for nutrients and sunlight, hindering their growth. The mulch layer, a crucial component of this water-saving strategy, acts as a natural weed barrier, saving you time and effort. And, of course, in a world increasingly conscious of water conservation, this technique allows you to grow delicious strawberries without feeling guilty about excessive water usage.
But the beauty of this DIY trick lies in its adaptability. Feel free to experiment with different types of mulch. Straw is a classic choice, but you could also use wood chips, shredded bark, or even compost. Consider adding a layer of landscape fabric beneath the mulch for even greater weed control. For those in colder climates, a thicker layer of mulch can provide extra insulation during the winter months, protecting your strawberry plants from frost damage. You can also adapt the watering system to suit your specific needs. If you’re growing strawberries in containers, you might opt for a drip irrigation system that delivers water directly to the base of each plant.
Don’t be afraid to get creative and personalize this method to fit your unique gardening style and environment. The key is to understand the principles behind it – efficient watering, weed suppression, and soil health – and then adapt the techniques to suit your specific needs.
We are confident that this water-saving strawberry growing method will revolutionize your strawberry patch. It’s easy to implement, cost-effective, and environmentally friendly. You’ll be amazed at the difference it makes in the health and productivity of your plants.
Now, it’s your turn! We encourage you to try this DIY trick and experience the benefits for yourself. Plant those strawberry runners, set up your watering system, and watch your plants thrive. And most importantly, share your experience with us! We’d love to hear about your successes, your challenges, and any variations you’ve tried. Post photos of your strawberry patch, share your tips and tricks, and let’s create a community of water-wise strawberry growers. Together, we can make a difference, one delicious strawberry at a time. So go ahead, get your hands dirty, and enjoy the sweet rewards of your labor! Let us know how this **water-saving strawberry growing** method works for you!
Frequently Asked Questions (FAQ)
Q: What type of strawberries are best suited for this water-saving method?
A: This method works well for virtually all types of strawberries, including June-bearing, everbearing, and day-neutral varieties. The key is to choose varieties that are well-suited to your local climate and growing conditions. June-bearing strawberries produce a large crop of berries in the spring, while everbearing and day-neutral varieties produce berries throughout the growing season. Consider the size of your garden and the amount of time you’re willing to dedicate to strawberry care when selecting your varieties.
Q: How often should I water my strawberries using this method?
A: The frequency of watering will depend on several factors, including the weather, the type of soil, and the age of your plants. As a general rule, you should water your strawberries when the top inch of soil feels dry to the touch. During hot, dry weather, you may need to water them daily. During cooler, wetter weather, you may only need to water them once or twice a week. The beauty of this water-saving method is that it allows you to deliver water precisely where it’s needed, minimizing water waste and ensuring that your plants receive the right amount of moisture. Always check the soil moisture before watering to avoid overwatering, which can lead to root rot.
Q: What type of mulch is best for water conservation and weed control?
A: Straw is a classic and effective choice for mulching strawberries. It’s readily available, relatively inexpensive, and provides excellent insulation and weed control. However, other options include wood chips, shredded bark, pine needles, and even compost. Wood chips and shredded bark decompose slowly, providing long-lasting weed control. Pine needles are acidic, which can be beneficial for strawberries, which prefer slightly acidic soil. Compost not only suppresses weeds but also adds nutrients to the soil. Experiment with different types of mulch to see what works best for your garden and your specific needs. Regardless of the type of mulch you choose, make sure to apply a thick layer (2-4 inches) to effectively suppress weeds and conserve moisture.
Q: Can I use this method for growing strawberries in containers?
A: Absolutely! This water-saving method is easily adaptable to container gardening. Simply choose a container that is large enough to accommodate the root system of your strawberry plants. Make sure the container has drainage holes to prevent waterlogging. Use a well-draining potting mix and apply a layer of mulch to the surface of the soil. You can use a watering can or a drip irrigation system to water your plants. Monitor the soil moisture regularly and water as needed. Container-grown strawberries may require more frequent watering than those grown in the ground, especially during hot weather.
Q: How do I prevent pests and diseases from affecting my strawberry plants?
A: Prevention is key when it comes to pests and diseases. Choose disease-resistant varieties of strawberries. Plant your strawberries in a sunny location with good air circulation. Avoid overcrowding your plants, as this can create a humid environment that is conducive to fungal diseases. Regularly inspect your plants for signs of pests or diseases. Remove any infected leaves or berries promptly. Consider using organic pest control methods, such as insecticidal soap or neem oil, to control pests. Proper watering practices, as facilitated by this water-saving method, can also help prevent diseases by avoiding overwatering and creating a healthy root environment.
Q: What should I do with my strawberry plants in the winter?
A: The winter care of your strawberry plants will depend on your climate. In colder climates, you’ll need to protect your plants from frost damage. Apply a thick layer of mulch (4-6 inches) around your plants to insulate the roots. You can also cover your plants with a row cover or a tarp during periods of extreme cold. In milder climates, you may not need to provide any winter protection. However, it’s still a good idea to apply a layer of mulch to help conserve moisture and suppress weeds. Prune away any dead or diseased leaves in the fall to prevent the spread of disease.
Q: How can I improve the soil for my strawberry plants?
A: Strawberries thrive in well-drained, fertile soil with a slightly acidic pH (6.0-6.5). Before planting, amend your soil with compost or other organic matter to improve its drainage and fertility. You can also add sulfur to lower the pH of your soil if necessary. Conduct a soil test to determine the pH and nutrient levels of your soil. Fertilize your strawberry plants regularly with a balanced fertilizer. Avoid over-fertilizing, as this can lead to excessive vegetative growth and reduced fruit production.
Q: What are some common mistakes to avoid when growing strawberries?
A: Some common mistakes to avoid include overwatering, underwatering, planting in poorly drained soil, overcrowding plants, neglecting weed control, and failing to protect plants from pests and diseases. This water-saving method helps to address the issue of overwatering by delivering water directly to the roots and minimizing water waste. By following the tips and techniques outlined in this article, you can avoid these common mistakes and enjoy a bountiful harvest of delicious strawberries.
Q: How long does it take for strawberry plants to produce fruit?
A: The time it takes for strawberry plants to produce fruit depends on the variety and the growing conditions. June-bearing strawberries typically produce fruit the following spring after planting. Everbearing and day-neutral strawberries may produce a small crop of fruit the first year, but the main crop will be produced the following year. Be patient and provide your plants with the care they need, and you’ll be rewarded with a delicious harvest of strawberries.
Leave a Comment