
Water saving tomato growing is not just a trend; it’s a necessity for the modern gardener! Are you tired of watching your precious tomato plants wither under the summer sun, despite your best watering efforts? I know I was! It felt like I was constantly battling the elements, and my water bill was reflecting that struggle. But what if I told you there’s a way to cultivate juicy, vibrant tomatoes while drastically reducing your water consumption?
For centuries, gardeners have sought innovative ways to nurture their crops, adapting to diverse climates and resource limitations. From ancient irrigation systems to modern-day hydroponics, the quest for efficient water usage has always been at the heart of successful cultivation. Today, with increasing environmental awareness and the rising cost of water, mastering water saving tomato growing techniques is more crucial than ever.
This DIY guide is packed with simple, yet effective tricks and hacks that will transform your tomato growing experience. Imagine harvesting a bountiful crop of delicious tomatoes, knowing you’re doing your part to conserve water and protect our planet. I’m going to show you how to minimize water waste, maximize plant health, and enjoy a thriving tomato garden, all while being kind to your wallet and the environment. Let’s dive in and unlock the secrets to water-wise tomato growing!
Wasser sparen beim Tomatenanbau: Ein DIY-Bewässerungssystem für üppige Ernten
Hallo liebe Gartenfreunde! Ich bin total begeistert, euch heute einen genialen Trick zu zeigen, wie ihr beim Tomatenanbau Wasser sparen und gleichzeitig eure Pflanzen optimal versorgen könnt. Wir bauen ein einfaches, aber effektives DIY-Bewässerungssystem, das direkt an die Wurzeln liefert und so Verdunstung minimiert. Das ist nicht nur gut für die Umwelt, sondern auch für euren Geldbeutel!
Warum dieses Bewässerungssystem?
* Wassersparen: Das Wasser gelangt direkt zu den Wurzeln, wodurch weniger Wasser durch Verdunstung verloren geht.
* Gezielte Bewässerung: Die Tomatenpflanzen erhalten genau die Menge an Wasser, die sie benötigen.
* Weniger Unkraut: Da die Oberfläche des Bodens trockener bleibt, haben Unkräuter weniger Chancen zu wachsen.
* Einfache Umsetzung: Das System ist mit wenigen Handgriffen und kostengünstigen Materialien gebaut.
* Gesündere Pflanzen: Eine gleichmäßige Wasserversorgung fördert das Wachstum und die Gesundheit der Tomatenpflanzen.
Was du brauchst: Die Materialliste
* Leere Plastikflaschen (PET): Am besten 1,5- oder 2-Liter-Flaschen. Je nach Anzahl deiner Tomatenpflanzen entsprechend viele.
* Bohrmaschine oder Schraubenzieher: Zum Bohren von Löchern in die Flaschen.
* Messer oder Schere: Zum Zuschneiden der Flaschen.
* Gießkanne oder Schlauch: Zum Befüllen der Flaschen.
* Mulchmaterial (optional): Stroh, Holzhackschnitzel oder Grasschnitt, um den Boden um die Pflanzen herum abzudecken.
* Gartenerde: Zum Auffüllen der Pflanzlöcher.
* Tomatenpflanzen: Natürlich!
Schritt-für-Schritt-Anleitung: So baust du dein Bewässerungssystem
Phase 1: Die Vorbereitung der Flaschen
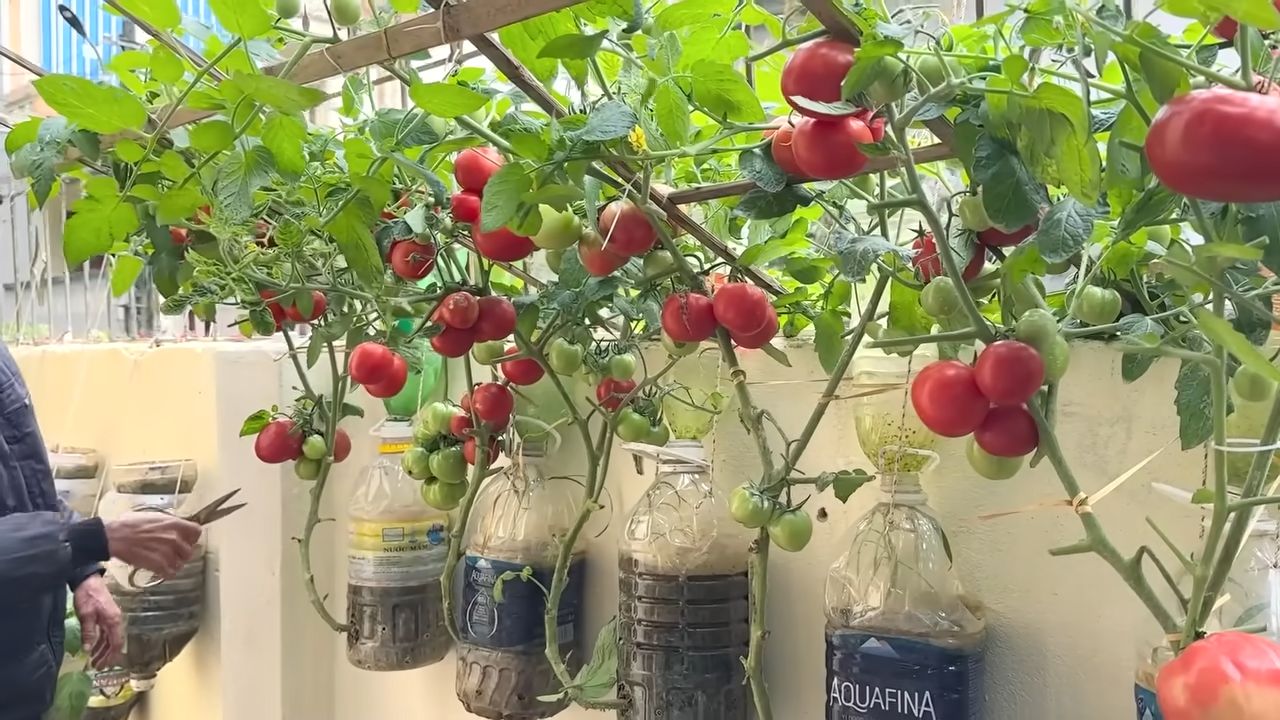
1. Flaschen reinigen: Zuerst musst du die leeren Plastikflaschen gründlich reinigen. Entferne alle Etiketten und spüle sie mit Wasser aus. Das ist wichtig, damit keine Rückstände die Erde verunreinigen.
2. Löcher bohren: Jetzt kommt der wichtigste Teil: das Bohren der Löcher.
* Bodenlöcher: Bohre mit der Bohrmaschine oder dem Schraubenzieher mehrere kleine Löcher in den Boden der Flasche. Ich empfehle 5-7 Löcher, damit das Wasser gut abfließen kann. Achte darauf, dass die Löcher nicht zu groß sind, sonst fließt das Wasser zu schnell ab.
* Seitenlöcher (optional): Wenn du möchtest, kannst du auch ein paar kleine Löcher in die Seiten der Flasche bohren, etwa 5-10 cm vom Boden entfernt. Das sorgt für eine noch bessere Verteilung des Wassers im Wurzelbereich. Ich mache das meistens, weil ich finde, dass es die Pflanzen noch besser versorgt.
3. Flaschenhals abschneiden: Schneide den Flaschenhals mit einem Messer oder einer Schere ab. Das erleichtert das Befüllen der Flasche später. Achte darauf, dass die Kante sauber ist, damit du dich nicht verletzt.
Phase 2: Das Einsetzen der Flaschen
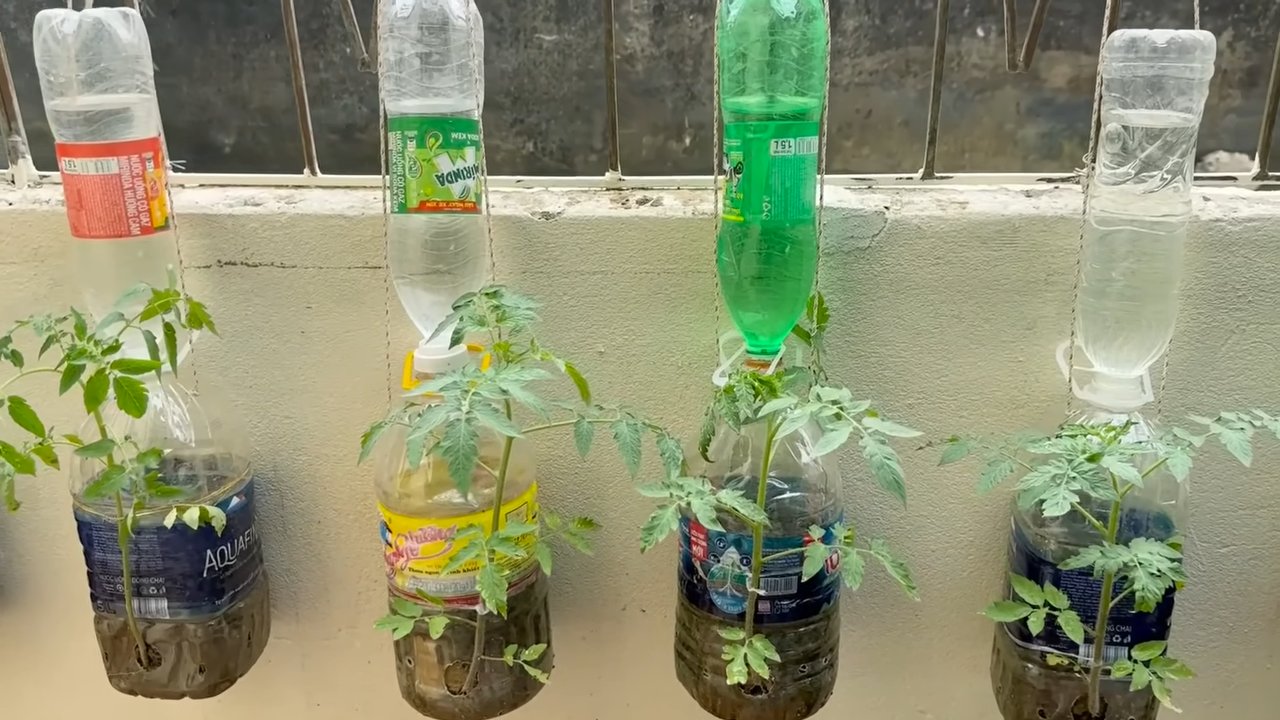
1. Pflanzlöcher vorbereiten: Grabe für jede Tomatenpflanze ein ausreichend großes Pflanzloch. Das Loch sollte tief genug sein, um die Flasche bis zum abgeschnittenen Hals darin zu versenken.
2. Flaschen einsetzen: Setze die vorbereiteten Plastikflaschen in die Pflanzlöcher ein. Achte darauf, dass die Flaschen stabil stehen und nicht umkippen können.
3. Pflanzen einsetzen: Setze nun die Tomatenpflanzen neben die Flaschen in die Pflanzlöcher. Achte darauf, dass die Wurzeln der Pflanzen nicht beschädigt werden.
4. Löcher auffüllen: Fülle die Pflanzlöcher mit Gartenerde auf und drücke die Erde leicht an. Achte darauf, dass die Flaschen fest im Boden verankert sind.
Phase 3: Bewässerung und Pflege
1. Flaschen befüllen: Fülle die Plastikflaschen mit Wasser. Du kannst dafür eine Gießkanne oder einen Schlauch verwenden. Achte darauf, dass du die Flaschen nicht überfüllst, damit das Wasser nicht überläuft.
2. Mulchen (optional): Bedecke den Boden um die Tomatenpflanzen herum mit Mulchmaterial. Das hilft, die Feuchtigkeit im Boden zu halten und Unkrautwachstum zu reduzieren. Ich verwende am liebsten Stroh, weil es gut aussieht und lange hält.
3. Regelmäßige Kontrolle: Kontrolliere regelmäßig den Wasserstand in den Flaschen und fülle sie bei Bedarf nach. Wie oft du nachfüllen musst, hängt von der Witterung und dem Wasserbedarf deiner Tomatenpflanzen ab. An heißen Tagen musst du möglicherweise täglich nachfüllen.
4. Düngen: Du kannst auch Flüssigdünger in das Wasser geben, um deine Tomatenpflanzen zusätzlich zu versorgen. Achte dabei auf die Dosierungsanleitung des Düngers. Ich dünge meine Tomatenpflanzen alle zwei Wochen mit einem speziellen Tomatendünger.
Zusätzliche Tipps und Tricks
* Flaschenfarbe: Dunkle Flaschen können sich in der Sonne stark aufheizen. Wenn du dunkle Flaschen verwendest, solltest du sie mit heller Farbe besprühen oder mit Stoff umwickeln, um die Erwärmung zu reduzieren.
* Schnecken: Schnecken lieben Tomatenpflanzen! Schütze deine Pflanzen vor Schneckenfraß, indem du Schneckenkorn um die Pflanzen streust oder Schneckenzäune aufstellst.
* Stützen: Tomatenpflanzen können sehr groß und schwer werden. Stütze deine Pflanzen mit Stäben oder Rankgittern, um zu verhindern, dass sie umknicken.
* Ausgeizen: Entferne regelmäßig die Seitentriebe (Geiztriebe) der Tomatenpflanzen, um das Wachstum der Haupttriebe zu fördern und die Fruchtbildung zu verbessern.
* Sortenwahl: Wähle Tomatensorten, die gut an dein Klima angepasst sind und einen hohen Ertrag versprechen. Es gibt unzählige Sorten, da ist sicher auch für dich die richtige dabei!
Häufige Fehler und wie du sie vermeidest
* Zu große Löcher: Wenn die Löcher in den Flaschen zu groß sind, fließt das Wasser zu schnell ab und die Pflanzen können es nicht richtig aufnehmen. Bohre lieber kleinere Löcher und erweitere sie bei Bedarf.
* Flaschen nicht tief genug eingegraben: Wenn die Flaschen nicht tief genug eingegraben sind, können sie leicht umkippen. Achte darauf, dass die Flaschen bis zum abgeschnittenen Hals im Boden versenkt sind.
* Falsche Erde: Verwende eine hochwertige Gartenerde, die gut Wasser speichert und gleichzeitig durchlässig ist. Vermeide verdichtete Böden, da diese die Wurzelbildung behindern.
* Überwässerung: Auch wenn das Bewässerungssystem wassersparend ist, solltest du darauf achten, die Pflanzen nicht zu überwässern. Kontrolliere regelmäßig den Feuchtigkeitsgehalt des Bodens und passe die Bewässerung entsprechend an.
Ich hoffe, diese Anleitung hilft dir dabei, deine Tomatenpflanzen erfolgreich und wassersparend anzubauen. Mit diesem DIY-Bewässerungssystem kannst du dich auf eine reiche Ernte freuen und gleichzeitig etwas Gutes für die Umwelt tun. Viel Spaß beim Gärtnern!
Conclusion
So, there you have it! This simple yet incredibly effective water saving tomato growing trick is more than just a gardening hack; it’s a pathway to a more sustainable and bountiful harvest. We’ve explored how burying a bottle alongside your tomato plants can dramatically reduce water waste, delivering moisture directly to the roots where it’s needed most. This method not only conserves precious water resources but also encourages deeper root growth, leading to stronger, healthier plants that are better equipped to withstand drought conditions and produce an abundance of delicious tomatoes.
Think about the impact: less time spent watering, lower water bills, and a thriving tomato garden, all thanks to this easy DIY solution. It’s a win-win-win!
But the beauty of this water saving tomato growing technique lies in its adaptability. Feel free to experiment with different bottle sizes depending on the size of your plants and the climate you live in. For larger tomato varieties or particularly hot and dry regions, consider using two bottles per plant for optimal hydration. You can also add a slow-release fertilizer to the bottle along with the water to provide your tomatoes with an extra boost of nutrients. Another variation is to use terracotta pots instead of plastic bottles. Burying a terracotta pot near the plant and filling it with water allows for a gradual release of moisture into the surrounding soil.
Don’t be afraid to get creative and tailor this method to suit your specific gardening needs and preferences. The key is to ensure that the water is delivered directly to the root zone, minimizing surface evaporation and maximizing water absorption.
We understand that trying new gardening techniques can sometimes feel daunting, but trust us, this one is incredibly straightforward and rewarding. The initial setup takes just a few minutes, and the long-term benefits are well worth the effort. Imagine the satisfaction of harvesting juicy, flavorful tomatoes knowing that you’ve done so in an environmentally responsible way.
We wholeheartedly encourage you to give this water saving tomato growing trick a try in your own garden. We are confident that you will be amazed by the results. And once you’ve experienced the benefits firsthand, we would love to hear about your experience! Share your photos, tips, and variations in the comments section below. Let’s create a community of gardeners who are passionate about growing delicious tomatoes while conserving our planet’s precious resources. Together, we can make a difference, one tomato plant at a time. So, grab your bottles, head out to your garden, and get ready to enjoy a more sustainable and bountiful tomato harvest!
Frequently Asked Questions (FAQ)
What type of bottle is best to use for this water saving tomato growing method?
The best type of bottle to use is a sturdy plastic bottle, such as a recycled soda or water bottle. Avoid using bottles that are too thin or flimsy, as they may collapse under the weight of the soil. A 1-2 liter bottle is generally a good size for most tomato plants, but you can adjust the size depending on the size of your plants and the climate you live in. Make sure to thoroughly clean the bottle before using it to remove any residue that could harm your plants. You can also use glass bottles, but be extra careful when handling them to avoid breakage.
How often should I refill the bottle?
The frequency of refilling the bottle will depend on several factors, including the size of the bottle, the type of soil, the climate, and the size of your tomato plants. As a general rule, check the bottle every few days and refill it when it is about half empty. During hot and dry periods, you may need to refill it more frequently. Observe your plants closely for signs of dehydration, such as wilting leaves, and adjust your watering schedule accordingly. The goal is to keep the soil consistently moist but not waterlogged.
Can I use this method for other plants besides tomatoes?
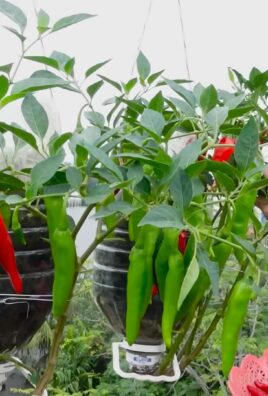
Yes, this water saving technique can be adapted for use with other plants that benefit from deep watering, such as peppers, eggplants, and squash. The key is to ensure that the bottle is placed close to the root zone of the plant and that the water is delivered slowly and consistently. You may need to adjust the size of the bottle and the frequency of refilling depending on the specific needs of the plant. Experiment and observe your plants closely to determine the optimal watering schedule.
Will this method attract pests or insects?
While this method is generally safe and effective, there is a slight possibility that it could attract certain pests or insects, particularly if the bottle is not properly sealed or if the water becomes stagnant. To minimize this risk, make sure to use a bottle with a tight-fitting cap or lid. You can also add a small amount of mosquito dunks or other insect repellent to the water to deter pests. Regularly inspect the bottle and the surrounding soil for signs of pests or insects and take appropriate action if necessary.
What if I don’t have plastic bottles? Can I use something else?
Absolutely! If you don’t have plastic bottles readily available, you can use other materials to achieve the same effect. Terracotta pots are an excellent alternative. Bury a terracotta pot near your tomato plant, leaving the rim exposed. Fill the pot with water, and the porous terracotta will slowly release moisture into the surrounding soil. This method is particularly effective in hot and dry climates. You can also use a length of perforated soaker hose buried near the root zone of your plants. Connect the hose to a water source and allow it to slowly drip water into the soil.
Is this method suitable for all types of soil?
This water saving tomato growing method is generally suitable for most types of soil, but it is particularly beneficial for sandy soils that tend to drain quickly. In clay soils, which retain water more readily, you may need to be more careful not to overwater. Amend your soil with organic matter, such as compost or peat moss, to improve its drainage and water-holding capacity. This will help to ensure that your tomato plants receive the right amount of moisture without becoming waterlogged.
Can I add fertilizer to the water in the bottle?
Yes, adding fertilizer to the water in the bottle can be a great way to provide your tomato plants with an extra boost of nutrients. Use a slow-release fertilizer or a diluted liquid fertilizer to avoid burning the roots. Follow the instructions on the fertilizer package carefully and avoid over-fertilizing. You can also add compost tea or other organic amendments to the water to provide your plants with a natural source of nutrients.
How does this method actually save water?
This method saves water by delivering moisture directly to the root zone of the tomato plant, minimizing surface evaporation and runoff. When you water from above, a significant portion of the water is lost to evaporation before it can reach the roots. By burying a bottle and filling it with water, you are creating a localized reservoir of moisture that the plant can access as needed. This reduces water waste and ensures that your tomato plants receive the hydration they need to thrive.
What are the benefits of using this water saving tomato growing method?
The benefits of using this method are numerous. It conserves water, reduces water bills, promotes deeper root growth, leads to stronger and healthier plants, increases tomato yields, and is an environmentally friendly gardening practice. It’s a simple and effective way to grow delicious tomatoes while minimizing your impact on the planet.
What if I have a large tomato garden? Is this method practical?
While setting up individual bottles for a large tomato garden might seem time-consuming initially, the long-term benefits make it worthwhile. Consider it an investment in your garden’s health and your water bill. You can streamline the process by preparing all the bottles at once and enlisting the help of family or friends. Alternatively, for a very large garden, consider a drip irrigation system as a more automated solution, but for smaller to medium-sized gardens, the bottle method is a highly effective and sustainable choice.

Leave a Comment