
Water spinach container gardening: it’s easier than you think! Imagine stepping outside your door and harvesting fresh, vibrant greens for your stir-fry, all grown right on your patio. Forget those limp, overpriced bunches at the grocery store. I’m going to show you how to cultivate your own thriving water spinach crop, even if you only have a small balcony or a sunny windowsill.
Water spinach, also known as Ong Choy or Kang Kong, has a rich history, deeply rooted in Southeast Asian cuisine. For generations, it’s been a staple, prized for its delicious flavor and nutritional benefits. But you don’t need a sprawling rice paddy to enjoy this amazing vegetable.
In today’s busy world, finding time for a traditional garden can be a challenge. That’s where water spinach container gardening comes in. It’s the perfect solution for urban dwellers and anyone looking for a low-maintenance, high-yield gardening experience. Plus, growing your own food is incredibly rewarding! You’ll know exactly where your food comes from and avoid harmful pesticides. Ready to ditch the store-bought greens and embrace the joy of homegrown goodness? Let’s dive in!
Growing Water Spinach (Kangkong) in Containers: A Beginner’s Guide
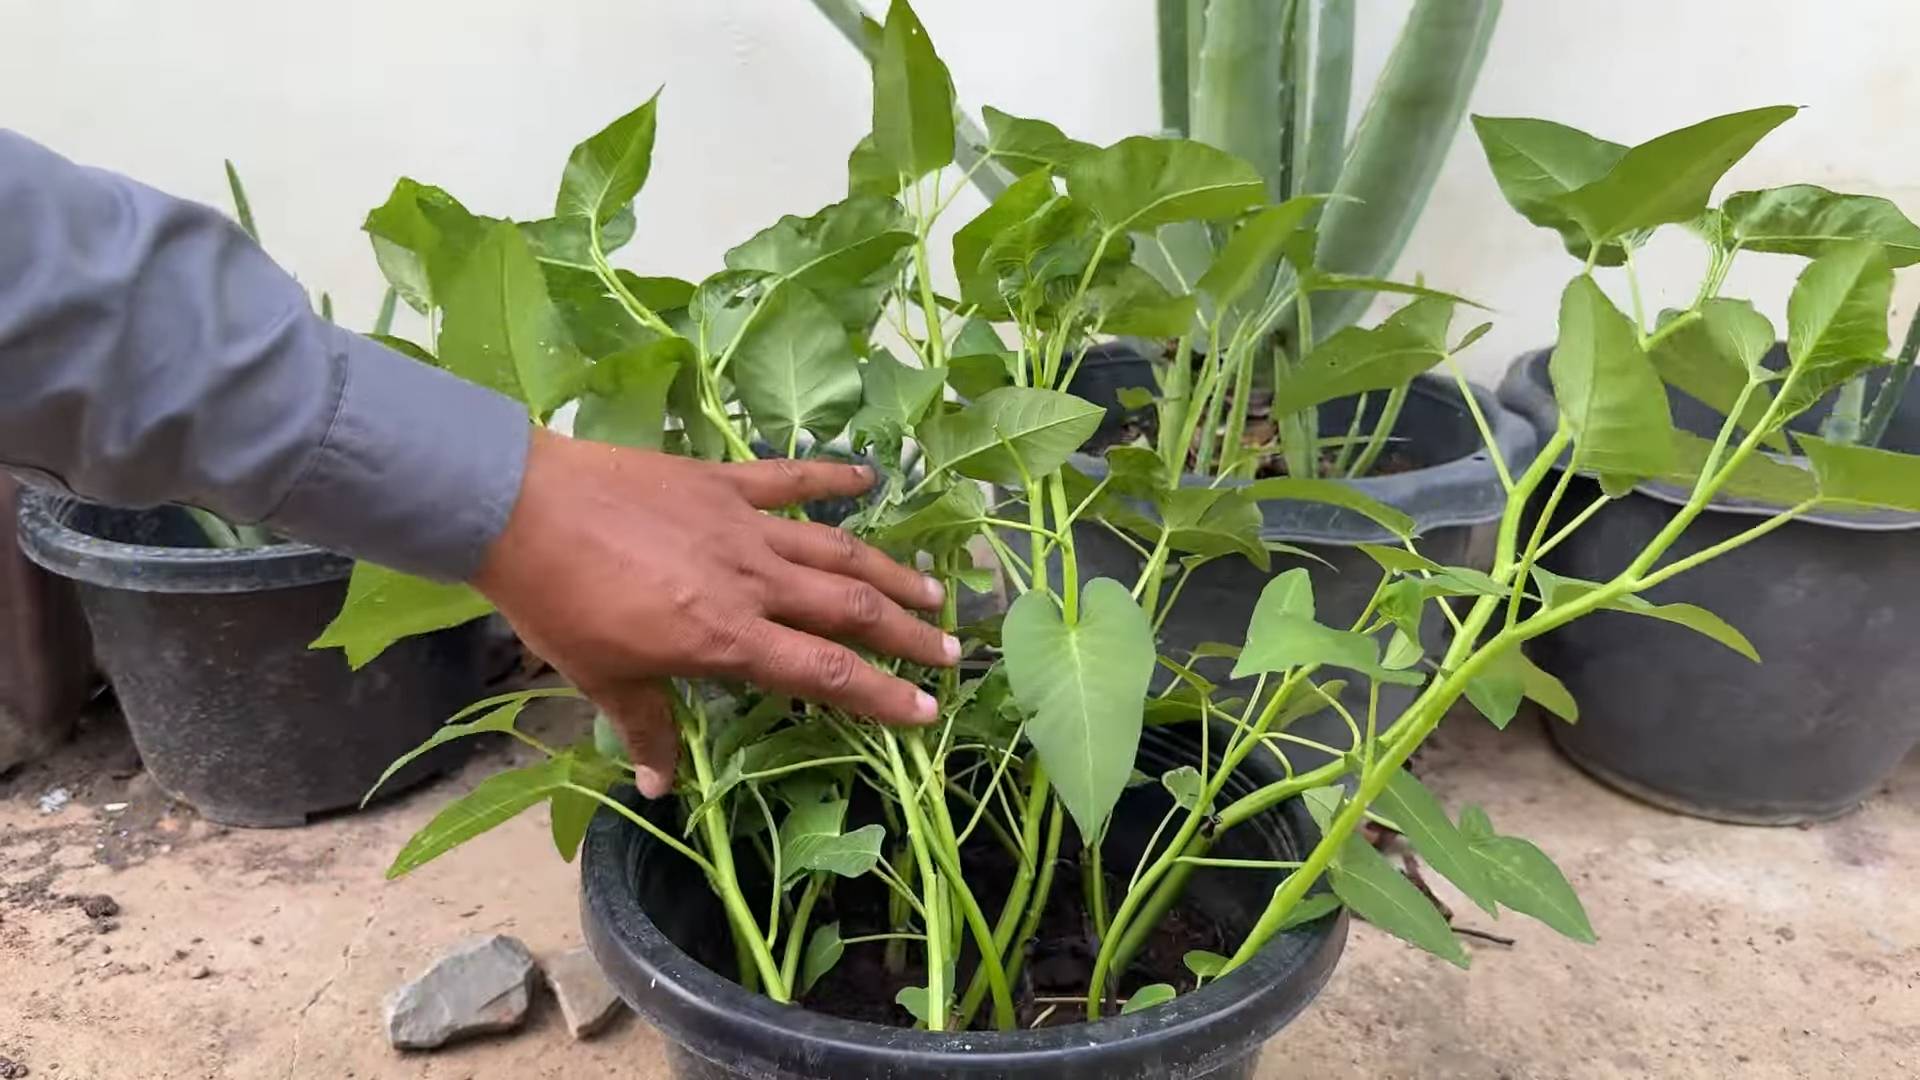
Hey there, fellow gardening enthusiasts! Ever wanted to grow your own fresh, leafy greens right on your balcony or patio? Well, you’re in luck! Today, I’m going to walk you through the super-easy process of growing water spinach, also known as kangkong or ong choy, in containers. Trust me, it’s a rewarding experience, and you’ll be enjoying delicious, homegrown veggies in no time.
Why Grow Water Spinach in Containers?
Water spinach is a fantastic choice for container gardening for several reasons:
* Fast Growth: This veggie is a speed demon! You can harvest your first batch in as little as 4-6 weeks.
* Space-Saving: Containers are perfect for small spaces like apartments, balconies, or patios.
* Easy to Manage: Growing in containers allows you to control the soil, water, and sunlight, making it easier to provide the ideal conditions.
* Continuous Harvest: With proper care, you can harvest water spinach multiple times from the same plant.
* Nutritious and Delicious: Water spinach is packed with vitamins and minerals and has a mild, slightly sweet flavor that’s great in stir-fries, soups, and salads.
What You’ll Need
Before we get started, let’s gather our supplies. Here’s what you’ll need to grow water spinach in containers:
* Water Spinach Seeds or Cuttings: You can find seeds online or at your local garden center. Cuttings from mature plants also work well.
* Containers: Choose containers that are at least 12 inches deep and wide. Plastic pots, grow bags, or even repurposed buckets will do the trick. Make sure they have drainage holes.
* Potting Mix: Use a high-quality potting mix that’s well-draining and rich in organic matter. Avoid using garden soil, as it can become compacted in containers.
* Water: Water spinach loves water, so have a reliable water source nearby.
* Fertilizer: A balanced liquid fertilizer or slow-release fertilizer will help your plants thrive.
* Sunlight: Water spinach needs at least 4-6 hours of direct sunlight per day.
* Optional: A tray or saucer to place under the container to catch excess water.
Getting Started: Planting Your Water Spinach
Now for the fun part! Let’s get those seeds or cuttings into the soil.
1. Prepare Your Containers:
* First, make sure your containers are clean and have adequate drainage holes.
* Place a layer of gravel or small stones at the bottom of the container to improve drainage. This is especially important if your container has limited drainage.
* Fill the container with potting mix, leaving about an inch or two of space at the top.
2. Planting Seeds:
* If you’re starting from seeds, sow them about ½ inch deep and 1-2 inches apart.
* Gently cover the seeds with potting mix and water thoroughly.
* Keep the soil consistently moist until the seeds germinate, which usually takes about 7-14 days.
3. Planting Cuttings:
* If you’re using cuttings, choose healthy stems that are about 4-6 inches long.
* Remove the leaves from the bottom half of the cutting.
* You can root the cuttings in water first by placing them in a glass of water until roots develop (this usually takes about a week). Alternatively, you can plant them directly into the potting mix.
* If planting directly, make a small hole in the potting mix and insert the cutting, burying the bottom half.
* Gently firm the soil around the cutting and water thoroughly.
* Keep the soil consistently moist until the cuttings establish roots and start to grow.
4. Placement:
* Place your containers in a location that receives at least 4-6 hours of direct sunlight per day. A south-facing balcony or patio is ideal.
* If you live in a very hot climate, you may need to provide some afternoon shade to prevent the plants from scorching.
Caring for Your Water Spinach
Once your water spinach is planted, it’s important to provide the right care to ensure healthy growth and abundant harvests.
1. Watering:
* Water spinach loves water, so keep the soil consistently moist. Water deeply whenever the top inch of soil feels dry to the touch.
* In hot weather, you may need to water your plants daily or even twice a day.
* Avoid letting the soil dry out completely, as this can stress the plants and reduce yields.
* Consider placing a tray or saucer under the container to catch excess water. This will help to keep the soil moist and prevent the plants from drying out too quickly.
2. Fertilizing:
* Feed your water spinach plants with a balanced liquid fertilizer every 2-3 weeks. Follow the instructions on the fertilizer label.
* Alternatively, you can use a slow-release fertilizer at planting time.
* Avoid over-fertilizing, as this can lead to excessive foliage growth and reduced yields.
3. Sunlight:
* Water spinach needs at least 4-6 hours of direct sunlight per day.
* If your plants are not getting enough sunlight, they may become leggy and produce fewer leaves.
* If you live in a very hot climate, you may need to provide some afternoon shade to prevent the plants from scorching.
4. Pest and Disease Control:
* Water spinach is generally pest-resistant, but it can be susceptible to aphids, spider mites, and whiteflies.
* Inspect your plants regularly for signs of pests or diseases.
* If you find any pests, you can try spraying them off with a strong stream of water or using an insecticidal soap.
* To prevent fungal diseases, avoid overwatering and ensure good air circulation around the plants.
5. Pruning:
* Pinch off the tips of the stems regularly to encourage bushier growth.
* Remove any yellowing or damaged leaves.
Harvesting Your Water Spinach
The best part of growing your own water spinach is, of course, the harvest!
1. When to Harvest:
* You can start harvesting your water spinach about 4-6 weeks after planting.
* Harvest when the stems are about 6-8 inches long.
2. How to Harvest:
* Use scissors or a sharp knife to cut the stems about 2 inches above the soil line.
* This will allow the plants to regrow and produce more leaves.
* You can harvest water spinach multiple times from the same plant.
3. Post-Harvest Care:
* After harvesting, water and fertilize your plants to encourage new growth.
* Continue to provide the same care as before, and you’ll be enjoying fresh water spinach for weeks to come.
4. Storing Your Harvest:
* Water spinach is best used fresh, but you can store it in the refrigerator for a few days.
* Wrap the leaves in a damp paper towel and place them in a plastic bag.
Troubleshooting
Even with the best care, you might encounter a few challenges along the way. Here are some common problems and how to fix them:
* Yellowing Leaves: This could be caused by overwatering, underwatering, nutrient deficiencies, or pests. Check the soil moisture, fertilize your plants, and inspect them for pests.
* Leggy Growth: This is usually caused by insufficient sunlight. Move your plants to a sunnier location.
* Slow Growth: This could be due to poor soil, lack of nutrients, or cool temperatures. Amend the soil with compost, fertilize your plants, and ensure they are getting enough warmth.
* Pests: Treat pests with insecticidal soap or neem oil.
Enjoying Your Homegrown Water Spinach
Now that you’ve harvested your own water spinach, it’s time to enjoy the fruits (or rather, leaves) of your labor! Water spinach is a versatile vegetable that can be used in a variety of dishes. Here are a few ideas:
* Stir-fries: Water spinach is a classic ingredient in stir-fries. Simply sauté it with garlic, ginger, and your favorite sauce.
* Soups: Add water spinach to soups for a boost of nutrients and flavor.
* Salads: Use young, tender leaves in salads.
* Steamed: Steam water spinach and serve it with a dipping sauce.
* Juices: Add water spinach to your favorite green juice recipes.
Advanced Tips for Water Spinach Container Gardening
Want to take your water spinach

Conclusion
So, there you have it! Growing your own water spinach in containers is not just a fun project; it’s a gateway to fresh, delicious, and readily available greens right at your fingertips. This DIY trick transforms even the smallest spaces into thriving edible gardens. Forget those wilted, overpriced bunches at the grocery store. Imagine stepping outside your door and harvesting vibrant, crisp water spinach whenever you need it.
Why is this a must-try? Because it’s incredibly rewarding. There’s a unique satisfaction in nurturing a plant from seed (or cutting) to table. It’s also economical. Once established, your water spinach will provide a continuous harvest, saving you money on groceries. Plus, you know exactly what’s going into your food – no pesticides, no hidden chemicals, just pure, homegrown goodness.
But the benefits extend beyond the practical. Gardening is therapeutic. It’s a chance to connect with nature, de-stress, and engage in a mindful activity. Watching your water spinach flourish is a visual reminder of the power of nature and your own ability to cultivate life.
Ready to take your water spinach container gardening to the next level? Consider these variations:
* Vertical Gardening: If space is truly limited, explore vertical gardening options. Stacked planters or hanging baskets can create a stunning and productive water spinach wall.
* Aquaponics Integration: For the adventurous gardener, consider integrating your water spinach container into a small-scale aquaponics system. The water spinach will thrive on the nutrient-rich water from your fish tank, and the plants will help filter the water for the fish.
* Companion Planting: Experiment with companion plants like basil or mint around your water spinach. These herbs can help deter pests and enhance the flavor of your greens.
* Different Varieties: While the common variety is excellent, explore different cultivars of water spinach. Some may have slightly different leaf shapes or growth habits.
Don’t be afraid to experiment and adapt this DIY trick to your own unique circumstances. The beauty of container gardening is its flexibility. You can tailor it to your space, your climate, and your personal preferences.
We wholeheartedly encourage you to give this water spinach container gardening method a try. It’s easier than you think, and the rewards are immense. Once you’ve harvested your first batch of homegrown water spinach, you’ll be hooked!
And most importantly, we want to hear about your experience! Share your photos, tips, and challenges in the comments below. Let’s build a community of water spinach enthusiasts and learn from each other. What kind of container did you use? What growing medium worked best for you? Did you encounter any pests or diseases? Your insights will help other gardeners succeed. Let’s grow together!
Frequently Asked Questions (FAQ)
What kind of container is best for growing water spinach?
The ideal container for water spinach should be at least 12 inches deep and wide to accommodate the plant’s extensive root system. Plastic tubs, large pots, or even repurposed containers like old buckets or storage bins work well. Ensure the container has drainage holes to prevent waterlogging, which can lead to root rot. You can also use self-watering containers to help maintain consistent moisture levels. The material of the container isn’t as crucial as its size and drainage capabilities.
What type of soil or growing medium should I use?
Water spinach thrives in rich, well-draining soil that retains moisture. A good mix would be equal parts of potting soil, compost, and perlite or vermiculite. The potting soil provides a base, the compost adds nutrients and improves water retention, and the perlite or vermiculite enhances drainage and aeration. Avoid using garden soil directly, as it can be too heavy and compact, hindering root growth. You can also use a soilless mix specifically designed for hydroponics, as water spinach can tolerate being grown in water.
How often should I water my water spinach?
Water spinach loves moisture, so it’s crucial to keep the soil consistently damp. Water deeply whenever the top inch of soil feels dry to the touch. In hot weather, you may need to water daily, or even twice a day. Consider using a moisture meter to accurately gauge the soil’s moisture level. Mulching around the base of the plants can also help retain moisture and reduce the frequency of watering.
How much sunlight does water spinach need?
Water spinach needs at least 6 hours of direct sunlight per day to thrive. If you live in a hot climate, providing some afternoon shade can prevent the leaves from scorching. If you don’t have access to enough natural sunlight, you can supplement with grow lights. Position the grow lights about 12-18 inches above the plants and keep them on for 12-14 hours per day.
How do I fertilize my water spinach?
Water spinach is a heavy feeder, so regular fertilization is essential for optimal growth. Use a balanced liquid fertilizer (e.g., 20-20-20) diluted to half strength every two weeks. You can also amend the soil with compost or aged manure before planting. Avoid over-fertilizing, as this can lead to excessive foliage growth at the expense of flavor. Organic fertilizers like fish emulsion or seaweed extract are also excellent options.
When and how do I harvest water spinach?
You can start harvesting water spinach about 4-6 weeks after planting. Harvest the tender stems and leaves by cutting them about 6 inches from the base of the plant. This will encourage new growth and allow you to harvest repeatedly. Regular harvesting also prevents the plants from becoming too leggy and encourages bushier growth. Harvest in the morning for the best flavor and texture.
What are some common pests and diseases that affect water spinach?
Water spinach is generally pest-resistant, but it can be susceptible to aphids, spider mites, and whiteflies. Regularly inspect your plants for signs of infestation and take action promptly. You can control these pests by spraying the plants with insecticidal soap or neem oil. Root rot can be a problem if the soil is waterlogged, so ensure good drainage. Avoid overhead watering to prevent fungal diseases.
Can I grow water spinach indoors?
Yes, you can grow water spinach indoors, but you’ll need to provide adequate light and humidity. Place the container near a sunny window or use grow lights. Maintain a humidity level of around 60-70% by misting the plants regularly or using a humidifier. Ensure good air circulation to prevent fungal diseases.
Is water spinach safe to eat?
Yes, water spinach is safe to eat when grown properly. However, it’s important to source your seeds or cuttings from a reputable supplier to avoid contamination. Thoroughly wash the leaves and stems before eating to remove any dirt or debris. Avoid growing water spinach in areas with polluted water sources, as the plants can absorb contaminants.
How can I propagate water spinach?
Water spinach is easily propagated from stem cuttings. Simply cut a 6-inch section of stem with several nodes and place it in a glass of water. Roots will typically develop within a week or two. Once the roots are about an inch long, you can transplant the cutting into a container filled with potting mix. You can also propagate water spinach from seeds, which can be started indoors or directly sown into the container.


Leave a Comment