
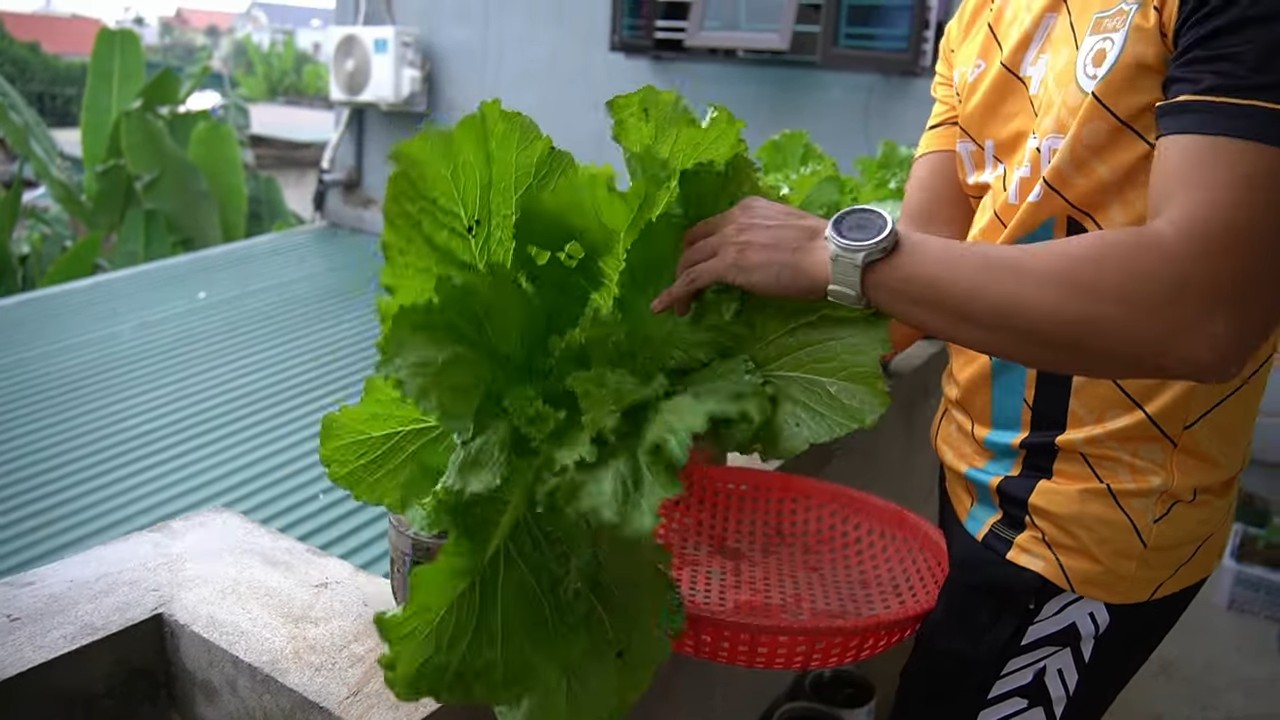
Waterless Mustard Greens Growing might sound like something out of a sci-fi movie, but trust me, it’s a real, and surprisingly simple, way to cultivate these peppery greens right in your own home! Forget lugging around watering cans and constantly checking soil moisture. I’m about to share a game-changing DIY trick that will have you harvesting fresh mustard greens with minimal effort.
Mustard greens have a rich history, deeply rooted in various cultures around the world. From ancient medicinal uses in traditional Chinese medicine to being a staple in Southern American cuisine, these leafy greens have nourished and healed for centuries. But let’s be honest, sometimes the traditional methods of growing them can be a bit… demanding. That’s where this waterless method comes in!
In today’s busy world, who has time to constantly fuss over a garden? We’re all looking for ways to simplify our lives, and that includes our gardening endeavors. This DIY trick for waterless mustard greens growing is perfect for anyone who wants fresh, healthy greens without the daily commitment of watering. Imagine, delicious, homegrown mustard greens for salads, stir-fries, or even a spicy side dish, all grown with virtually no water! I’m excited to show you how easy it is to achieve this, so let’s dive in!
Wasserloser Anbau von Senfgrün: Dein DIY-Leitfaden für frisches Grün ohne Gießen!
Hey Gartenfreunde! Habt ihr Lust auf knackige, würzige Senfgrün, aber keine Lust auf tägliches Gießen? Dann seid ihr hier genau richtig! Ich zeige euch, wie ihr Senfgrün ganz einfach und ohne viel Aufwand in eurem Zuhause anbauen könnt – und das ganz ohne Erde und Gießen! Klingt verrückt? Ist es aber nicht! Wir nutzen die Kraft der Hydrokultur, um frisches Grün direkt auf euren Tisch zu zaubern.
Was du für deinen wasserlosen Senfgrün-Garten brauchst:
* Senfgrün-Samen: Wähle deine Lieblingssorte! Es gibt milde und scharfe Varianten.
* Ein flaches Gefäß: Eine Plastikschale, ein Tablett oder sogar ein alter Joghurtbecher (gereinigt!) eignen sich hervorragend. Achte darauf, dass es nicht zu tief ist.
* Küchenpapier oder Wattepads: Das ist unser “Substrat”, auf dem die Samen keimen.
* Eine Sprühflasche: Für die anfängliche Befeuchtung.
* Ein dunkler Ort: Für die Keimung. Ein Schrank oder eine Schublade sind ideal.
* Ein heller Ort: Sobald die Samen gekeimt sind, brauchen sie Licht! Ein Fensterbrett ist perfekt.
* Geduld: Senfgrün wächst zwar schnell, aber ein bisschen Geduld braucht es trotzdem.
Schritt-für-Schritt-Anleitung: So legst du los!
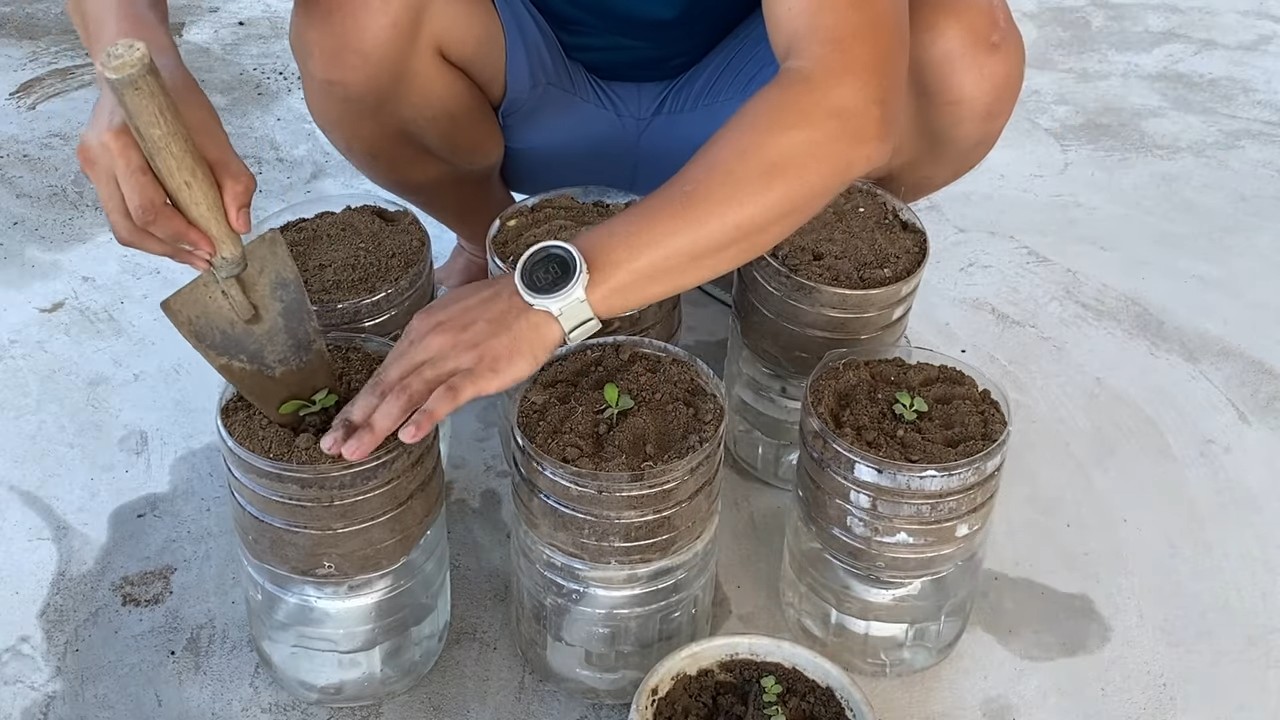
1. Das Gefäß vorbereiten: Reinige dein Gefäß gründlich mit warmem Wasser und Spülmittel. Das ist wichtig, um Schimmelbildung zu vermeiden. Trockne es anschließend gut ab.
2. Das “Substrat” auslegen: Lege den Boden deines Gefäßes mit einer Schicht Küchenpapier oder Wattepads aus. Die Schicht sollte gleichmäßig und nicht zu dick sein. Sie dient als Feuchtigkeitsspeicher für die Samen.
3. Befeuchten, befeuchten, befeuchten: Befeuchte das Küchenpapier oder die Wattepads gründlich mit Wasser aus der Sprühflasche. Es sollte gut durchfeuchtet sein, aber nicht im Wasser schwimmen. Drücke überschüssiges Wasser vorsichtig aus.
4. Samen säen: Verteile die Senfgrün-Samen gleichmäßig auf dem feuchten Küchenpapier. Achte darauf, dass sie nicht zu dicht liegen, damit sie genügend Platz zum Keimen haben.
5. Nochmal befeuchten: Besprühe die Samen vorsichtig mit Wasser aus der Sprühflasche.
6. Ab in die Dunkelheit: Stelle das Gefäß an einen dunklen Ort. Die Dunkelheit fördert die Keimung.
7. Geduld haben (und kontrollieren!): Überprüfe das Gefäß täglich. Das Küchenpapier sollte immer feucht sein. Besprühe es bei Bedarf mit Wasser. Nach 2-3 Tagen sollten die ersten Keimlinge sichtbar sein.
8. Licht marsch!: Sobald die Samen gekeimt sind, stelle das Gefäß an einen hellen Ort, z.B. auf ein Fensterbrett. Vermeide direkte Sonneneinstrahlung, da diese die zarten Keimlinge verbrennen kann.
9. Feuchtigkeit halten: Besprühe die Keimlinge weiterhin täglich mit Wasser, um sie feucht zu halten. Achte darauf, dass das Küchenpapier nicht austrocknet.
10. Wachsen und Gedeihen: Beobachte, wie deine Senfgrün wächst und gedeiht! Innerhalb weniger Tage werden sie größer und kräftiger.
11. Ernten: Nach etwa 7-10 Tagen kannst du deine Senfgrün ernten! Schneide sie einfach mit einer Schere ab.
Herausforderungen und Lösungen:
* Schimmelbildung: Wenn du Schimmelbildung bemerkst, entferne die betroffenen Stellen sofort und lüfte das Gefäß gut. Achte darauf, dass das Küchenpapier nicht zu nass ist. Eine gute Belüftung hilft, Schimmelbildung vorzubeugen.
* Austrocknung: Wenn das Küchenpapier zu schnell austrocknet, besprühe es öfter mit Wasser oder decke das Gefäß mit einer durchsichtigen Folie ab, um die Feuchtigkeit zu halten.
* Zu wenig Licht: Wenn die Senfgrün blass und langgezogen aussehen, bekommen sie nicht genug Licht. Stelle sie an einen helleren Ort oder verwende eine Pflanzenlampe.
* Ungleichmäßige Keimung: Manchmal keimen nicht alle Samen gleichzeitig. Das ist normal. Entferne einfach die nicht gekeimten Samen, sobald die anderen groß genug sind.
Tipps und Tricks für noch mehr Erfolg:
* Samenqualität: Verwende frische, hochwertige Samen. Ältere Samen keimen oft schlechter.
* Wasserqualität: Verwende am besten gefiltertes Wasser oder abgekochtes Wasser, um Kalkablagerungen zu vermeiden.
* Belüftung: Sorge für eine gute Belüftung, um Schimmelbildung vorzubeugen.
* Erntezeitpunkt: Ernte die Senfgrün, wenn sie die gewünschte Größe erreicht haben. Je älter sie werden, desto schärfer werden sie.
* Nachsaat: Säe regelmäßig neue Samen aus, um eine kontinuierliche Ernte zu gewährleisten.
Die richtige Umgebung für dein Senfgrün
Die Umgebung spielt eine entscheidende Rolle für den Erfolg deines wasserlosen Senfgrün-Gartens. Hier sind einige wichtige Aspekte, die du beachten solltest:
* Temperatur: Senfgrün bevorzugt eine Temperatur zwischen 15 und 25 Grad Celsius. Vermeide extreme Temperaturen, da diese das Wachstum beeinträchtigen können.
* Luftfeuchtigkeit: Eine hohe Luftfeuchtigkeit ist ideal für die Keimung und das Wachstum. Du kannst die Luftfeuchtigkeit erhöhen, indem du das Gefäß mit einer durchsichtigen Folie abdeckst oder einen Luftbefeuchter in der Nähe aufstellst.
* Licht: Wie bereits erwähnt, benötigen die Keimlinge nach der Keimung viel Licht. Ein Fensterbrett mit indirektem Sonnenlicht ist ideal. Wenn du nicht genügend natürliches Licht hast, kannst du eine Pflanzenlampe verwenden.
* Belüftung: Eine gute Belüftung ist wichtig, um Schimmelbildung vorzubeugen. Stelle das Gefäß an einen Ort, an dem die Luft gut zirkulieren kann.
Senfgrün ernten und verwenden
Die Ernte ist der schönste Teil! Wenn deine Senfgrün die gewünschte Größe erreicht haben (normalerweise nach 7-10 Tagen), kannst du sie ernten.
* Erntemethode: Schneide die Senfgrün einfach mit einer Schere knapp über dem Küchenpapier ab.
* Lagerung: Die geernteten Senfgrün sind nicht lange haltbar. Am besten verwendest du sie sofort. Du kannst sie aber auch für ein paar Tage im Kühlschrank aufbewahren. Wickle sie dazu in ein feuchtes Papiertuch und lege sie in einen Plastikbeutel.
* Verwendung: Senfgrün ist vielseitig einsetzbar! Du kannst sie roh in Salaten, Sandwiches oder Wraps verwenden. Sie eignen sich auch hervorragend als Topping für Suppen oder als Zutat in Smoothies. Durch ihren würzigen Geschmack verleihen sie jedem Gericht eine besondere Note.
Warum wasserloser Anbau? Die Vorteile auf einen Blick
* Weniger Aufwand: Kein Gießen, kein Umtopfen, kein Düngen!
* Platzsparend: Ideal für kleine Wohnungen oder Balkone.
* Schnelle Ernte: In nur wenigen Tagen kannst du frische Senfgrün ernten.
* Nachhaltig: Weniger Wasserverbrauch und kein Einsatz von Erde oder Dünger.
* Gesund: Frische, vitaminreiche Senfgrün direkt aus deinem eigenen Anbau.
* Ganzjährig: Du kannst Senfgrün das ganze Jahr über anbauen, unabhängig von der Jahreszeit.
* Lehrreich: Eine tolle Möglichkeit, Kindern die Grundlagen des Pflanzenanbaus näherzubringen.
Weitere Ideen für deinen wasserlosen Garten
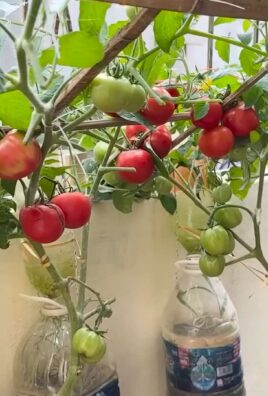
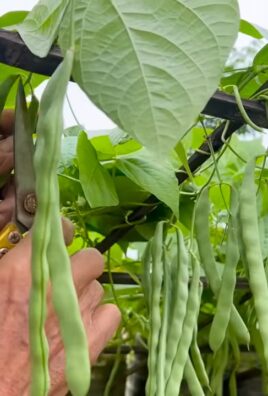
Senfgrün ist nur der Anfang! Du kannst auch andere Gemüsesorten und Kräuter wasserlos anbauen, z.B.:
* Kresse: Ä
Conclusion
So, there you have it! Growing mustard greens without soil might sound like something out of a science fiction novel, but it’s surprisingly simple, incredibly rewarding, and a fantastic way to enjoy fresh, peppery greens even if you’re short on space or time. This waterless method, relying on the inherent moisture and nutrients within the seeds themselves, unlocks a world of possibilities for urban gardeners, apartment dwellers, and anyone looking for a quick and easy way to add a nutritional boost to their diet.
Why is this DIY trick a must-try? Because it’s more than just a gardening hack; it’s a gateway to understanding the power of seeds and the resilience of nature. It’s a low-effort, high-reward project that yields delicious, nutrient-packed mustard greens in a fraction of the time it takes with traditional methods. Plus, it’s a conversation starter! Imagine serving a salad made with greens you grew yourself, without even using soil. Your friends and family will be amazed.
But the beauty of this method lies in its adaptability. Feel free to experiment! Try different types of mustard greens seeds – some varieties are spicier than others. You could also try mixing mustard greens seeds with other fast-growing sprouts like radish or broccoli sprouts for a more complex flavor profile. Consider adding a diluted nutrient solution spray every few days after the initial sprouting to boost growth and nutrient content, though this isn’t strictly necessary. You can also play around with the container you use. While a simple jar works perfectly, you could also use a sprouting tray or even a repurposed plastic container with drainage holes.
Don’t be afraid to get creative and make this waterless mustard greens growing method your own!
We’re confident that once you try this method, you’ll be hooked. The satisfaction of watching those tiny seeds transform into vibrant, flavorful greens is truly unparalleled. It’s a reminder that even in the smallest of spaces, we can cultivate our own food and connect with the natural world.
So, what are you waiting for? Gather your mustard greens seeds, find a suitable container, and get ready to embark on a journey of waterless gardening. We encourage you to try this DIY trick and share your experiences with us! Let us know what variations you tried, what challenges you faced, and what delicious dishes you created with your homegrown mustard greens. Share your photos and stories in the comments below – we can’t wait to see what you come up with! Let’s build a community of waterless mustard greens enthusiasts and spread the word about this amazing gardening technique. Happy growing!
Frequently Asked Questions (FAQs)
What exactly does “waterless” mean in this context?
When we say “waterless,” we don’t mean that the seeds receive absolutely no moisture. Instead, it means that we’re not using soil as a medium to retain water and nutrients. The seeds are initially soaked to kickstart the germination process, and then they rely on the residual moisture within the jar and the humidity in the air to continue growing. You might need to mist them lightly if you live in a very dry climate, but generally, no additional watering is required after the initial soaking. This is different from hydroponics, which involves actively circulating a nutrient-rich water solution.
How long does it take for the mustard greens to grow using this method?
One of the biggest advantages of this waterless method is its speed. You can typically harvest your mustard greens in as little as 5-7 days. The exact timeframe will depend on the variety of mustard greens you’re growing, the temperature, and the humidity levels in your environment. Keep a close eye on your sprouts and harvest them when they reach your desired size and flavor intensity.
What kind of mustard greens seeds should I use?
You can use any variety of mustard greens seeds for this method. Some popular choices include:
* Southern Giant Curled: A classic variety with large, frilly leaves and a mild, slightly peppery flavor.
* Florida Broadleaf: A smooth-leaved variety with a more robust, pungent flavor.
* Red Giant: A beautiful variety with reddish-purple leaves and a spicy, mustardy taste.
* Mizuna: While technically a Japanese mustard green, Mizuna is a great option for waterless growing due to its fast growth and mild flavor.
Experiment with different varieties to find your favorite!
What if my mustard greens start to smell bad?
A foul odor is usually a sign of overwatering or poor drainage. If you notice a bad smell, it means that bacteria or mold are starting to grow. Immediately rinse the seeds thoroughly with fresh water and ensure that the jar is well-ventilated. Avoid overcrowding the seeds in the jar, as this can also contribute to poor air circulation. If the problem persists, it’s best to discard the batch and start over with fresh seeds and a clean jar.
Can I use this method to grow other types of seeds?
Yes, you can! This waterless method is suitable for growing a variety of other sprouts and microgreens, including:
* Radish sprouts
* Broccoli sprouts
* Alfalfa sprouts
* Clover sprouts
* Arugula
* Kale
Keep in mind that different seeds may have different germination times and optimal growing conditions, so do some research before you start.
How do I store my harvested mustard greens?
To store your harvested mustard greens, gently rinse them with cold water and pat them dry with a paper towel. Place them in a resealable plastic bag lined with a paper towel and store them in the refrigerator. They should stay fresh for up to a week.
Is it safe to eat the roots of the mustard greens?
Yes, the roots of the mustard greens are perfectly safe to eat. They have a slightly peppery flavor and can be added to salads, sandwiches, or stir-fries.
Can I reuse the seeds that don’t sprout?
Unfortunately, no. Seeds that don’t sprout during the initial germination process are unlikely to sprout later. It’s best to discard them and start with a fresh batch of seeds.
What are the nutritional benefits of mustard greens?
Mustard greens are packed with vitamins, minerals, and antioxidants. They are an excellent source of vitamins A, C, and K, as well as folate, calcium, and potassium. They are also a good source of fiber and glucosinolates, which have been linked to cancer prevention. Growing your own mustard greens ensures that you’re getting the freshest and most nutritious greens possible.
How can I incorporate these waterless mustard greens into my diet?
The possibilities are endless! Here are just a few ideas:
* Add them to salads for a peppery kick.
* Use them as a topping for sandwiches and wraps.
* Stir them into soups and stews.
* Sauté them with garlic and olive oil.
* Blend them into smoothies for a nutritional boost.
* Use them as a garnish for your favorite dishes.
Get creative and experiment with different ways to enjoy your homegrown mustard greens!

Leave a Comment