
Watermelon container gardening tips are your ticket to enjoying juicy, homegrown watermelons even if you’re short on space! Imagine biting into a sweet, refreshing watermelon you nurtured from a tiny seed, all from the comfort of your balcony or patio. Sounds dreamy, right?
For centuries, humans have cultivated watermelons, tracing their origins back to Africa. Ancient Egyptians even depicted watermelons in their art, showcasing their importance as a source of hydration and sustenance. Now, you don’t need acres of farmland to participate in this delicious tradition!
Let’s face it, traditional watermelon gardening can be intimidating. They’re known for sprawling vines and demanding a lot of room. But what if I told you that you could bypass all that hassle? That’s where watermelon container gardening tips come in. This DIY guide will equip you with the knowledge to successfully grow watermelons in pots, regardless of your gardening experience. We’ll cover everything from choosing the right container and soil to providing the necessary support and care. So, ditch the grocery store melons and get ready to harvest your own sweet success!
Growing Watermelons in Containers: A Sweet DIY Project
Okay, watermelon lovers, let’s get real. You don’t need acres of farmland to enjoy a juicy, homegrown watermelon. I’m going to show you how to cultivate these summer delights right on your patio, balcony, or even a sunny windowsill! Container gardening is totally doable, and with a little know-how, you’ll be sinking your teeth into your own watermelons before you know it.
Choosing the Right Watermelon Variety
Not all watermelons are created equal, especially when it comes to container gardening. We need to think small(er). Giant watermelons like ‘Charleston Gray’ are going to be a struggle in a pot. Instead, opt for these compact varieties:
* ‘Sugar Baby’: A classic, small, and sweet watermelon that matures quickly. This is my go-to for container growing.
* ‘Bush Sugar Baby’: Even more compact than ‘Sugar Baby,’ perfect for smaller spaces.
* ‘Golden Midget’: A yellow-fleshed watermelon that’s small and early-maturing.
* ‘Tiger Baby’: A personal favorite! It’s a smaller, striped variety with excellent flavor.
* ‘Patio Baby’: As the name suggests, this one is bred specifically for containers!
Gathering Your Supplies
Before we dive into planting, let’s make sure we have everything we need. Trust me, having everything ready beforehand makes the whole process so much smoother.
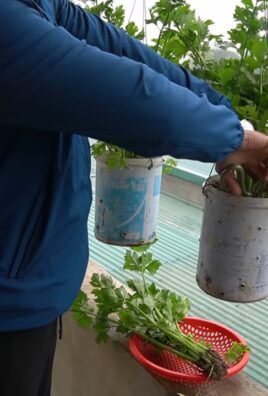
* Large Container: This is crucial! You’ll need a container that’s at least 24 inches in diameter and 24 inches deep. Watermelons have extensive root systems, and they need room to spread out. A half whiskey barrel or a large, sturdy plastic container works great. Make sure it has drainage holes!
* High-Quality Potting Mix: Don’t skimp on this! Use a well-draining potting mix specifically formulated for containers. Garden soil is too heavy and compacts easily, which can suffocate the roots. I like to use a mix that contains peat moss, perlite, and vermiculite.
* Water-Soluble Fertilizer: Watermelons are heavy feeders, so we’ll need to provide them with regular nutrients. Choose a fertilizer that’s high in phosphorus and potassium, which are essential for fruit development. Look for something like a 10-10-10 or even a 5-10-10.
* Watering Can or Hose: Obvious, but important! Watermelons need consistent moisture, especially when they’re fruiting.
* Trowel or Small Shovel: For planting and transplanting.
* Seeds or Seedlings: You can start your watermelons from seed or purchase seedlings from a local nursery. I usually start from seed indoors to get a head start.
* Trellis or Support (Optional): While not always necessary for bush varieties, a small trellis or support can help keep the vines off the ground and improve air circulation.
* Mulch (Optional): Mulch helps retain moisture, suppress weeds, and regulate soil temperature. Straw or wood chips work well.
Planting Your Watermelon
Now for the fun part! Let’s get those watermelon seeds or seedlings into their new home.
1. Prepare the Container: Fill your container with the high-quality potting mix, leaving a few inches of space at the top.
2. Starting from Seed: If you’re starting from seed, sow 2-3 seeds about 1 inch deep in the center of the container. Gently water the soil. Keep the soil consistently moist but not waterlogged. You can cover the container with plastic wrap to create a humid environment, but remove it once the seeds germinate.
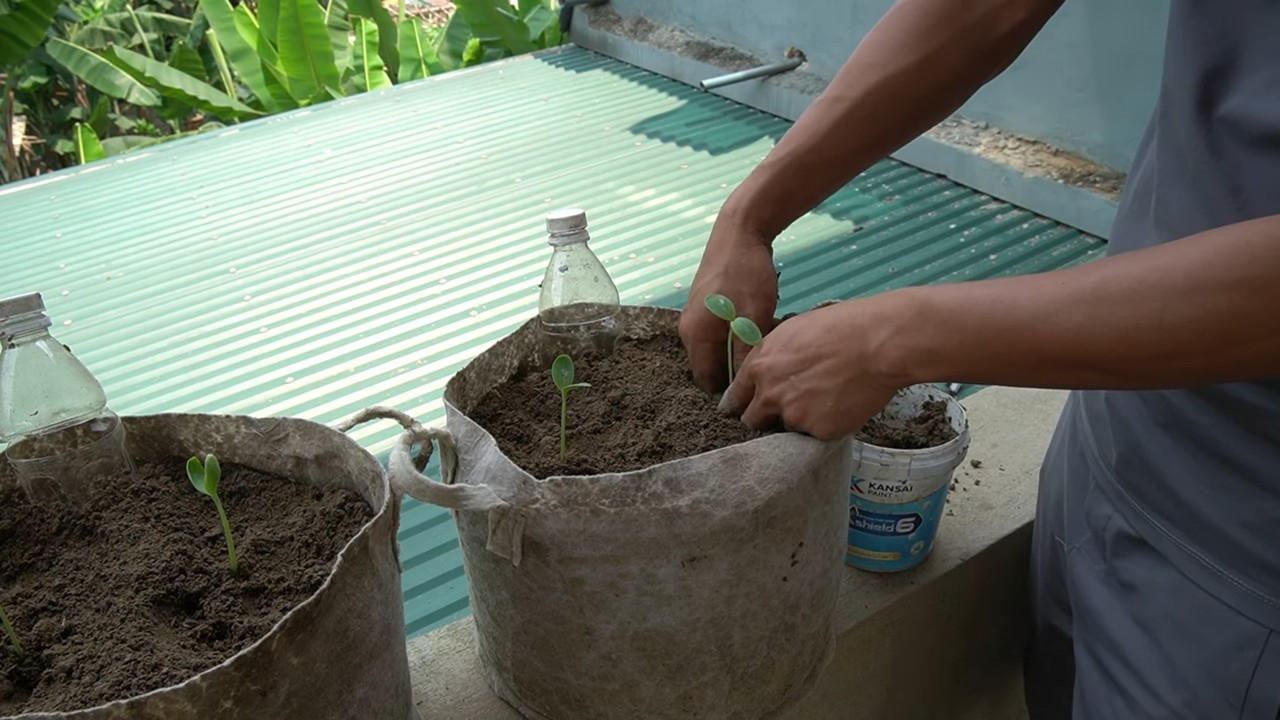
3. Transplanting Seedlings: If you’re using seedlings, gently remove them from their nursery pots. Dig a hole in the center of the container that’s large enough to accommodate the root ball. Place the seedling in the hole and backfill with potting mix. Gently pat down the soil around the base of the plant.
4. Water Thoroughly: After planting, water the watermelon thoroughly until water drains out of the drainage holes. This helps settle the soil and encourages root growth.
5. Mulch (Optional): Apply a layer of mulch around the base of the plant to help retain moisture and suppress weeds.
Caring for Your Container Watermelon
Okay, so you’ve planted your watermelon. Now what? Consistent care is key to a successful harvest.
* Sunlight: Watermelons need at least 6-8 hours of direct sunlight per day. Place your container in the sunniest spot you can find. If you don’t have enough natural sunlight, you can supplement with grow lights.
* Watering: Watermelons need consistent moisture, especially during hot weather and when they’re fruiting. Check the soil moisture regularly and water when the top inch of soil feels dry to the touch. Avoid overwatering, as this can lead to root rot. I usually water deeply every other day, or even daily during heat waves.
* Fertilizing: As I mentioned earlier, watermelons are heavy feeders. Start fertilizing about two weeks after planting, using a water-soluble fertilizer according to the package directions. Fertilize every 2-3 weeks throughout the growing season.
* Pollination: Watermelons need to be pollinated in order to produce fruit. If you’re growing your watermelons outdoors, bees and other pollinators will usually take care of this for you. However, if you’re growing them indoors or if you’re not seeing a lot of bee activity, you may need to hand-pollinate. To hand-pollinate, use a small paintbrush to transfer pollen from the male flowers to the female flowers. Male flowers have a long, thin stem, while female flowers have a small, immature watermelon at the base.
* Pruning (Optional): Some people like to prune their watermelon vines to encourage fruit production. You can remove some of the side shoots that don’t have flowers or fruit. This will help the plant focus its energy on developing the existing watermelons. I usually don’t prune unless the vines are getting too unruly.
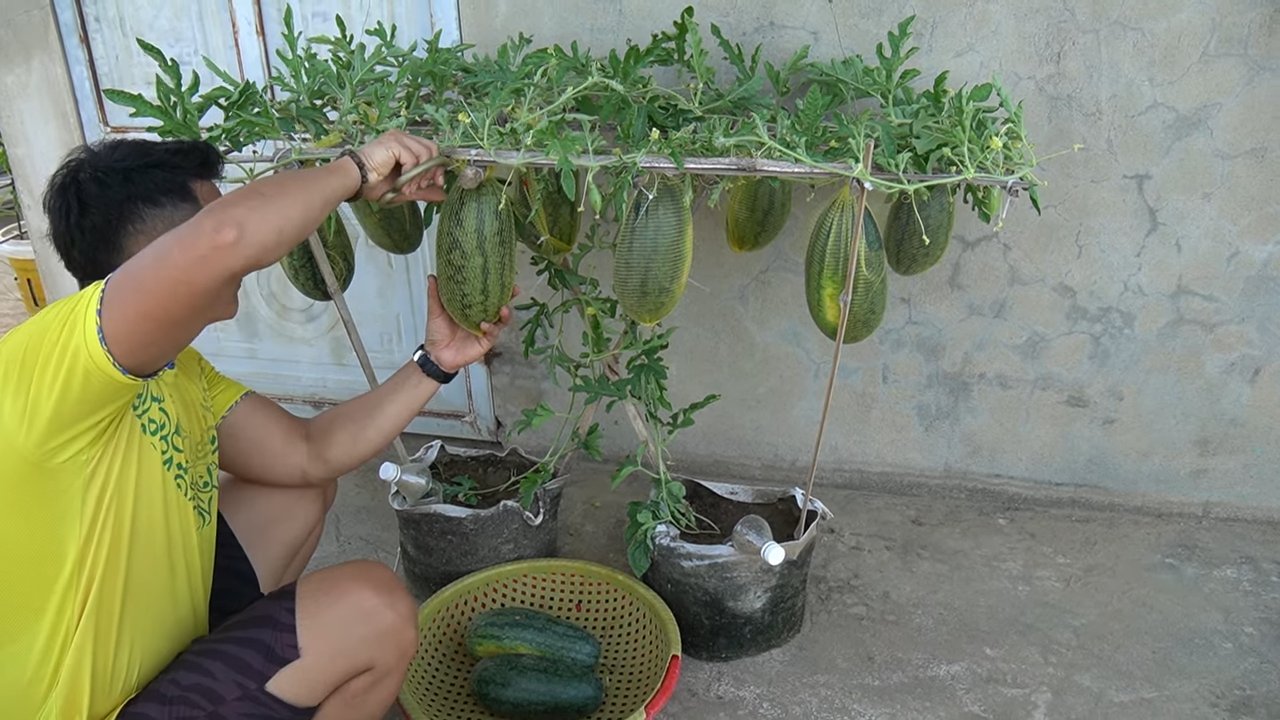
* Support (Optional): If you’re growing a vining variety, you may want to provide some support for the vines. A small trellis or even just a few stakes can help keep the vines off the ground and improve air circulation. This can help prevent diseases and make it easier to harvest the watermelons.
* Pest and Disease Control: Keep an eye out for pests and diseases. Common watermelon pests include aphids, squash bugs, and cucumber beetles. Common diseases include powdery mildew and fusarium wilt. If you spot any problems, take action immediately. You can use insecticidal soap or neem oil to control pests, and fungicide to control diseases.
Harvesting Your Watermelon
The moment we’ve all been waiting for! Knowing when to harvest a watermelon can be tricky, but here are a few telltale signs:
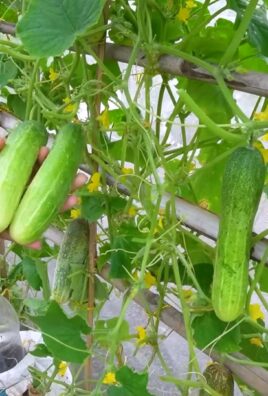
* The Tendril: The tendril closest to the watermelon stem will turn brown and dry. This is a reliable indicator that the watermelon is ripe.
* The Ground Spot: The spot where the watermelon rests on the ground (or the container) will turn from white to yellow.
* The Thump Test: Give the watermelon a gentle thump. A ripe watermelon will sound hollow.
* Days to Maturity: Check the seed packet or plant tag for the days to maturity. This will give you a general idea of when to expect your watermelons to be ripe.
Once you’re confident that your watermelon is ripe, use a sharp knife to cut it from the vine, leaving a few inches of stem attached.
Troubleshooting
Even with the best care, you might encounter a few challenges. Here are some common problems and how to address them:
* Blossom End Rot: This is a common problem in watermelons, caused by calcium deficiency. The bottom of the watermelon will develop a dark, sunken spot. To prevent blossom end rot, make sure your soil is rich in calcium and water consistently. You can also add calcium to the soil by mixing in bone meal or crushed eggshells.
* Poor Fruit Set: If your watermelon plants are producing flowers but not setting fruit, it could be due to a lack of pollination. Make sure there are plenty of bees and other pollinators in your garden. If not, you may need to hand-pollinate.
* Yellowing Leaves: Yellowing leaves can be a sign of nutrient deficiency, overwatering, or disease. Check the soil moisture and fertilize if necessary. If the problem persists, consult a local gardening expert.
* Pests and Diseases: As mentioned earlier, keep an eye out for pests and diseases and take action immediately if you spot any problems.
Enjoying Your Homegrown Watermelon
Congratulations! You’ve successfully grown a watermelon in a container. Now it’s time to enjoy the fruits (or rather,
Conclusion
So, there you have it! Transforming your patio, balcony, or even a sunny corner of your yard into a thriving watermelon patch is not only achievable but incredibly rewarding. We’ve walked you through the essential steps, from selecting the right container and soil to nurturing your precious watermelon vines and ensuring a bountiful harvest. The beauty of this DIY approach lies in its accessibility. You don’t need acres of land to enjoy the sweet, juicy taste of homegrown watermelon.
This isn’t just about growing watermelons; it’s about connecting with nature, learning new skills, and experiencing the satisfaction of cultivating your own food. Imagine the delight of sharing a slice of your very own, vine-ripened watermelon with friends and family. The taste is simply unmatched by anything you can find in a store.
But the fun doesn’t stop there! Feel free to experiment with different watermelon varieties. Perhaps you’d like to try growing a smaller, personal-sized watermelon like ‘Sugar Baby’ or a unique yellow-fleshed variety for a splash of color. You can also explore companion planting to enhance your watermelon’s growth. Marigolds, for example, can help deter pests, while basil can improve the overall flavor of your watermelons. Consider adding a small trellis or support system as your watermelons grow larger to prevent them from resting directly on the soil, which can lead to rot.
Don’t be afraid to get creative with your container gardening setup. Use repurposed materials like old tires or wooden crates to add a rustic touch to your garden. Get the kids involved and make it a family project! They’ll love watching the tiny seedlings sprout and transform into sprawling vines laden with delicious fruit.
Ultimately, the success of your watermelon container gardening venture hinges on your dedication and attention to detail. Remember to provide consistent watering, adequate sunlight, and regular fertilization. Keep a close eye out for pests and diseases, and address any issues promptly.
We are confident that with a little effort and the tips we’ve shared, you’ll be enjoying your own homegrown watermelons in no time. So, grab your gardening gloves, gather your supplies, and embark on this exciting adventure. We encourage you to try this DIY trick and discover the joy of growing your own watermelons, even in a limited space.
We’d love to hear about your experiences! Share your photos, tips, and stories with us in the comments below. Let’s create a community of watermelon container gardening enthusiasts and inspire others to give it a try. What variety did you choose? What challenges did you face? What successes did you celebrate? Your feedback is invaluable and will help us continue to improve and refine our gardening advice. Happy growing!
Frequently Asked Questions (FAQ)
1. What is the best size container for growing watermelons?
The ideal container size for growing watermelons is at least 20 gallons, but larger is always better. A half-barrel container (approximately 25 gallons) or a large, sturdy plastic tub works well. The key is to provide ample space for the roots to develop and support the vigorous growth of the watermelon vine. Smaller containers can restrict root growth, leading to smaller fruits and reduced yields. Ensure the container has adequate drainage holes to prevent waterlogging.
2. What type of soil should I use for container watermelon gardening?
Use a high-quality potting mix specifically formulated for containers. Avoid using garden soil, as it can become compacted in containers and hinder drainage. A good potting mix should be lightweight, well-draining, and rich in organic matter. You can also amend your potting mix with compost or aged manure to provide additional nutrients. A slightly acidic to neutral pH (around 6.0 to 7.0) is ideal for watermelons.
3. How much sunlight do watermelons need when grown in containers?
Watermelons require at least 6-8 hours of direct sunlight per day to thrive. Choose a location for your container that receives ample sunlight throughout the day. If you live in a particularly hot climate, you may need to provide some afternoon shade to prevent the fruits from scorching. Insufficient sunlight can result in poor fruit development and reduced sweetness.
4. How often should I water my container watermelons?
Watermelons are heavy drinkers, especially when they are actively growing and producing fruit. Water deeply and regularly, ensuring the soil remains consistently moist but not waterlogged. Check the soil moisture level daily, and water when the top inch feels dry to the touch. During hot weather, you may need to water your watermelons twice a day. Consider using a soaker hose or drip irrigation system to provide consistent and efficient watering.
5. What kind of fertilizer should I use for container watermelons?
Watermelons are heavy feeders and require regular fertilization to produce a bountiful harvest. Start with a balanced fertilizer (e.g., 10-10-10) when planting, and then switch to a fertilizer higher in phosphorus and potassium (e.g., 5-10-10) once the vines begin to flower. Fertilize every 2-3 weeks throughout the growing season. You can also supplement with liquid seaweed or fish emulsion for added nutrients. Avoid over-fertilizing, as this can lead to excessive foliage growth at the expense of fruit production.
6. How do I pollinate my watermelon flowers if I don’t see bees?
Watermelons require pollination to set fruit. If you don’t see bees or other pollinators in your garden, you may need to hand-pollinate the flowers. Identify the male and female flowers. The female flowers have a small, immature watermelon at the base, while the male flowers do not. Use a small paintbrush or cotton swab to collect pollen from the male flower and transfer it to the stigma of the female flower. Hand-pollinate in the morning, when the flowers are open and receptive.
7. How do I know when my container watermelons are ripe?
There are several indicators that your watermelon is ripe. The tendril closest to the fruit should be brown and dry. The underside of the watermelon (where it rests on the soil) should turn from white to a creamy yellow. When you thump the watermelon, it should sound hollow and deep. The skin should also be dull rather than shiny. These are all signs that your watermelon is ready to harvest and enjoy.
8. Can I grow multiple watermelon plants in one container?
While it’s possible to grow multiple watermelon plants in a very large container, it’s generally recommended to grow only one plant per container. Overcrowding can lead to competition for resources, resulting in smaller fruits and reduced yields. If you choose to grow multiple plants, ensure the container is large enough to accommodate their root systems and provide adequate spacing between the plants.
9. How do I deal with pests and diseases on my container watermelons?
Monitor your watermelon plants regularly for signs of pests and diseases. Common pests include aphids, squash bugs, and vine borers. Diseases can include powdery mildew and fungal infections. Use organic pest control methods such as insecticidal soap or neem oil to control pests. Ensure good air circulation around the plants to prevent fungal diseases. Remove any infected leaves or fruits promptly.
10. Can I save seeds from my container watermelons to plant next year?
You can save seeds from your container watermelons, but keep in mind that the resulting plants may not be true to type, especially if you grew hybrid varieties. To save seeds, scoop out the seeds from a ripe watermelon, rinse them thoroughly, and allow them to dry completely. Store the dried seeds in an airtight container in a cool, dark place.

Leave a Comment